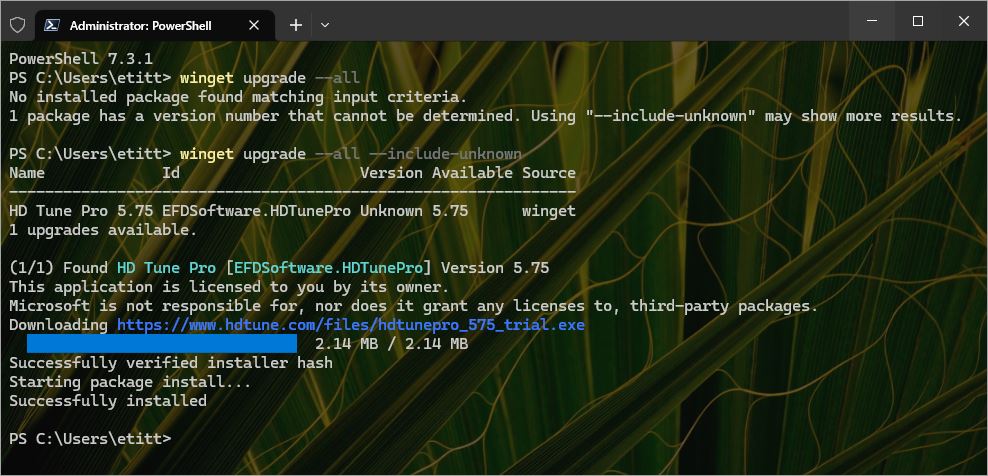
A couple of weeks ago, a new version of Winget popped up on Github. Pretty much since then, I’ve been slowly but surely making sure all 11 of my Windows PCs are running this latest and greatest version (e.g. 1.4.10173). For me that naturally raised the question: How does one go about obtaining Winget version info? That led me back into the MS Learn documentation, about which I’ll now report.
Obtaining Winget Version Info Is Dead Easy
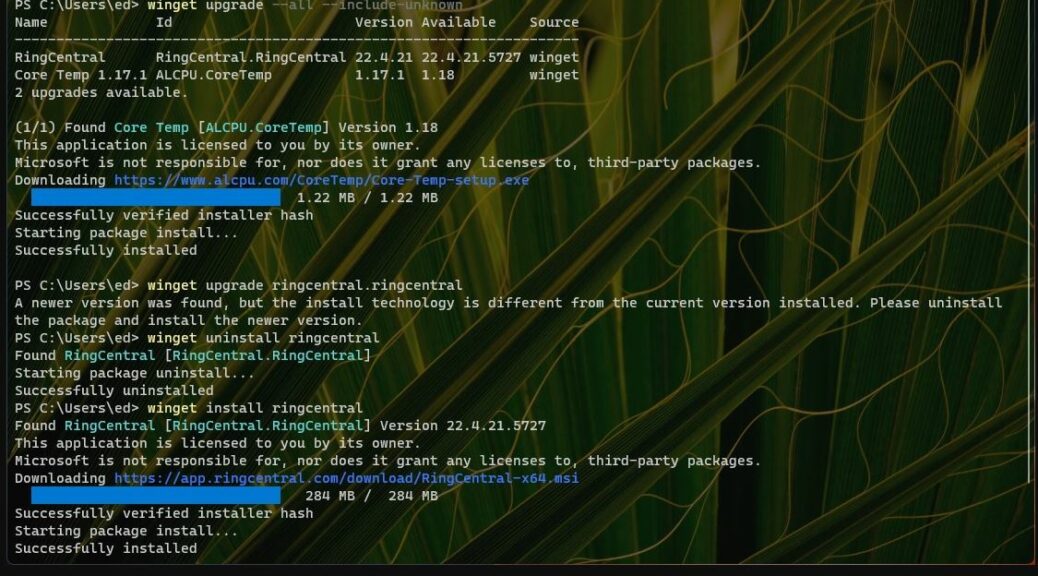
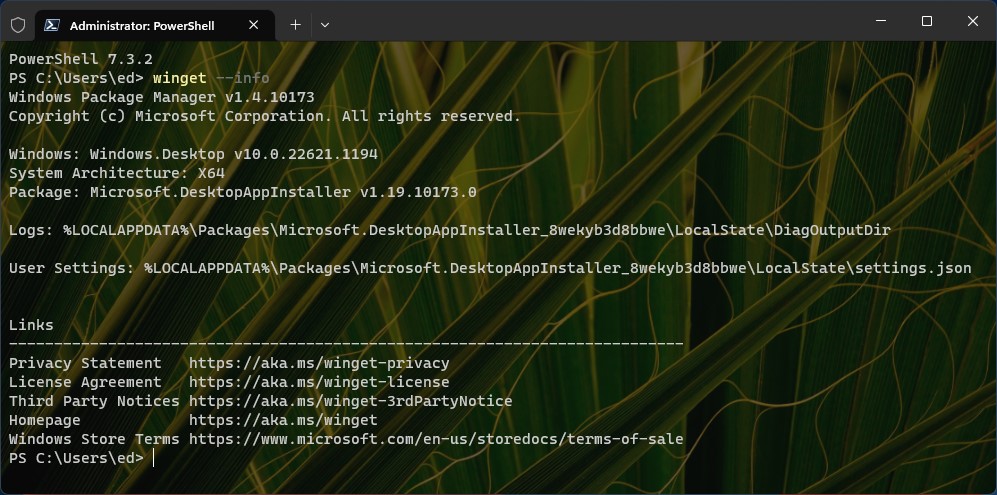
Turns out that winget is just another package, like all the others that the tool can download, install, upgrade, delete and otherwise manage. Thus a simple and basic winget command told me what I wanted to know:
winget –info winget
The lead-in graphic for this story shows this command and its resulting output. Note the first line after the command reads:
Windows Package Manager v1.4.10173
That matches the “Latest” version number at Github, so it’s the most current version around AFAIK (not counting previews). And indeed, I’m pleased to report that using standard winget upgrade commands has ensured that winget is current on all my PCs.
More than One Path to Enlightenment
I also noticed that winget syntax errors will report the version running before conveying its error message info. Thus, omitting the dashes before “info” in the preceding command will also tell you its version number (after which a pageful of syntax guidance follows). I guess you could deliberately mistype a command to produce the version number. But heck, I’d rather do it the right way if I can remember how.
One More Thing: Winget -v
Turns out that Winget -v (or -version) will produce just the info needed in compact readable form. Thanks to Demetrius Nelson (@DenelonMs) for pointing this out to me on Twitter! Why didn’t I think of that… Here ’tis:
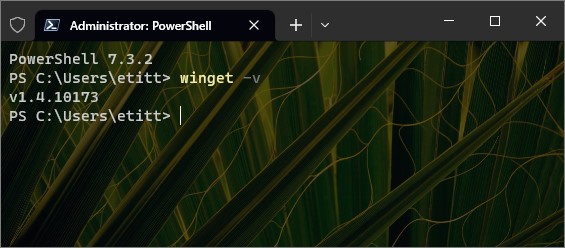
Hmmm. It doesn’t get any easier than this.
Moral: RTFM (with more care)!