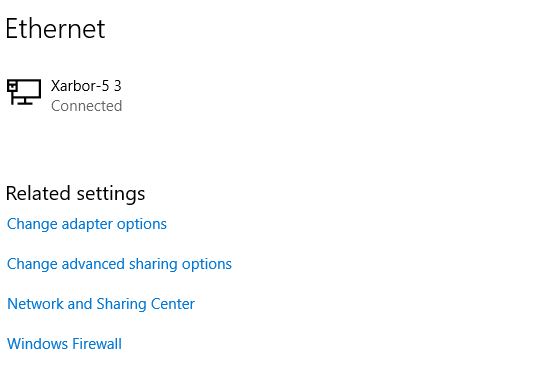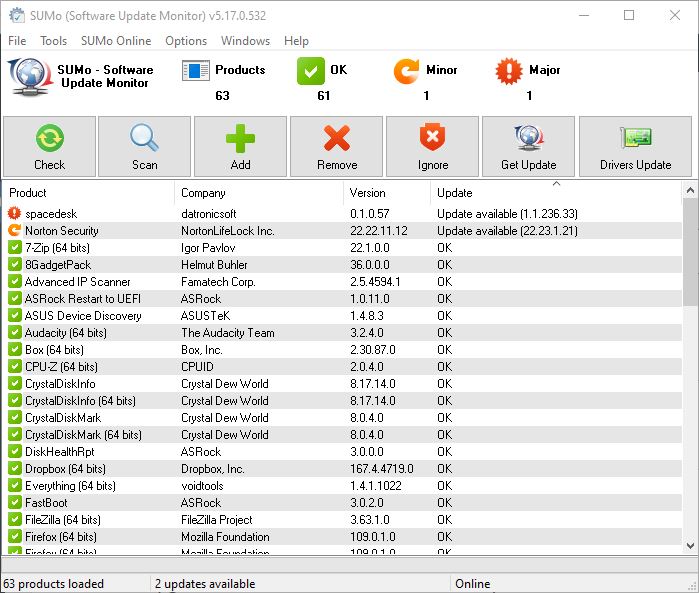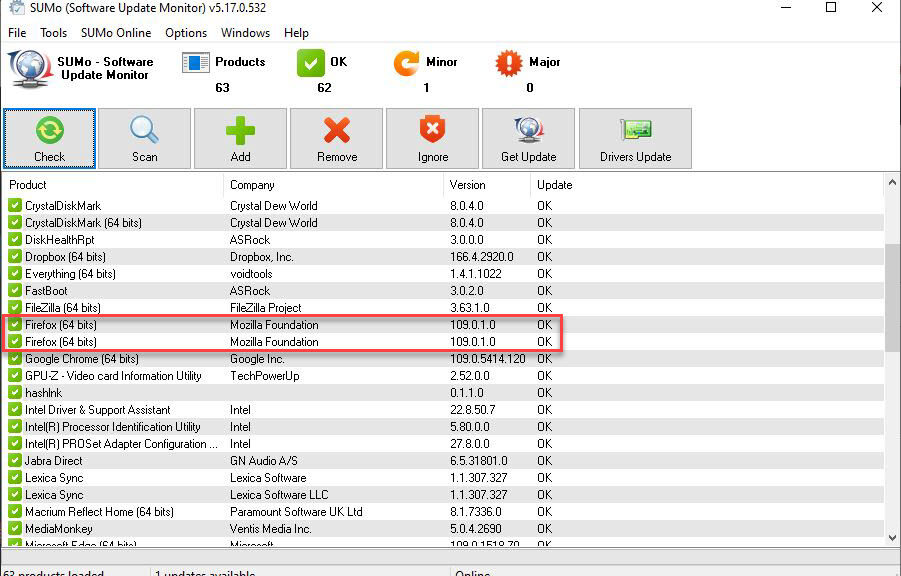
In surveying my PCs this morning, I learned it was time to update the Intel PROSet software. This remains an entirely routine matter. It’s easy if a bit time-consuming to accomplish. Hence, I’m pleased to find Intel PROSet still ticking along. I have an admittedly small population of PCs (11 in total right now). Of those 6 show Intel interfaces in Advanced IP Scanner. I’m aware of at least 3 more Intel interfaces that don’t register on its scans. (Example: my Asrock Z170 motherboard has two Intel GbE interfaces: an I-211 and an I-219V.)
If Intel ProSet Still Ticking Along, Then What?
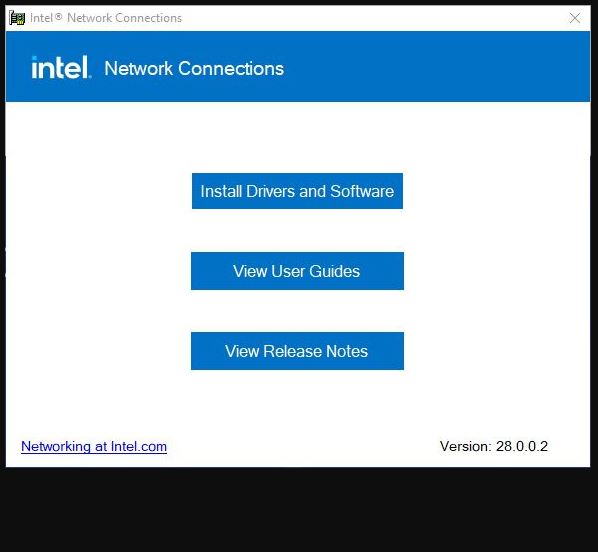
The download/install routine is pretty straightforward. Search Intel Downloads/Drivers&Software for the string “Intel Ethernet Adapter Complete Driver Pack” (for wired Ethernet). or for “PROSet wireless” (for Wi-Fi connections). Either way, you’ll get a ZIP file out of the download. Unpack it to a folder of its own, and you can use the autorun.exe file therein to perform installations for drivers (if applicable) and the latest PROSet software version (28.0.0.2 for wired; 22.190.0 for wireless).
Note: Don’t ask me why the window shown above reads “intel Network Connections.” It’s been that way for a long, long time. If memory serves — and this goes back far enough that it may not serve very well — this used to be the general description for intel network drivers and software before PROSet came along. But that’s what it says, no matter if my recollection is correct or not.
The lead-in graphic shows the wired package, as you can see from the version number at the lower right of that image. The whole update process took less than 5 minutes on each of the affected machines. If you unzip the contents of the download to a shared drive, it works like a charm for all PCs on an accessible network.
It’s Easy to Get Lost in the Weeds
There are tons of advanced settings for Ethernet (especially wired GbE or higher speeds) available. PROSet provides access to such things pretty directly, or you can go through the Advanced Properties tab for the target interface in Device Manager under the Network Adapters heading. All-in-all, PROSet is a bit less unwieldy to use than DevMgr (where it is available).
So if one needs to monkey around with such things, I find PROSet preferable for such shenanigans. If you’re not already using this tool and you’ve got Intel interfaces to manage, give it a try.