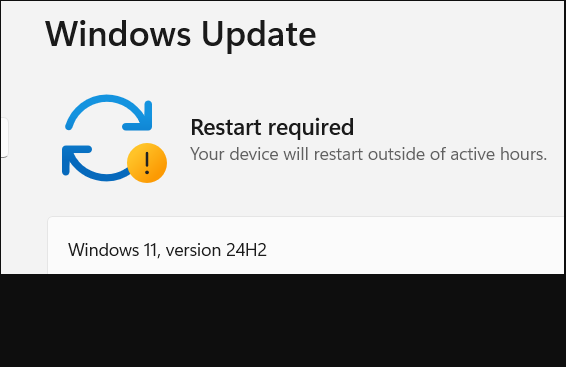
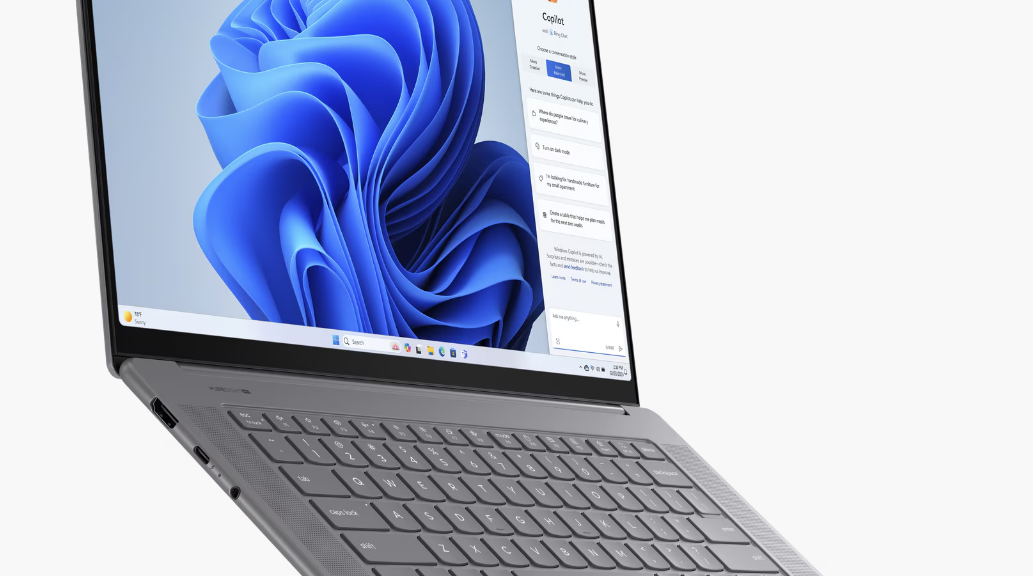
Category Archives: Recent Activity

A-Volute Software Component Mystery Solved

Oho! Yesterday was Patch Tuesday for July. Thus, I’ve been working through my stable of PCs, applying updates as I can. On my Ryzen 5800X Windows 11 desktop, I noticed something new and mysterious. Its MUC (Microsoft Update Catalog) entry provides the lead-in graphic for this story. Upon conducting research, this A-Volute software component mystery solved itself immediately.

How Is A-Volute Software Component Mystery Solved?

As with most such things, a quick trip to Google helps point me in the right direction. It turns out that A-Volute provides drivers for the Asrock B550’s audio circuitry. This also includes support for an Nh3 Audio Effects Component. It pops up under Software Components in Device Manager:

A-Volute Software Component Mystery Solved.dev-mgr-props

Googling online points me to a Realtek-related (Nahimic) audio driver, with matching entry in DevMgr. [Click for full-size view.]

I first found a credible mention of this at TenForums.  It appears in a thread on which I myself have been active. ( It’s entitled “Latest Realtek HD Audio Driver.”) Next, I find an entry named “A-Volute Nh3 Audio Effects Component” inside Device Manager. Presto! That convinces me the mystery is no longer unsolved.

I like to run things down when something new shows up amidst Patch Tuesday updates. It came along for the ride because MS  provides drivers as well as OS and other related updates. In most corporate or production IT environments, this doesn’t happen. Why not? Because untested drivers pose too many potential problems to simply let them through on their own.

Deconstructing Windows Mysteries

In general, when something new or unexpected shows up in Windows, it’s worth the effort to identify it. In most cases, it will be benign — as it was with this item. But sometimes, the mystery might deepen. Or it might even point to something malicious or malign. That’s when remediation comes into play. I’m happy that wasn’t needed this time. I’ll still keep my eye on new stuff going forward, though. One never knows when something wicked might this way come.

Facebooklinkedin
Facebooklinkedin

Change Dev Channel Task Manager Default View

Here’s a nice little addition that’s popped up in the Dev Channel version of Task Manager. If you visit its Settings page, you will see a “Default Start Page” pull-down menu there. This makes it easy to change Dev Channel Task Manager default view. My preference is Details, as shown here:

Change Dev Channel Task Manager Default View.details

Because it’s my go-to view, I set “Details” as the default in Task Manager.

Why Change Dev Channel Task Manager Default View?

For convenience, mostly. It’s not a huge deal in terms of added functionality. But anything that saves a mouse click is helpful, when it comes to getting down to work, eh? In general, MS seems to be moving to a move open, less cluttered layout for Task Manager in the Dev Channel version. It takes a little getting used to, but I like it.

My eyeballs are still better trained to make sense of the old-fashioned Task Manager that’s still visible in Windows 10 and other Windows 11 versions (for me that mostly means production version, Build 22000.778). The contrasting yellow shades for data cells are still more recognizable to me.

But, as with all things Windows, changes spur us on to learn and appreciate new things. That’s how I’m going to play the evolution of Task Manager. We’ll probably have side-by-side versions for Windows 10 and 11 for some time anyway, what with Windows 10 EOL not until October 2025.

But Wait, There’s More…

Turns out you can change the default tab for older Task Manager versions, too. The menu fiddling is a bit different though, as shown in the next screencap:

A different sequence of menu picks changes the default view in old Task Manager iterations.

As you can see in the preceding screenshot, click Options → Set default tab → and then any of the items shown (Processes, Performance, App history, Startup, Users, Details, Services) to make your selection. Good stuff!

[Note] Here’s a shout-out to Mauro Huculak at Windows Central, whose July 8 story clued me into this new wrinkle on an old favorite Windows tool. Thanks, Mauro!

Facebooklinkedin
Facebooklinkedin

More WingetUI Interactions

OK, then. I’m using WingetUI as an element of my Windows PC update toolbox. Along the way, I’m finding some areas where it shines, and others where it doesn’t. But as I gain familiarity with this tool, more WingetUI interactions convince me it’s worth using. That said, it’s no silver bullet for Windows updates, either. Let me explain…

After More WingetUI Interactions, Another Status Report

If you look at the lead-in graphic, I can point to elements where WingetUI shines, and those where it doesn’t. It handles most third-party apps perfectly (e.g. 7-Zip, Kindle, SUMo, Python 2, and Spacedesk). Not so for MS components, except for C++ runtime elements. It failed (or I didn’t try based on prior failures) with Edge WebView2, Teams, and the WADK. This is not a huge problem for me.

SUMo also catches the follow items that did not show up on the WingetUI radar: Chrome, Firefox, CrystalDiskInfo, Intel PROSet utility, MyLANViewer, Nitro Pro, Notepad++ (a false positive, IMHO), Snagit and Winaero Tweaker. Thus I must continue to use a collection of tools to get through my entire update roster. But I knew that already.

All’s Well That Ends Well

I was able to use PatchMyPC to handle the routine updates that WingetUI didn’t see. SUMo led me to fix everything except Intel PROSet, Nitro Pro, and Snagit. I got the first and last myself, and skipped Nitro Pro for the moment (though I did find install syntax for the latest version using winget itself, which I’ll try again later…).

[Note added 1 Day later…] Eventually, I jumped to the Nitro Pro download page (Product Updates) to grab and install the latest version (13.67.0.45). That got me completely caught up. What I now can’t understand is why winget will sometimes update Nitro Pro for me, but why I must do it manually at other times. I’m guessing it depends on package prep and info…


Facebooklinkedin
Facebooklinkedin

NetBScanner Blind Spot

I’ve been trying to understand what’s going on with local machine name handling on my LAN this week. Along the way, I’ve found a NetBScanner blind spot in that otherwise excellent NirSoft tool. Here’s the thing: as you can see in the lead-in graphic, NetBScanner does not include the name/address info for the scanning PC in its results. Those appear in the nslookup results in the cmd prompt window below.

What NetBScanner Blind Spot Means

I was quickly able to find another Nirsoft tool that does a complete scan, including the scanning PC — namely FastResolver. But alas, some tinkering with that tool is required to make it show only occupied IP addresses in a target range. That’s shown in the next screencap, which includes the scanning machine in its results:

NetBScanner Blind Spot.FR

Note that the i7Skylake item, IP 192.168.1.63, appears in the list along with all other items that NetBScanner shows above.

One of the most interesting things about using tools properly requires understanding their limitations. I just learned an important limitation for NetBScanner (ditto for FastResolver) in figuring this out.

Other Lessons Learned

I’ve now observed also that it takes the Spectrum router 24 hours to update its LAN entries in its DNS database. That’s entirely consistent with the default timeout of 24 hours for “positive DNS cache” entries. So now I understand that when a machine name won’t resolve to the correct IP address, it’s because DHCP has leased a different IP address to that host sometime in the past day. If I give it time, it will catch up. Good to know!

Facebooklinkedin
Facebooklinkedin

Use NSlookup for Machine Name Checks

Certain recent Dev Channel builds have played intermittent hob with RDP. Thus, for example, I had to switch from using the machine name to its IP address to RDP into one particular PC. In troubleshooting that issue, I quickly realize it makes sense to use NSlookup for machine name checks. Indeed as you can see in the lead-in graphic, when NSlookup resolves that name correctly, RDP will also accept that name to establish a connection.

Why Use NSlookup for Machine Name Checks?

Because it will tell you if RDP can recognize the machine name. Under the hood, both RDP and NSlookup rely on access to local DNS records to resolve the name into an IP address (see lead-in graphic). When the command line works, RDP should also be able to rely on the same underlying service — namely, DNS — to do its thing as well.

Of course, this raises the question as to why my local DNS server — which runs on the boundary device from Spectrum that sits between my LAN and the cable Internet connection — sometimes fails to resolve valid machine names. Feature upgrades can cancel existing IP address leases, and require the DNS cache to be rebuilt. And apparently, recent lightning storms can also mess with that device’s DNS cache when the power fails. So, I’m learning to flush and rebuild that cache as part of local device hygiene.

At least I now know what’s going on and why I must sometimes switch from machine names to IP addresses to access certain devices. Good thing it’s easy to log into and handle the reset over the LAN. It’s always something, right?

Facebooklinkedin
Facebooklinkedin

Why USB Disk Speeds Matter

It’s been a busy and interesting week. I’ve been messing around with numerous backups and restores. Ditto for mounting ISOs and running Windows repair installs. A LOT of disk reads and writes to USB drives have been involved. Because of the huge amounts of data involved, I’m better prepared to explain why USB disk speeds matter. A LOT!

Why USB Disk Speeds Matter So Very Much

In a word, the shortest possible answer is “Time.” If you can get something done faster, you can do more in a single work interval. Compare the USB disk speeds for an NVMe drive in a USB-C enclosure (left) to those for an mSATA drive in a USB-A 3.1 enclosure (right — see lead-in graphic). When backups and restores are concerned the top lines (which involve large file transfers) actually matter. Of course, all the times matter as well.

But those differences are pretty stark for backup and restore. Let me explain… If you look at the top pairs of numbers, these cover large data transfers with a queue depth of 8 (upper) and 1 (lower). In both pairs of numbers, the NVMe drive is over twice as fast as the mSATA drive. Those same results were born out in backups and restores (7 and 14 minutes for backup; 11 and 23 minutes for restore).

The More You Do, the Better You’ll Like It!

Those results show why I’ve long been a believer in using fast USB drives whenever possible. I’m still waiting to see what kind of bump I can get with a Thunderbolt 4 NVMe enclosure, proper cables and enclosure, and Thunderbolt 4 on the host device. From what I read, it should be 25-40% as fast again.

This realization came to me when I started copying a backup from a BitLocker protected NVMe drive to an mSATA unprotected drive. I got a consistent 26-27 MBps transfer rate between the two devices. It took over 20 minutes to copy the file!

If I could’ve gone Thunderbolt 4 all the way, I could have quadrupled the transfer speed or better. That would cut my wait time from 20 minutes to 5. Waiting for necessary data can’t be completely bypassed — but it surely shows the “need for speed” on such occasions.

Facebooklinkedin
Facebooklinkedin

Wrong Backup Means Wrong Outcome

I have to laugh. I’ve been fighting weird behaviors on my X12 Hybrid Tablet all week long. Only yesterday afternoon did I finally snap to an obvious visual cue that told me what was wrong. Among lots of other interesting things, I learned that wrong backup means wrong outcome when restored. It’s a testament to Windows 11 and to Macrium Reflect, because the target PC actually ran — sort of — even with the wrong image running the works. Let me explain…

If Wrong Backup Means Wrong Outcome, How Wrong Is It?

Here’s what I did: I restored a backup from my Lenovo X380 Yoga to my Lenovo X12 Hyrbrid Tablet. Different CPU, different biometrics devices and capabilities, different Thunderbolt support, and so on. Now that I know what I did, I’m amazed the OS ran at all. And actually, except for refusing to recognize (or work with) hardware present on the X12, but absent on the X380, it worked pretty well.

So how did I finally figure out what I’d done to myself (or rather, to the X12)? The answer’s in the lead-in graphic for this story. I use 8Gadgetpack on all of my PCs. I also use its analog clock gadget, and use the machine name from the target host as the clock name. So there it was on my X12 desktop: X380 (as you can see). That’s what told me I’d restored the wrong backup to the target machine. I have a number of roving SSD devices in USB enclosures. Apparently the backup I chose had moved from a USB port on the X380 to the X12’s Thunderbolt dock.

After that Aha! moment, I quickly located a recent backup from the X12. I had to jump through some hoops because it lived on a BitLocker protected drive (hint: the Macrium Reflect Rescue Disk requires additional options to restore backups from a BitLocker protected volume). But once I restored the right image, all my problems went away. I was able to use a UUPdump image I’d already built to quickly update to the latest Dev Channel version, too.

Lessons Learned

1. I’m glad I use my machine name technique on the Gadget Clock because it’s a good way to see where a backup originated.

2. I’ve started adding the machine name into my Reflect backup image names, so I can tell backups apart quickly and easily.

3, I’ve learned how to deal with BitLocker drives as restore sources, and how to re-enable BitLocker on a recovered C: drive

4. I’ve learned to be more careful in choosing which image to restore to a target PC, when a restore is necessary

Now, all I can hope is that I don’t do this again. Sigh, and sigh again.

Facebooklinkedin
Facebooklinkedin

Overcoming RDP Access Hurdles

Here at Chez Tittel, I’ve got 9 PCs in my office. 2 Desktops and 7 laptops, to be more specific. I like to access most of them from my primary desktop. That’s because it sports a couple of aging but still decent Dell 2717 Ultrasharp monitors. Over the years, I’ve encountered interesting issues in making RDP (remote desktop protocol) connections to my “Other PCs.” For me, overcoming RDP access hurdles usually involves one or more of three workarounds.

Three Workarounds to Overcome RDP Access Hurdles

These workarounds help to address a list of problems that include:

  • Can’t find remote PC
  • Can’t authenticate login credentials
  • Password error despite known, good working account/pwd pair

Workaround #1: Try the device IPv4 address

When the Remote Desktop Connection (or Remote Desktop app) simply can’t find a machine name, it’s always a good idea to try the target PC’s IPv4 address instead. As shown in the lead-in graphic for this story, it worked to get me into a Lenovo X380 Yoga I just put through a bunch of Windows 11 upgrades.

Workaround #2: Try a Different MSA

On occasion, when I try to login to a remote PC using my current Microsoft Account (MSA) it just won’t get past authentication. This is often a symptom of difficulty in getting MS authentication to work properly. When that happens, I will try another one of my known, good working MSAs (I have three, as I write this story). That does occasionally work, especially if I’ve already used that MSA on the target machine already. Go figure!

Workaround #3: Try a Local Account Instead of MSA

Sometimes, RDP will strenuously resist allowing you to establish an RDP connection over the LAN using a Microsoft Account (via its associated email address). In fact, it generates an account name/password error, even though I’m using a known, good working MSA account name and its associated password to try to login.

When that happens I’ve found that setting up a local admin account — one named, LocalU, for example — will get me right into the target PC. That’s also on display in the lead-in graphic where I had to use both workarounds at once to get into that PC. Sigh.

Remember: Where There’s a Will, There’s a Way

If you need to establish an RDP session on a remote PC, you can usually figure out a way to make such a connection work. If the preceding workarounds don’t do the trick, try the other tips in this 2021 WindowsReport story: it offers pretty good tips, tricks and advice.


Facebooklinkedin
Facebooklinkedin

25145 Gets File Explorer Tabs

OK, then. It’s been a gradual roll-out, so I can’t know if everyone running Dev Channel can see this. But once I got it running, Build 25145 gets File Explorer tabs on both of my test PCs. It’s pretty cool, too, as I hope to show in the ensuing discussion.

To get this party started, you can see File Explorer in the lead-in graphic. It’s got the default tab (“Home”) open at left, the UUPdump folder from my D: drive open at right. The latter shows the various files left over after an .ISO file is created (~4GB item, 6th from top).

When 25145 Gets File Explorer Tabs, Then What?

Why, you mess around with them to see what they can do. So far I’ve discovered multiple techniques to open such tabs, including:

  1. Click the Plus sign (“+”) to the right of the rightmost open tab, and an open tab set to the default appears. Navigate anywhere you want from there.
  2. Right-click a folder inside the main File Explorer pane, and a new option labeled “Open in new tab” appears. I *like* this one! Here’s what it looks like (annotated for easy recognition).

3. I remember reading about a keyboard shortcut to open such a tab, but I can’t find the reference. Winkey+E still opens a new File Explorer window, and WinKey+T doesn’t do anything. I’ll keep poking about on this front, and see what I can learn. So far, the best third-party coverage of the feature I’ve found is at WindowsLatest.

This is a cool and helpful new feature. As I learn (and find out) more about it, I’ll either update this post, or write a new one. Stay tuned!

Facebooklinkedin
Facebooklinkedin

Recent 25145 Dev Channel Hijinks

The last two Dev Channel builds are 25145 and 25140. For both of them, my Start Menu has been munged when first accessing the desktop. On 25140, a restart set things back to rights. On 25145, I launched File Explorer, then restarted the process in Task Manager. That worked, too. So while recent 25145 Dev Channel hijinks have been irksome, they’ve been by no means insurmountable.

Limits to Recent 25145 Dev Channel Hijinks

Interestingly, this phenom occurs only my Lenovo X12 Hybrid Tablet. It does not pop up on the Lenovo X380 laptop. I don’t see any interesting errors in Reliability Monitor on the X12 that could point to possible causes. Once again, I find myself wondering if it might be related to 8GadgetPack, which has wonked around for a while lately  in the wake of new Dev Channel builds.

Recent 25145 Dev Channel Hijinks.relimon

This time Relimon doesn’t have much useful to say (the SearchHost item is a known gotcha, unrelated to my issue).

Frankly, it’s hard to pinpoint the cause of this trouble without more data to go on. But now that I know how to work around it without a restart, I’ll keep plugging away as new Dev Channel builds keep coming. Either the problem will get fixed in the background, or I’ll get enough data to identify — and hopefully deal with — the actual cause.

FWIW, I’ve sent feedback to the hub about this. It’s entitled “Build 25145 start menu nonresponsive on first boot.” Please upvote if you encounter the same thing on one of your Dev Channel PCs or VMs. Cheers!

Facebooklinkedin
Facebooklinkedin