OK, then. Lenovo sent me a terrific Thunderbolt 4 4K ThinkVision P27-u20 monitor. It actually showed up the day before Thanksgiving. It’s been sitting on my office floor since then, waiting patiently for me to get around to it. I’m working with the company to get a better sense of how Thunderbolt 4 works in an office environment. And indeed, now I can say from experience that a Thunderbolt monitor makes life easy for properly-equipped PCs and laptops.
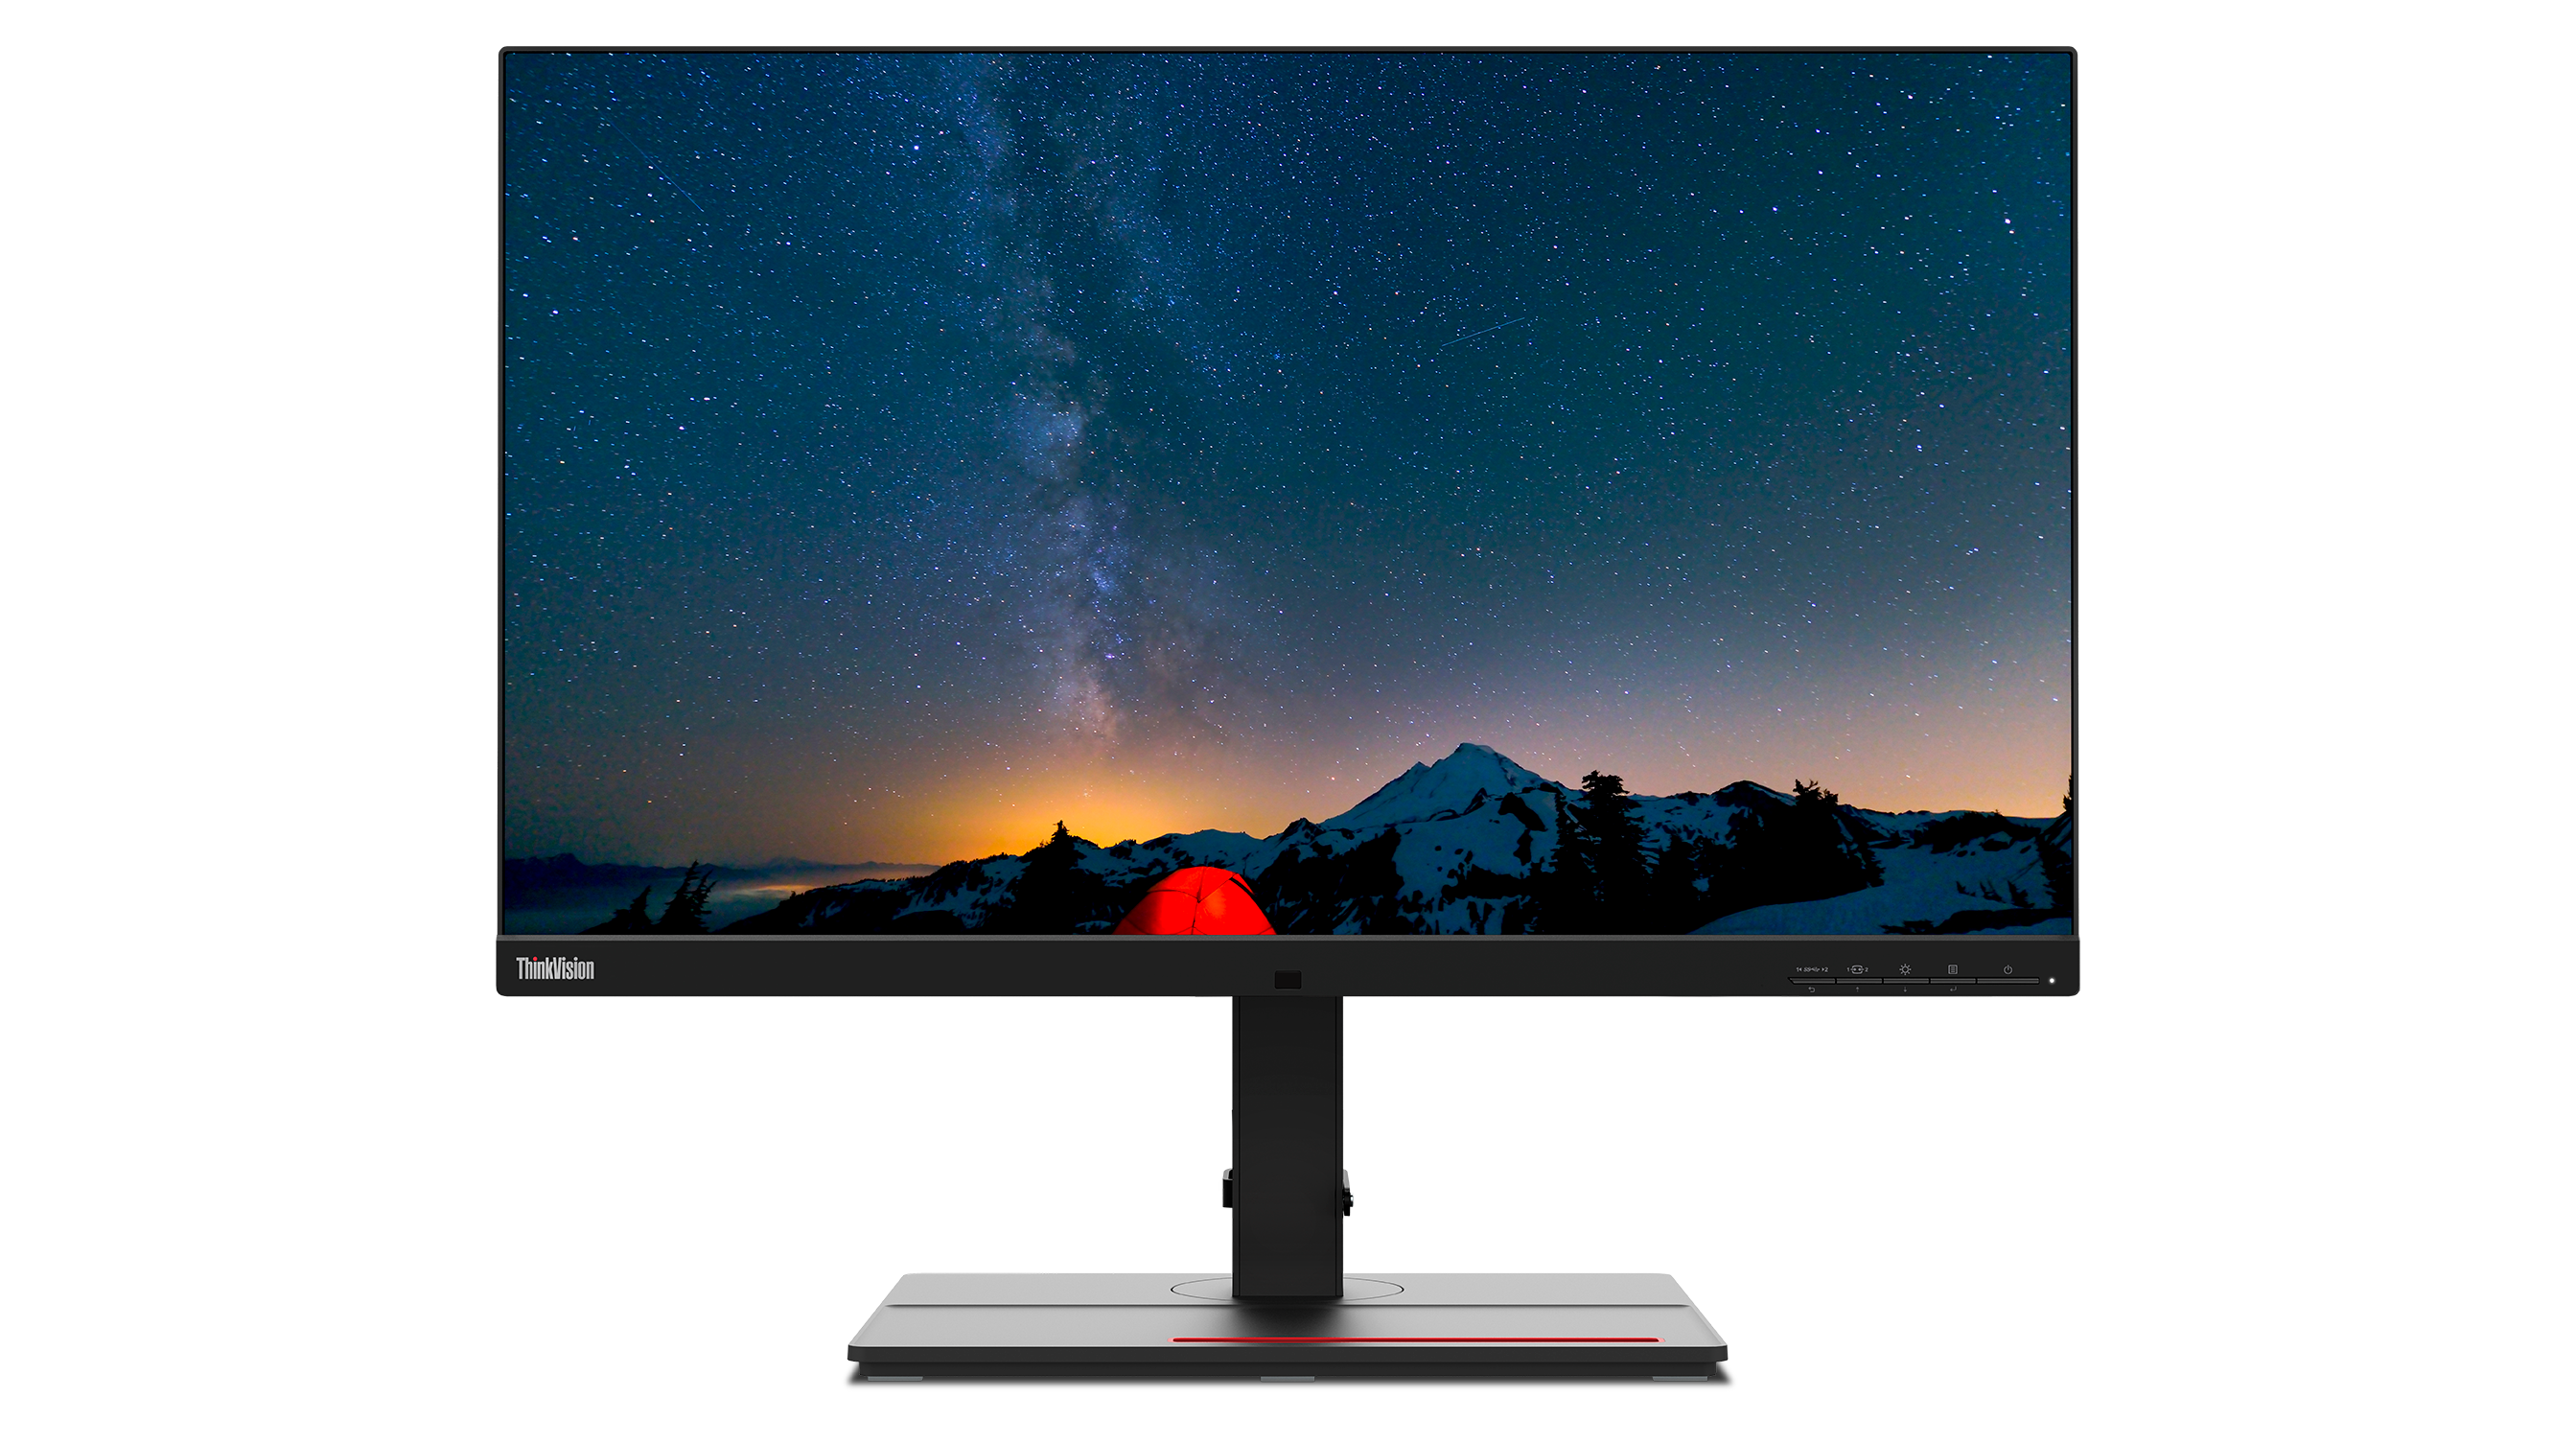
Extremely narrow side and top bezels make for a compelling and nicely stackable monitor. [Click image for full-size view.]
Why Thunderbolt Monitor Makes Life Easy
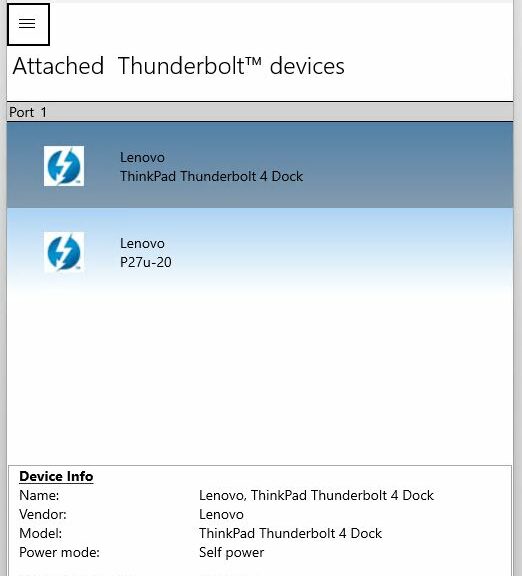
Simple: plug it it, turn it on, set the device for dual displays and extend the desktop on a laptop. You can see how this looks in the Thunderbolt Control Center on the X12 Hybrid Tablet in the top graphic.
On the P360 Ultra, it fired up on its own when plugged into the front Thunderbolt 4 port. Colors are crisp, and the monitor appears to work as fast using TB4 as it does under either HDMI or DisplayPort. Better yet, the Thunderbolt-accessible ports on the monitor include TB4 in/out, 2xHDMI 2.0, DP 1.2, GbE (RJ-45), an audio mini-jack, and 2xUSB3.1 (1 USB-Type B, and USB-C is TB4 capable). It’s also got integrated speakers (3W each, so not really major, but adequate). It runs a 60Hz refresh rate with a response time of 4 -6 ms so it’s not really a gaming monitor by any stretch. That said, it’s nice for productivity and static creation work.
Resolution is nominal 4K (3840 x 2160), and it supports DCI-PC3 and Adobe RGB. It’s also DisplayHDR 400 certified (that means 10-bit color). See the product page for complete tech specs.
Built-in TB4 Hub Makes For a Killer Price
Yes, that’s right: the monitor includes an entirely capable, built-in Thunderbolt 4 hub as part of its equipage. Very cool, for a device with an MSRP of under US$550. Indeed, even the cheapest TB4 hubs, similarly equipped, cost over US$300 nowadays. It also includes a DP cable, a TB 4 cable, and a USB TypeB2A cable to hook an external USB 3.1 device up to its Type B port. Note: I just happened to hook the monitor up through a Lenovo TB4 Dock because I have one, but it will act as a dock by itself. That’s why two devices (dock and monitor) show up in the Thunderbolt Control Center up top.
To me, this functionality makes the price of the monitor easy to justify given that it comes ready to support Thunderbolt 4 based audio, video, networking and peripherals right out of the box. If you need another monitor and you can also benefit from TB4 connectivity and access, this could be too good to pass up.
Upon first exposure and short-term use, I’m wowed. I’ll follow up with more details after I’ve had a chance to spend some time with this puppy.
Notes Added December 7
A few more noteworthy things have occurred to me as I ponder this new peripheral and its inner workings. The USB C port delivers up to 100 W of power, so it should be able to handle most laptops without a separate AC connection for juice. The on-screen menus do take some fooling with to figure out. It is kind of heavy (28 lbs/12.7 Kg) but easy to assemble, move around and adjust. Here’s an interesting technical review from PC Magazine for your consideration, too.