When I saw the news, I had to try it. A couple of weeks back, MS announced that 24H2 users for all versions of Windows 11 except the Dev and Canary Channel could move up to 25H2. So I used the Installation Assistant, and did that very thing for my X380 Yoga install. But, as I’m learning, that Beta 25H2 jump brings unexpected side effect. Namely, as MS drops new Beta Builds (e.g. 26120.6982), my jumped-up Yoga doesn’t partake of such updates. It’s on a higher track.
Why Beta 25H2 Jump Brings Unexpected Side Effect
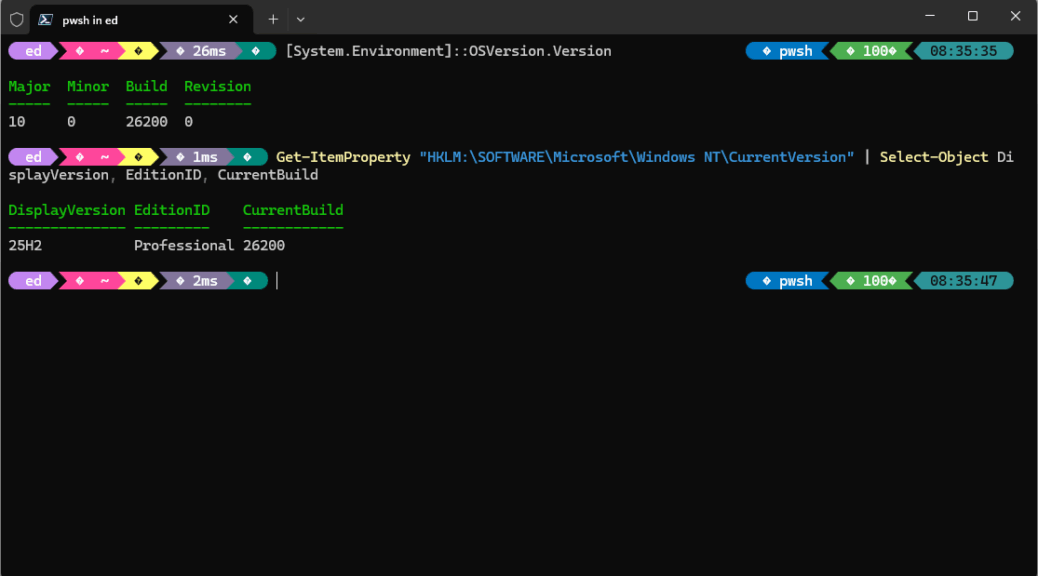
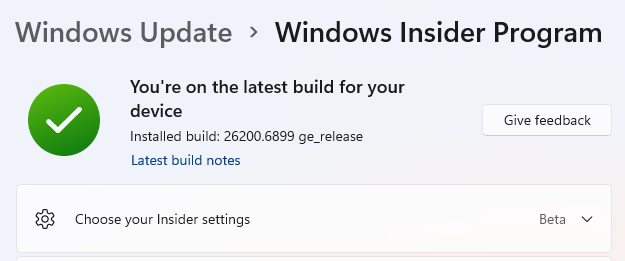
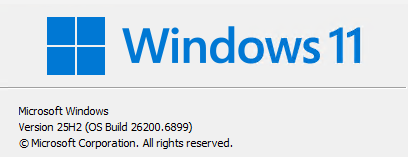
The base build number for 24H2 Beta versions remains 26120. For Beta installs jumped to 25H2, that base build number advances to 26200, as you can see in the lead-in graphic. Thus, for my Beta Channel test PC the unexpected side effect of the jump-up is to exclude it from updates and new versions that target 24H2 instead. I should have known, but found out when I saw last week’s announcement of Build 26120.6982, visited WU, and didn’t get anything in response to clicking the “Check for updates” button.
Only slowly did it dawn on me that my install is on a different track right now. I’m not exactly sure when I’ll see the next update for this track. I’m guessing I may have put myself on the Patch Tuesday schedule with this change, along with occasional OOB updates and 4th Tuesday items as they sometimes appear.
Here in Windows-World, it can be easy to change tracks, or even to get onto the wrong track. I know I’ve done the former, and time will tell me if I’ve also done the latter. In the meantime, I’ll just keep chugging along.
One More Thing [Added 6 hrs later]
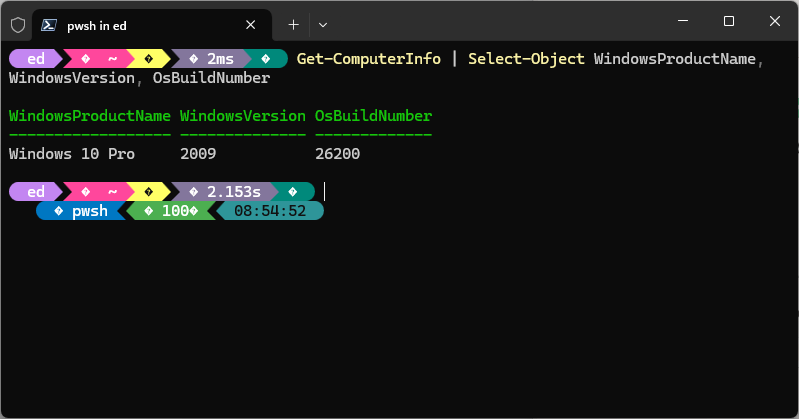
I just ran DISM /online /analyzecomponentstore on this updated PC and guess what? the 25H2 eKB restored the spurious reclaimables that I’d hand-deleted from the 24H2 image. (See this March 21 post for details.) It worked this time, too, just as recited in that earlier post (and again, thanks to ElevenForum user @Bree for figuring this out in the first place).