Whoa! In the realm of Windows Insider Preview upgrades, sometimes you win and sometimes you lose. This time around — starting from Build 27783 — I found myself on a long, hard 27788 upgrade road for this latest Canary Channel version. When I tell you what happened, and how I surmounted the obstacles on that path, you may be able to save yourself some unnecessary time and effort.
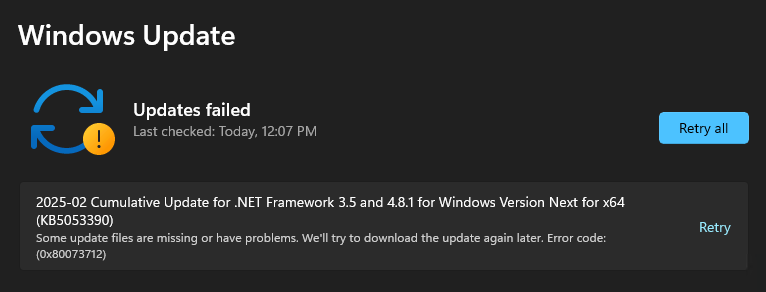
To begin with, what I lost on this upgrade road was time. I spent most of yesterday afternoon going through various motions to try to get the Insider Preview for 27788 and a companion KB5053390 (CU for .NET Framework…) up and running. All such attempts, alas, proved fruitless.
Traversing That Long Hard 27788 Upgrade Road
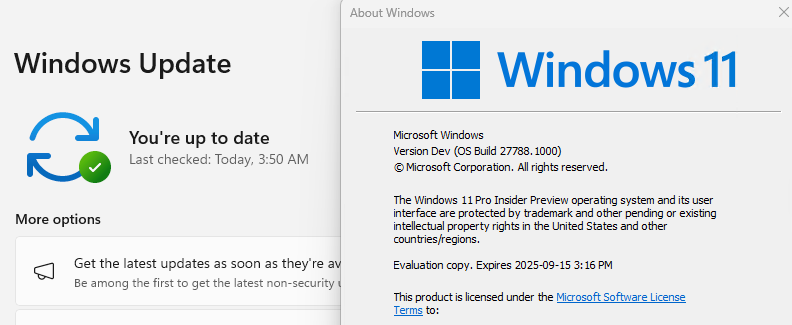
Getting to the state depicted in the lead-in graphic — showing that the Lenovo ThinkPad X12 Hybrid Tablet is up-to-date in WU and running Build 27788 in Winver — took some doing and some time. In fact, it wasn’t until I read about a workaround in an ElevenForum post from Russian user @Dronix that I made any real headway. Along the way, each update/upgrade cycle took about 1:10 (70 minutes) to work through.
I’ll deliver a recitation of what I tried that didn’t help my problems. I am also speculating when I say this, but I believe one can’t upgrade to 27788 until KB5053390 for .NET completes successfully. There may be dependencies in the upgrade that need the previous CU to complete successfully. And indeed, once I did that, the upgrade went through without further issues.
Here’s my list of failed strategies:
1. Simply retry the failed KB or upgrade item.
2. Run Eleven Forum’s Reset_Reregister_Windows_
Update_Components.bat from this Reset WU tutorial
3. Run the built-in WU Troubleshooter
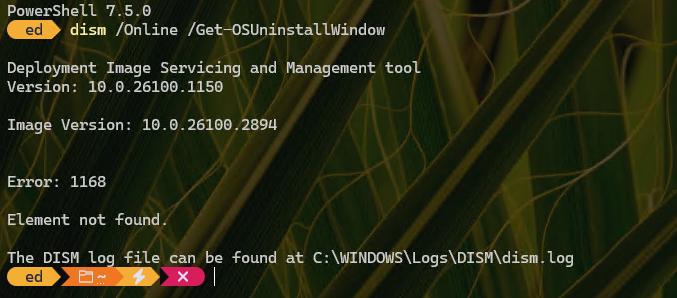
What Worked: DISM-GUI 1.3.1.02
Turns out there’s a German software tool named DISM-GUI that lets one install KB .cab files from failed installations. You have to know the name (a partial name will do) of that file to provide it as a target. The afore-linked Eleven Forum thread identifies it, and it includes the KB number as a sub-string. Using Voidtools Everything, I found it immediately (search string *KB5053390*.cab). For the record, the filename is:
Windows11.0-KB5053390-x64-NDP481.cab
Click on the box in DISM-GUI that reads “CAB Install” (lower left) and the program will prompt for the file location. You can get that from Everything, then left-shift click and use the “Copy as Path” option (you’ll have to delete opening and closing quote marks).
This opens a Command Prompt session and uses DISM to install the package for you. Unlike the WU driver install, this actually works. And it takes less than two minutes to complete. Then, when you’ve got the CU installed, the follow-up upgrade to 27788 works, too.
TLDR: Possible Problems with 27788 Are Fixable
If you read through the whole Eleven Forum thread about 27788, some posters were able to install KB5053390 and the 27788 upgrade without any difficulties. Numerous others — myself included– got exactly nowhere until they used DISM-GUI to get over the KB5053390 hump.
Should you find yourself in the same boat, you can go straight to the workaround using that tool, and avoid the hours and hours of thrashing about I went through yesterday. Why not learn from my experience, instead of repeating that misery?
Providing such info explains why I write this blog. It also explains why I expect lifetime employment doing that kind of thing here in Windows-World. It’s always something…
But Wait! There’s More… (Added Jan 7)
When I logged into the X380 and the X12 this morning, KB5053390 again showed up as needed. And again, a regular WU install failed. So this time, I fired off DISM-GUI taking the left-click “Run as administrator…” option. Apparently that did the trick. Here are some screencaps along the way:
 Between the 2nd and 3rd screencap, I ran DISM-GUI again (as admin) and it showed a successful conclusion at the command line, then reboot with successful update there after). Once I rebooted the system and it worked through the rest of the process, I got the 3rd figure above from WU. Gadzooks! I hope it’s finally over…