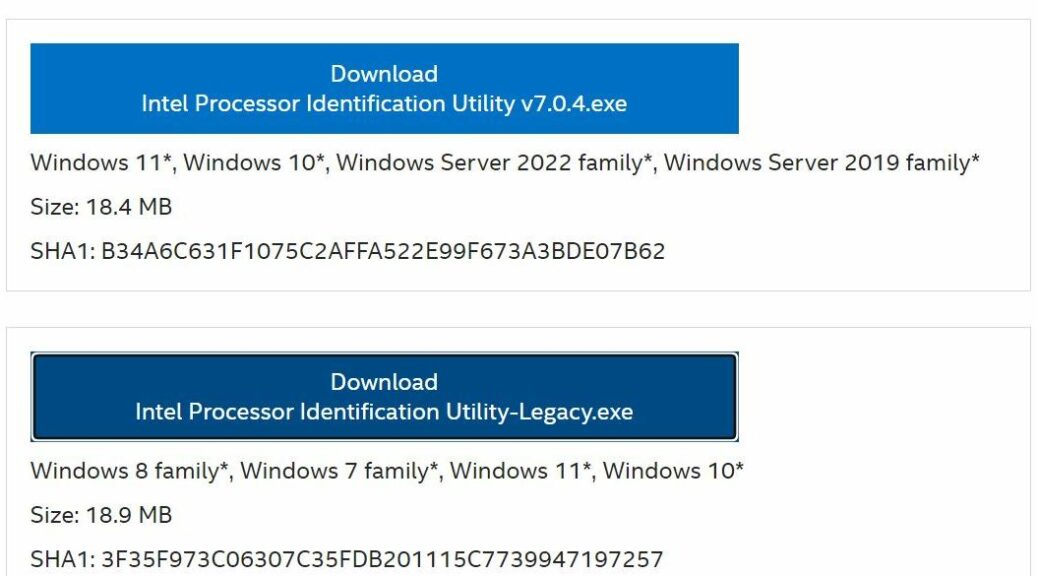
Hmmmm. Here’s an interesting one. SUMo just told me that the Intel Processor Identification Utility (Legacy Model) needs an update. Poking around on the Intel site, I found a download page that covers Intel processors by generation: the new one goes Gen 12 and up; the old one Gen 11 and down. The old one appears beneath the new in the lead-in graphic, so it’s the one I downloaded and installed. That got me through Updating Intel Processor ID Utility on my i7 Skylake.
Why Bother Updating Intel Processor ID Utility?
The latest version of the new utility is 5/22/2023. The legacy one that works for my i7 Skylake shows a date of 5/17/2023 on the General Properties tab for the ProcID.exe file. That means it’s the latest and greatest of such files. I’m not aware of any security or other issues that the new version fixes. I’m just in the habit of updating as new versions come out. It runs just fine on the production PC. Here, for example, is the “CPU Technologies” info from that tool:
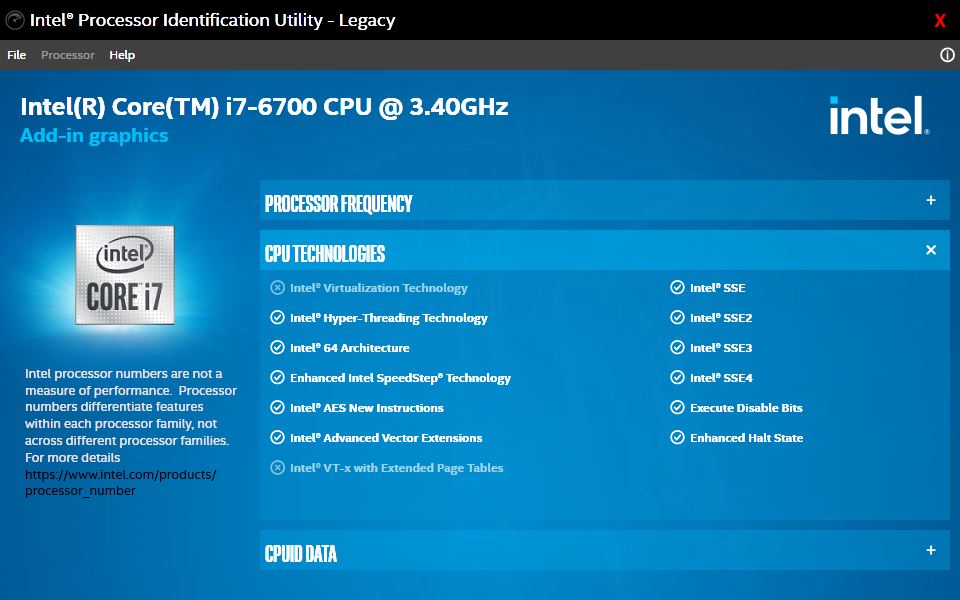
CPU Technologies show instructions, virtualization, sleep and other state info support (or not).
Intel Always Makes Updates Interesting
I feel lucky this morning that the landing page for Processor ID Utility took me to the update I needed. Sometimes, they don’t make it totally easy or simple to find the latest versions. Indeed, searching on version number (6.10.29.0517) didn’t work all that well for me. But this tool has an “Update” button subordinate to its Help menu. Now that I know this is an option, I bet it will work immediately next time around. That’s what makes updates interesting in general (and Intel in particular): there’s almost always a way to get a boost from the developer, if you know where and how to look for same. Sigh.