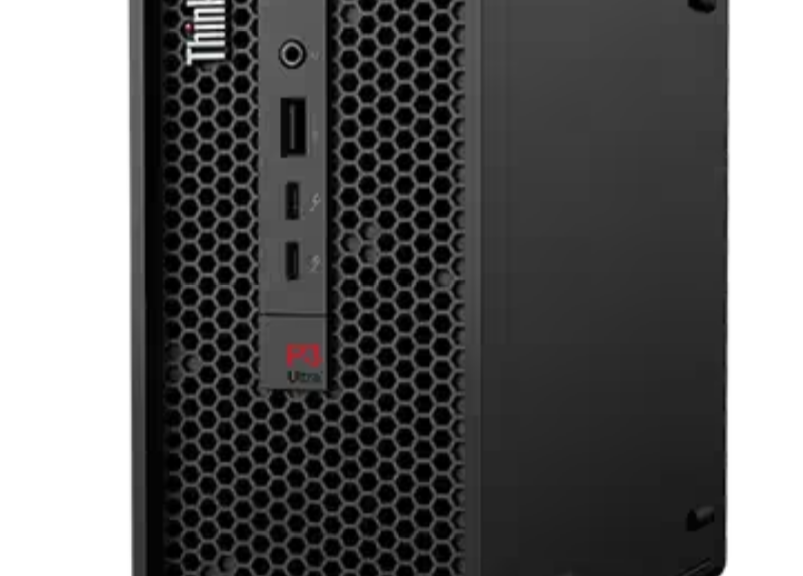
When Lenovo asked me if I’d like to review another one of their well-engineered SFF PCs last week, my immediate reply was “Heck yeah!” The ThinkStation P3 Ultra Small Form Factor Workstation showed up lateThursday. I got to unboxing and setup over the weekend. So far, it’s been a gas, but a bit of a mixed blessing. Let me explain…
Working Thru Lenovo ThinkStation P3 Ultra Intake
I’ve looked at a couple of recent Copilot+ PCs (Lenovo Yoga Slim 7x and ThinkPad T14s) and a couple of other late 2023/early 2024 laptops in the last 12 months. All of them included plastic-free packaging. Thus, I was SHOCKED to see plastic bags and plastic twist ties in the P360 Ultra packing materials. That was my first clue this is no bleeding edge PC.
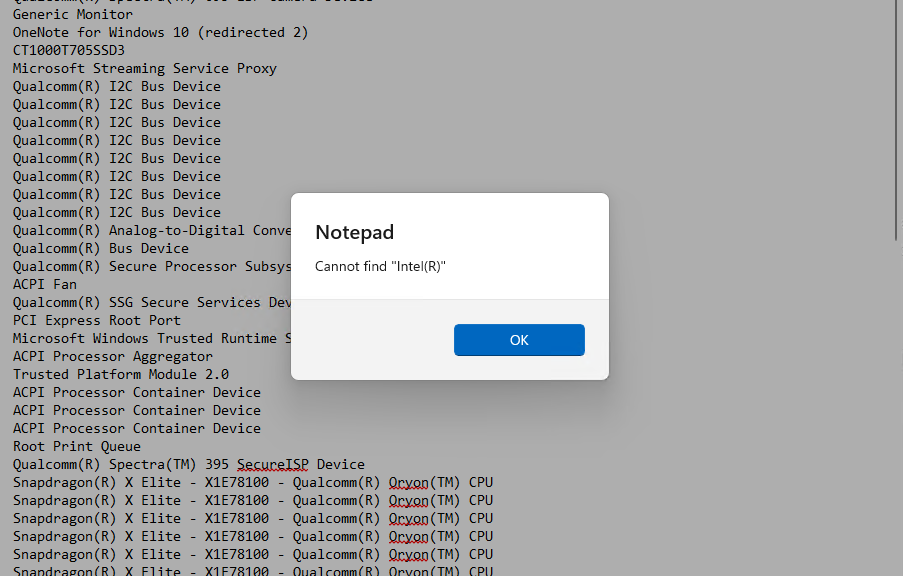
My next big clue came when I opened Settings > Bluetooth & Devices > USB and found no USB4 hubs in evidence. In fact, I had to revert to the old Thunderbolt Control Center (TBCC) to see (some of) my faster USB4/Thunderbolt4 devices and connections. Here’s a screencap:
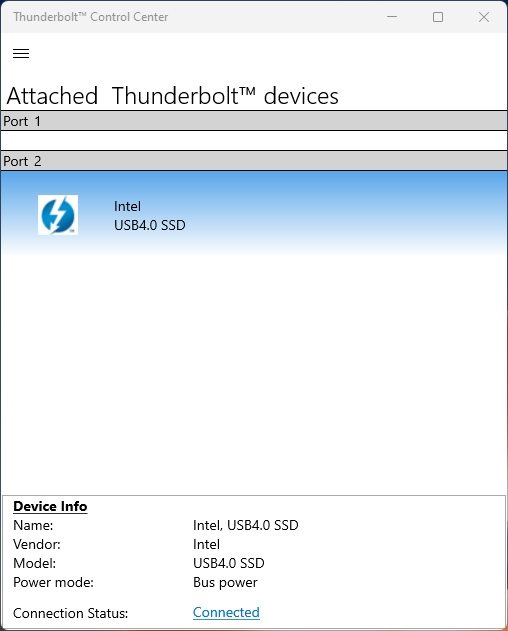
My newest USB4 NVMe enclosures didn’t show up in TBCC, but the 2022 Acasis model did. Go figure!
I have two newer USB4/TB4 NVMe enclosures (Konyead and Maiwo models) that don’t pop up in TBCC. Because they DO show up on the Copilot+ PCs in the USB4 hierarchy, and I can observe they run at higher speeds, I know they’re working OK. But it’s a bit distressing to lack the level of insight and monitoring I get on USB4-capable Windows 11 PCs.
Speeds, Feeds, and So Forth…
These are, however, pretty darn minor as quibbles go. The P3 Ultra is a speedy and capable PC in a nicely compact package. Indeed, as equipped, it retails for about US$2,500 so it’s no lightweight by any estimation. Here’s what’s inside:
- CPU: Intel 13th-Gen/Raptor Lake 19-13900 (24 cores)
- RAM: 64 GB (2x32GB DDR5-5600 Hynix)
- OS: Windows 11 Pro Version 23H2
- Graphics: Intel UHD Graphics 770/NVIDIA RTX A2000 12GB
- Networking: Intel I225-LM 2.5 GbE and I210 GbE, Intel AX211 Wi-Fi6 adapter (with external antenna)
- Storage: Hynix OEM PCIe x4/Gen4 2TiB NVMe SSD, 1 open M.2 slot, 1 open SATA slot
- USB ports: 2xUSB-C/USB4-TB4 40 Gbps front, 2xUSB-A 3.2 back, 1 front
- 3xDisplayPort 1.2 ports (both miniDP and full-sized)
- PSU: External 300W power brick
This is a nicely-equipped PC for sure, but its lack of Wi-Fi7, USB4, older DP version (1.2) and packing materials that include a tiny bit of plastic all speak to 2023 standards. And indeed, a quick check on the release date says May 2023. It is what it is, and what it is is a fast and fairly powerful mini workstation. I’m glad to have it here.
Set-up and Intake Process
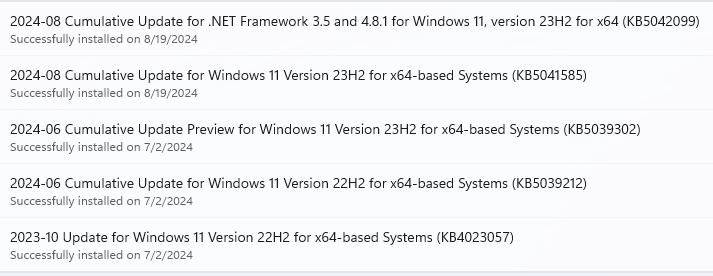
Once I got the P3 Ultra plugged in and attached mouse and keyboard (included) and wired into a Lenovo ThinkVision P27u-20 monitor the OS came right up into a generic Admin user account. As is my wont I set up my usual MSA as another Admin account. Then came a slew of upgrades and updates, starting with this handful of Quality updates:
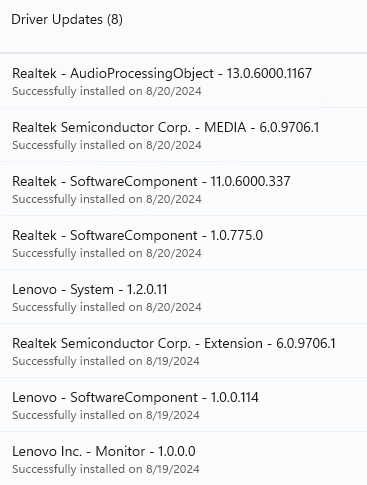
 Then came a number (8) of driver updates:
 I also perforce picked up the latest MSRT when I got the latest quality update. The whole process took about 15 minutes, including reboot and restart. Interestingly, Lenovo Vantage didn’t find anything new to add to the July 2 Intel Chipset update. But it just now found a new chipset and graphics driver so I’m installing them now (total time: 2 minutes plus reboot/under 3 minutes to get back via RDP).
Then I used PatchMyPC Home Updater plus a few manual installs to add 7-Zip, 8GadgetPack, Advanced IP Scanner v2, CPU-Z, CrystalDiskInfo, CrystalDiskMark 8, Everything, FileZilla, Chrome, HWiNFO64, Intel DSA, NotePad++, the NVIDIA (beta) app, Revo Uninstaller, and WizTree to my runtime environment. That took 15-20 minutes in all. I still have to install Macrium Reflect for backup, but I’m mostly ready to start working with and testing this PC. More will come soon, but what I see so far is fast and capable.