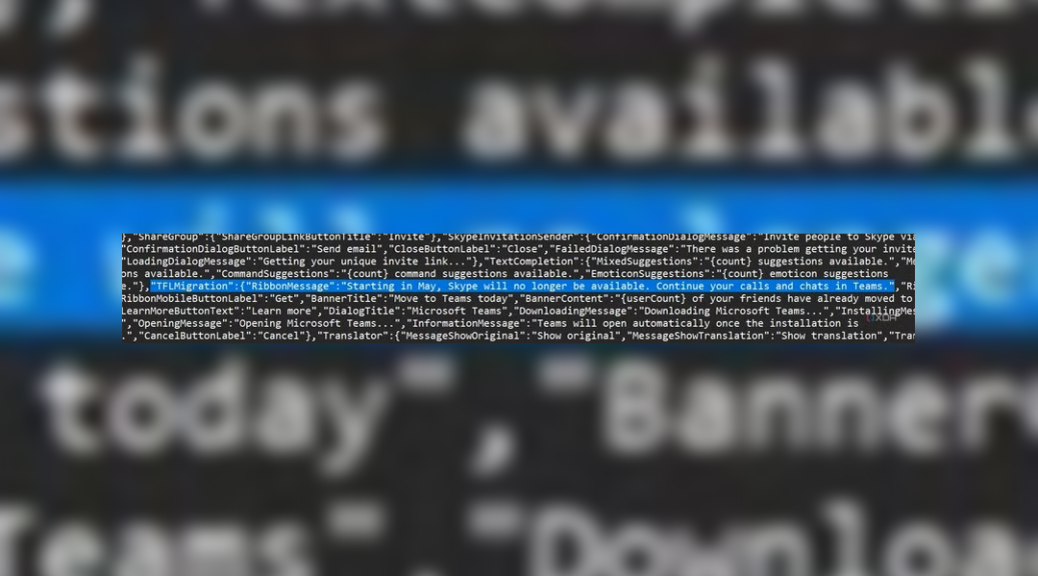
Here’s an odd one. A few months back, I tried out a pre-release version of UniGetUI that still fell under the WinGetUI umbrella. The package info involved — as you can see in the lead-in graphic — was ID=MartiCliment.UniGetUI.Pre-Release Version=1.5.2. I thought I’d deleted same, and it showed up in none of Programs and Features, Settings > Apps, or Revo Uninstaller. Yet it kept showing up in WinGet‘s upgrade and list commands anyway. TLDR; extirpating WinGetUI requires registry cleanup to “make it go away.” Sigh.
Why Extirpating WinGetUI Requires Registry Cleanup
Apparently, adding packages to Windows leaves all kinds of traces in the file structure, as well as settings and pointers that get instantiated in the registry. Furthermore, it looks like WinGet relies what it finds in the registry to create its view of what’s installed on a Windows PC. Thus, I had to remove all registry entries that included the string “WinGetUI” and/or “UniGetUI” (except for stuff not related to the application or its package info, such as pointers to Word files I’d written about those tools).
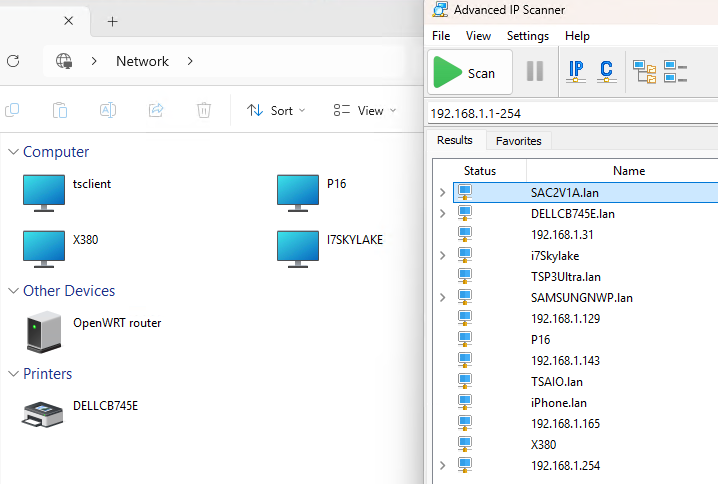
And indeed, that did the trick. Neither WinGet Upgrade nor WinGet List Marti.Climent.UniGetUI,Pre-Release posits pointers to something I know isn’t there. The next screengrab provides visual proof. Good-oh!
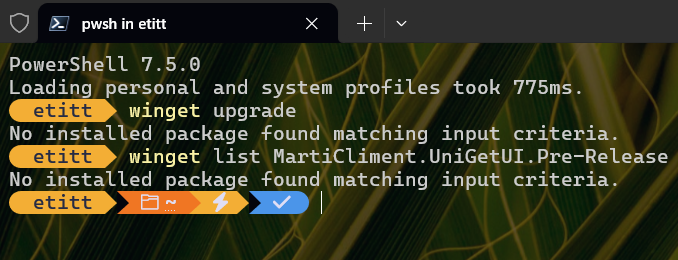
After removing all WinGetUI references in the registry, WinGet no longer sees the older package.
It just goes to show that some uninstall facilities work better than others. For all its good features, it appears that WinGetUI/UniGetUI does not clean the registry upon uninstall deeply enough to tell WinGet that it’s gone, gone, gone. You’d think that wouldn’t happen with a WinGet-related and -focused follow-on tool. But here’s a counter-example that says otherwise.
That’s the way things go here in Windows-World, where not all is as it seems, not always works exactly the way it should. Sigh. When that happens, we clean up manually and keep on truckin’…