Bringing AMD PC Into Windows 11

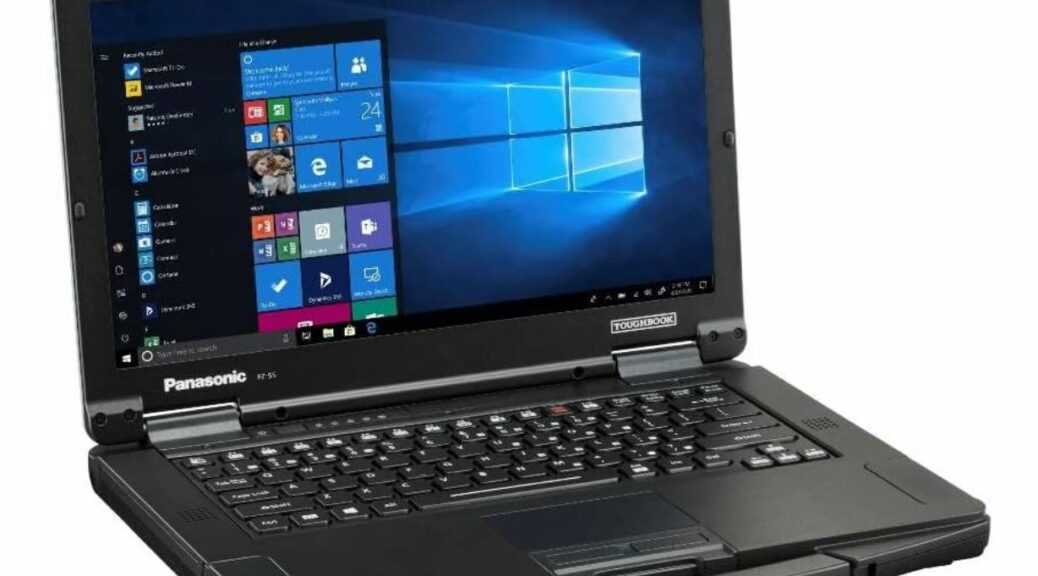
Man! What a day yesterday turned out to be. I finally had all the pieces together — or so I thought — to finish the AMD Ryzen 7 5800X PC. On the path to making that happen, and getting Windows 11 installed, I learned more than I expected. A LOT more… Bringing AMD PC into Windows 11 proved more difficult and challenging than I’d ever dreamed. Let me explain…

Parts Needed When Bringing AMD PC Into Windows 11

I finally broke down and ordered an Nvidia 3070 Ti GPU for the new build. I didn’t realize, until it showed up and I measured it against the Antec 902 case, that that darned thing was TOO BIG to fit inside. As my first such card, I didn’t know it needed about 2cm (around an inch) of additional clearance between the PCIe slot (and rear of the case where the outputs go) and the HDD cages at the front. Ouch!

So here’s what I had to do. My old Z170 (vintage 2017) build is in a monster Rosewill case with massive clearance. It housed an Nvidia 1070 Ti which I swapped out with the new 3070 Ti. Fortunately, the Corsair 750 PSU in the Rosewill case had enough power connectors for me to plug in 2x 8-pin power plugs to make that beast happy.

On the Antec side, I shoehorned the old 1070 Ti in. Even so, I endured some “cable snarl” to put everything in place. I had to use a tiny cable tie to hold the Reset, Power, and HD Light cablets together. Then, I used a “mosquito” (a tiny hemostat, very helpful for working inside tight spaces inside PCs) to plug them in together.

Other contortions were involved:

  • Went through a card slot at the back of the case to plug the HD97 audio connector in.
  • Used two HD power cables to reach each of 2 hard disks, to work around the 1070 GPU.
  • Used all but one of the power cables from the build’s Seasonic 650W PSU (first time ever for such a situation).

Power, Lights and Action…?

Eventually, I had all the parts together and mouse, keyboard and monitor plugged in. This time, when I hit the power switch the PC booted right into the Ventoy drive I had plugged into one of the USB 3.2 ports. I jumped immediately into installing Windows 11, only to be informed that the PC didn’t meet the necessary hardware requirements after getting past the “request for product key” screen.

Turns out that although the B550 Extreme4 motherboard and its Ryzen 5800X do support fTPM, they won’t do so unless it’s enabled in the UEFI. Figuring that out and fixing it turned into another series of adventures. They will serve as the basis for tomorrow’s story. Stay tuned, and I’ll tell you all about it then.

For now, I’m happy to report that the machine is running nicely at my second desk here in the office. I still have some setup work to do. Mostly that consists of installing a bunch of utilities, Macrium Reflect, Office 365, and then tweaking things just the way I like them. That should provide the basis for yet another story later this week. Cheers!

Facebooklinkedin
Facebooklinkedin

Windows Reset Data Wipe Sometimes Falls Short

For some time now, Windows has included a “Reset this PC” option. Among other uses, it lets sellers provide buyers with a pristine OS installation on used PCs. Or so runs the theory, when the “Remove everything” option is elected. However, researchers have observed that Windows reset data wipe sometimes falls short of this goal. Let me explain…

[NOTE: the lead-in graphic above shows what “Reset this PC” looks like in Windows 10 (above) and Windows 11 (below).]

How Windows Reset Data Wipe Sometimes Falls Short

Two data sources sometimes persist after running “Reset this PC” using the “Remove everything” option:

1. Windows.old remains behind. It includes all kinds of sensitive or interesting data about prior users.
2. When local OneDrive file copies exist, they could persist after the reset.

This info appears in the February 24 edition of Microsoft’s Windows 11 Known Issues. Indeed, there’s a section entitled “Files might persist after resetting a Windows device.” It reports which Windows versions manifest this failing: Windows 11, version 21H2;  and Windows 10, versions 21H2, 21H1 and 20H2.

What Known Issues Says

Here’s a verbatim quote from that page:

When attempting to reset a Windows device with apps which have folders with reparse data, such as OneDrive or OneDrive for Business, files which have been downloaded or synced locally from OneDrive might not be deleted when selecting the “Remove everything” option. This issue might be encountered when attempting a manual reset initiated within Windows or a remote reset. Remote resets might be initiated from Mobile Device Management (MDM) or other management applications, such as Microsoft Intune or third-party tools. OneDrive files which are “cloud only” or have not been downloaded or opened on the device are not affected and will not persist, as the files are not downloaded or synced locally.
Helpfully, two known fixes address these issues. First, disconnect from or disable OneDrive before initiating the reset. Second,  remove Window.old after reset completes. Taking these two simple steps ensures no personal info survives reset . Worth remembering!

For more information…

Use Disk Cleanup (or some useful analog like TheBookIsClosed’s Managed Disk Cleanup) or Storage Sense to remove Windows.old from a Windows PC. Indeed, MS provides a helpful how-to link for that latter operation.

Signing out of, or unlinking from, OneDrive before the reset operation prevents local OneDrive files from hanging ’round. Likewise, MS provides an equally helpful how-to link for this maneuver, too.

MS plans fixes for these shortcomings. In the meantime, if you simply disconnect from OneDrive before the Reset, then remove windows.old afterward, you’re covered. Good to know!

Note Added March 9, 2022: Issues Fixed (with Caveat)

With the release of Patch Tuesday fixes for Windows 10 and 11 yesterday (KB5011487 for 10; KB5011493 for 11) MS has fixed these “file hangover” problems. That said, both announcement include this language:

Some devices might take up to seven (7) days after you install this update to fully address the issue and prevent files from persisting after a reset. For immediate effect, you can manually trigger Windows Update Troubleshooter using the instructions in Windows Update Troubleshooter.

Thanks to Mary Jo Foley at ZDNet for bringing this to my attention.


Facebooklinkedin
Facebooklinkedin

Build 22563 Makes Advanced Startup MIA

Over the past couple of weeks, I’ve observed something odd and interesting. Many of my Windows 11 PCs were missing the Advanced Startup option. Ordinarily, it’s in Settings → System → Recovery → Recovery Options. Just yesterday, undeniable curiosity let me observe that Build 22563 makes Advanced Startup MIA again. This time, I’m NOT going to create an ISO and run an in-place upgrade repair install. Though I think it would fix it, I won’t do that this time. Instead, I’m convinced this needs reporting to Feedback Hub as a recurring problem.

Build 22563 Makes Advanced Startup MIA Again: FB Hub Report In

I upvoted and added to a thread on the Feedback Hub entitled “The Advanced Startup option is missing from the recovery menu.” I’m now convinced this is a recurring problem that can occur when upgrading an Insider Preview to a new Insider Build, or when applying a Cumulative Update to an RTM Build. I’ve had it happen on 3 of my 5 Windows 11 machines in the last week, in fact. That’s disheartening, after spending a half-day repairing the issue. See my Feb 21 post about the fix for all those gory details.

But now, I know there’s a problem across the board in Windows 11. The only thing I don’t know is if the problem is just across the board on MY Windows 11 PCs, or more of them than that. That’s why I’m reporting to Feedback Hub and hoping for results. Peferably, sooner rather than later. We’ll see.

I will observe that my lone “native Windows 11” PC seems immune to this issue. All of my other Windows 11 PCs were (a) upgraded from 10 to 11, and (b) regularly manifest this issue. I’d be curious to understand the connection, if any, that might be involved…

Facebooklinkedin
Facebooklinkedin

RTFM Stymies New PC Build

I have to laugh at myself. I’ve been trying to assemble a Ryzen 7 PC build here at Chez Tittel. But I’ve been unable to get to the UEFI on the PC. Turns out it’s for a very, very good reason. Today’s post bears the title “RTFM Stymies New PC Build” to recognize a certain lack. Let me explain…

If RTFM Stymies New PC Build . . . Order Parts!

My chosen CPU is a Ryzen 5800X. It’s a gaming CPU. As such, it includes no inbuilt GPU capability. Instead, it assumes builders will pair it up with one or more presumably high-end graphics cards.

Sigh. Guess what’s missing from my Bill of Materials? Indeed, no GPU. So, I finally broke down and ordered an Nvidia 3070 Ti from Amazon for a whopping US$1,200 or thereabouts. I’ll actually install that in my son’s PC — he’s the gamer in the family — and take his old 1070 Ti into the new build instead.

About that RTFM Thing

I just sort of assumed that because my Asrock B550 Extreme4 motherboard had graphics outputs, I’d be able to make the build work sans external GPU. But for that to happen, the CPU must include GPU circuitry. The 5800X does not, so no wonder the BIOS wouldn’t post: it had no display to talk to.

You might be amazed to learn it took me hours to figure this out. Then again, you might not… But whatever that reaction might be, the fix is in the mail so to speak. I’ll get the card next Tuesday, and try again. I predict a successful Windows 11 install. I’ll be interested to see how the Ryzen CPU does with the latest flagship OS. I’m still hearing occasional rumblings of performance and other issues for AMD PCs in this realm. Soon, I hope to find out first hand. Stay tuned.

Facebooklinkedin
Facebooklinkedin

AdwCleaner Roots Out PUAs

For months now, I’ve been seeing traces of a low-risk “potentially unwanted app”  (PUA) on one of my Dev Channel test PCs. You can see the Windows Security log trace entry for this item above. It’s named FusionCore.C and it shows up as low-risk adware. This morning I ran Malwarebytes’ AdwCleaner (v 8.3.1) to see if it would make it go away. It did, so I can report that AdwCleaner roots out PUAs. It’s free and doesn’t install so it inflicts no system footprint, either.

Because AdwCleaner Roots Out PUAs, Use It!

Now that Microsoft Defender has shown itself to be a great first-line of security defense for Windows PCs, I don’t recommend third-party AV or other real-time protection tools anymore. That said, cleanup tools like AdwCleaner can be helpful. That goes double, because while Defender flags FusionCore.C and other adware instances, it doesn’t offer its own clean-up capability (or even remediation advice).

When you run the AdwCleaner executable (adwcleaner_8.3.1.exe), it finds the two offending PUA elements right away. These consist of a .tmp file and and .exe file. Both have FusionCore.C in their file names. If you check those items under the PUP (Potentially Unwanted Program) heading, you can flag them for quarantine and removal. The following screencap shows the two items checked for potential quarantine.

AdwCleaner Roots Out PUAs.checked

All you need to do to flag items is to check the box to the left for each one you’d like to quarantine or remove.

Then, simply click Next to get to the quarantine Window. On this PC a bunch of pre-installed Lenovo items also appear (I don’t care about those: I actually USE most of them). I check none of those items, which are hidden behind the fore-window that says “Cancel” and “Continue.” I choose “Continue” and the items get quarantined. I run another Defender scan and sure enough, the PUAs no longer get reported. A visual inspection of the source folder (shown in the lead-in graphic) shows the items are no longer present there as well. Good-oh!

AdwCleaner Roots Out PUAs.quarantine

Click “Continue” and the checked PUA items go into quarantine, and off Defender’s scan radar. Done!

Facebooklinkedin
Facebooklinkedin

Windows 11 Watermark Warns Against Unsupported Hardware

OK, then. With the advent of Build 22557 (Dev Channel), MS is  testing a new watermark. It shows up on some PCs running Windows 11 that don’t meet hardware requirements. This Windows 11 watermark warns against unsupported hardware. It’s shown in the lead-in graphic above. The image source (shown at 200%  native resolution) comes from a story at WindowsLatest.

What If Windows 11 Watermark Warns Against Unsupported Hardware?

Rumors have been flying for weeks that MS planned an on-screen “nag” for non-compliant PCs. MS has been straight-up all along. Install and run Windows 11 on unsupported hardware, and you may be ineligible for future updates. MS won’t support PCs running Windows 11 on unsupported hardware, either.

Even so, lots of people are doing it anyway. Consider the number of threads and posts on this topic at ElevenForums.com. For example, there’s the “Let’s install Windows 11 on a incompatible hardware” thread. It’s up to 35 pages/697 posts as I write this ditty.

Clearly, certain intrepid do-it-yourselfers don’t care about Microsoft’s warnings. Personally, I think it’s a bad bet. The reason I had to turn to WindowsLatest for a screencap of the watermark is because I’m not running Windows 11 on incompatible hardware here at Chez Tittel .

The old saying goes: “You pays your money and you takes your chances.” But this is one chance I won’t take. I have other things that need doing…

Facebooklinkedin
Facebooklinkedin

Fixing MIA Advanced Startup Takes Time

Last Thursday (2/17), I wrote about how “Advanced Startup” had gone missing on all my upgraded Windows 11 PCs (5 of them). Though the repair was simple and straightforward, fixing MIA Advanced Startup takes time — lots of it, in fact. Though I was able to grab the latest production ISO with ease, I had to use UUP Dump to build ISOs for the Dev and Beta channel versions of Windows 11. All by itself, that took about an hour (or a bit more). Then came a series of repeated in-place repair upgrades to set things right.

Fixing MIA Advanced Startup Takes Time (and Plenty of It)

My maneuvers could have gone better, too. I had no trouble grabbing the latest files for the Dev Channel ISO. But I misidentified my target for Beta Channel, and ended up having to go through the ISO construction process twice for that Windows 11 version. Sigh.

And while the in-place upgrade repair install itself seldom takes more than 15-20 minutes to complete on any given PC, getting to that point takes longer than that. My average “build time” for the ISO ran about 30 minutes (so doing one over put a big ding in my afternoon).

All’s Well, and Ends Well Nonetheless…

Right now the final repair install is running on my Beta Channel X380 Yoga. I’ve gotten all three of the other machines installed and cleaned up now. I’ll do likewise for my straggler as soon as the install completes, and I get past the OOB (out of box) experience.

It’s interesting that this repair leaves a Windows.old behind, just like any other typical Windows install. I find myself turning to TheBookIsClosed’s excellent “Managed Disk Cleanup” to help sweep away the leftovers after the party’s over. Next, I’ll run Macrium Reflect on each of these PCs to catch a pristine image for possible future restoration. I pray I don’t need it, but better to have it and not need it, than need it and not have it!

Houston, We Still Have a Problem…

Turns out that the repair install on the Beta version did NOT fix the MIA Advanced Startup. For some reason, this X380 Yoga still does not show the Advanced Startup option along with “Reset the PC” and “Go back.” I’m filing this one with Feedback Hub, and glad to report further that the Shift+Restart key works, as does the shutdown command, to bring up the WinRE environment after a reboot.

The mystery continues…much to my ongoing interest and delight. It’s rare that an in-place repair upgrade fails to fix this kind of thing, but here’s a case in point for me to noodle at further. Love it!

Facebooklinkedin
Facebooklinkedin

BackgroundTaskHost Feedback Hub Response Received

Woo hoo! I saw a notification from Feedback Hub when I logged into my X1 Carbon this morning. Indeed: “BackgroundTaskHost Feedback Hub Response Received” hardly does justice to my sense of vindication and delight. AFAIK, this is the first time one of my FB Hub posts has engendered a reply. And if you look at the text in the lead-in graphic you’ll see they plan to fix it “in a future build.” (Note: you may have to open the graphic by double-clicking to read the text because of how WordPress handles such images.)

Party Time: BackgroundTaskHost Feedback Hub Response Received

I’ve reported a sizable number of FB Hub items, but this is the first time I’ve seen such a response. It’s nice to know the mechanism is doing its job. MS developers and engineers need input on what’s working and what’s not, for sure. But it’s even nicer to get a response back, and to understand that doing one’s bit can actuallly result in changes. Hopefully, improvements even.

All I can say is: I’m jazzed. This is a great way to get my Friday off to a good start. Considering what I need to accomplish today, this may be just the lift-off I need to help me along the way. Not to mention a forthcoming second cup of coffee, too!

Added to a Collection, It Was…

The feedback item I submitted has been added to a collection of similar items. It’s entitled “Getting an Application Error dialog pop up in recent Dev Channel builds due to backgroundtaskhost.exe.” Funny thing in my case is that I never saw the pop-up: all I saw was copious errors in Reliability Monitor, as described in this January 24 post. But hey: I’ll take my responses and their notoriety where I can get ’em. Cheers!

Facebooklinkedin
Facebooklinkedin

Solving Advanced Startup Windows 11 Mystery

Here’s one to ponder. On all of the PCs I upgraded from Windows 10 to Windows 11, a Settings option is missing. I’m talking about Start → Settings → System → Recovery  →Advanced Startup. As you can see in the lead-in graphic above, it does not show up under Recovery options. That’s what has me solving Advanced Startup Windows 11 mystery. All this said, here’s what shows up on my only “native Windows 11” PC — the Lenovo Yoga 7i — which I received last October with Windows 11 pre-installed.

Look! On the Yoga7i the option appears (it’s missing in the lead-in graphic above). Go figure…

Solving Advanced Startup Windows 11 Mystery Means…?

As I started poking around, looking for fixes, I quickly realized this missing menu item is on nobody’s radar. When I asked Shawn Brink (the chief moderator and tutorial magnate at ElevenForum.com) he advised an in-place upgrade repair install to see if it would fix the problem. Other than that, I found no insight or wisdom online to lead toward a cure.

However, I did discover a bunch of workarounds, all of which still work:

  • Anyplace you can get to the Restart option in Windows 11 (the various Power menus available from Start, the lock screen and so forth), if you hold down the Shift key while clicking or touching Restart, it will call up the Windows Recovery boot screen
  • You can run a special version of the shutdown command in PowerShell, at the command line, or in Windows Terminal:
    shutdown /r /o /f /t 00

This has the same net effect as using Advanced Startup in the Settings/System/Recovery menu anyway. So even if the in-place update repair fails, I can still get where I need to be on the systems where the menu option is MIA. That repair is 90% complete right now on my X1 Carbon, so I’ll be able to report on results fairly soon.

And the verdict is…SUCCESS!

Needless to say, I awaited the results of the restart and further updates with more than usual interest. It took about 10 minutes to complete the GUI-based portion of the repair, and another 5 minutes to get back to the desktop, and another 3 minutes for the out-of-box (OOB) experience to complete. And when I did, my first move was to visit Settings → System → Recovery.

Bingo! There’s the missing menu item, complete with the “Restart now” button. Thanks a bunch, Brink. I’ve long known that the in-place repair install fixes many Windows ills. Now I know for sure that it fixes another Windows 11-specific malady. The mystery of the missing Advanced Startup menu item is now also solved.


Facebooklinkedin
Facebooklinkedin

Build 22543 Brings New Battery Info

I updated my Dev Channel PCs to the latest build recently. And, as reported at WindowsLatest, the Settings app gets a few interesting new wrinkles. Chief among these changes, Build 22543 brings new Battery info into System → Power & battery → Battery. You can see for yourself what it looks like in the lead-in graphic.

The most obvious feature is a time series chart of battery levels. Mine’s a boring 100% across the board, because this test PC stays plugged in via a Thunderbolt/USB-C dock that delivers 85W of charging power. BTW, the dock also delivers multiple USB-C and USB 3.2 ports, GbE, dual HDMI, and an audio jack port as well.

If Build 22543 Brings New Battery Info, Check It Out!

While Battery & Power (shown above) is the most obvious change to settings, I see minor tweaks throughout. Fonts and layout show minor changes (check out the Display info on PCs with multiple displays). The contrasts with earlier Windows 11 versions are minor, but compared to Windows 10 you can readily see Settings is slowly but surely getting a major makeover.

FWIW, I like what I see. Overall, Windows 11 Settings screens seem cleaner, more streamlined and modern than their Win10 counterparts. Looks also like “Add device” capabilities in Settings (Settings Bluetooth & devices Add device) are ramping up. It’s not hard to see the old-fashioned “Devices and Printers” facility fading away in its wake.

The Increasing Pace of (Settings) Change

We’ve known for years that MS is working its way into Settings and away from the old-fashioned Control Panel. It will still be a while before that changeover is complete, but its evidence is everywhere. I hope I can learn where things are, and how they work well enough to remain productive before the old gives way completely to the new.

Whatever happens along the way there’s no doubt it will be an adventure. Stay tuned, and I’ll do my best to provide some hopefully useful info and guidance.

Facebooklinkedin
Facebooklinkedin

Author, Editor, Expert Witness