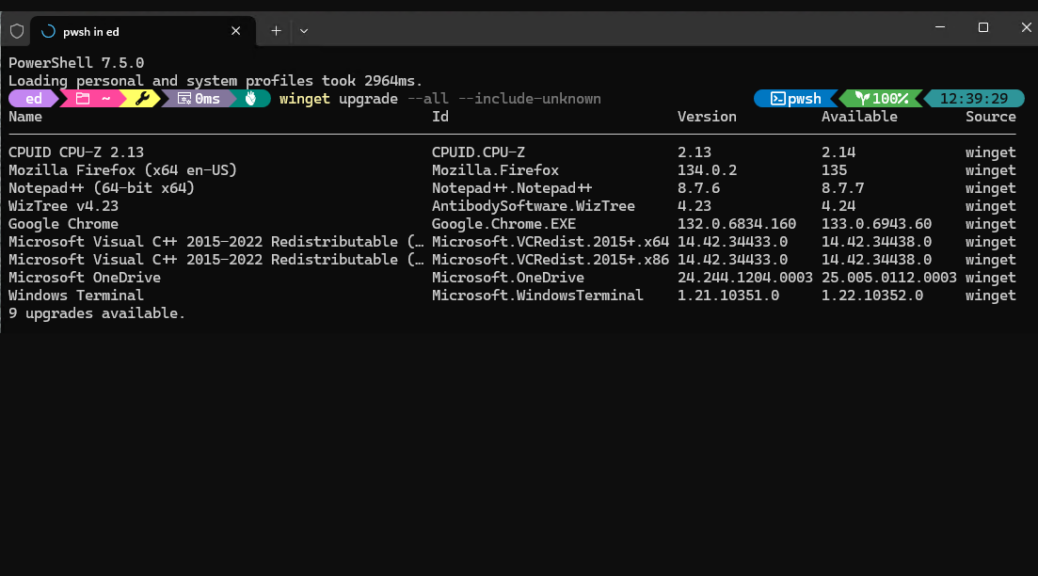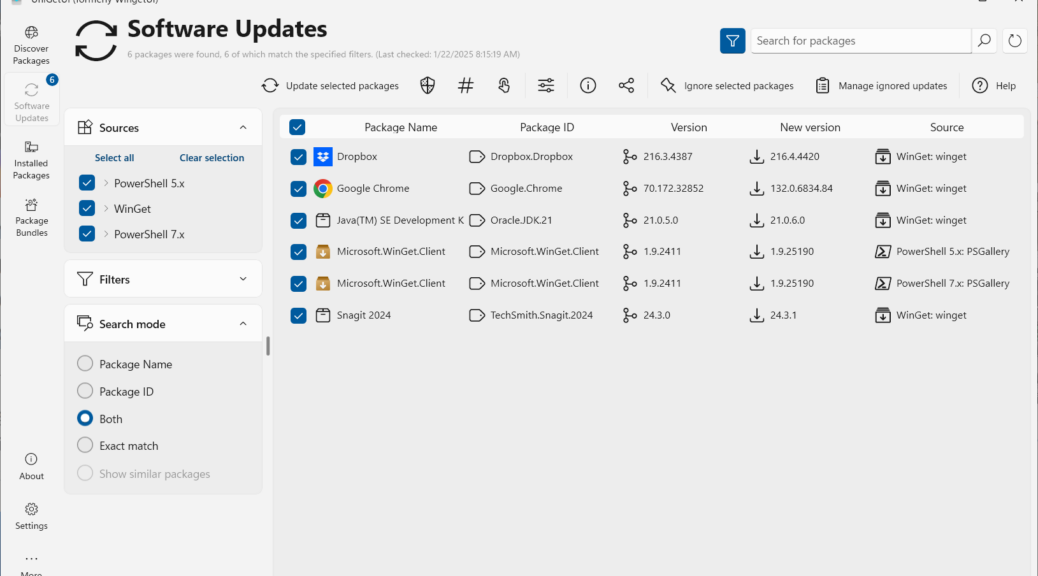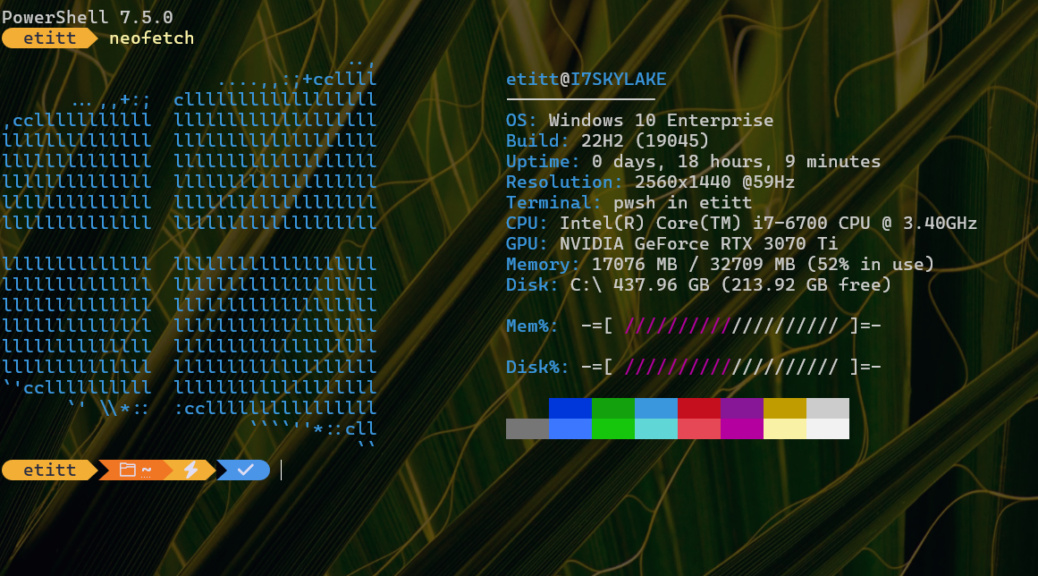
I knew there had to be a way. I just couldn’t find it or figure it out on my own. The venerable old OS info command line tool Neofetch (best known to UNIX and Linux users) works at the Windows command line, too. But I struggled with Chocolatey and Scoop to get it installed without liking the results. This morning Eleven Forum user Lance1 posted a terrific WinGet-based install/update tool from Chris Titus with an understated title “You may find this handy.” Indeed I did — and I also successfully tried bringing Neofetch aboard via WinGet on my production PC. You can see it running in the lead-in screengrab.
What’s Behind Bringing Neofetch Aboard via WinGet?
Running the command from Lance1’s post — namely
iwr -useb https://christitus.com/win | iex
absolutely did the trick for me.
Here’s how Copilot breaks this command string down (all six numbered items are quoted verbatim therefrom):
- iwr: This is an alias for the Invoke-WebRequest cmdlet. It sends an HTTP request to a web server and retrieves the response.
- -useb: This parameter tells Invoke-WebRequest to automatically unblock the downloaded file, which is useful when downloading scripts from the internet.
- https://christitus.com/win: This is the URL of the file you’re downloading. In this case, it’s a script hosted on Chris Titus’s website.
- |: This is the pipeline operator, which passes the output of one cmdlet to another cmdlet.
- iex: This is an alias for the Invoke-Expression cmdlet. It runs a script or command that is passed to it as input.
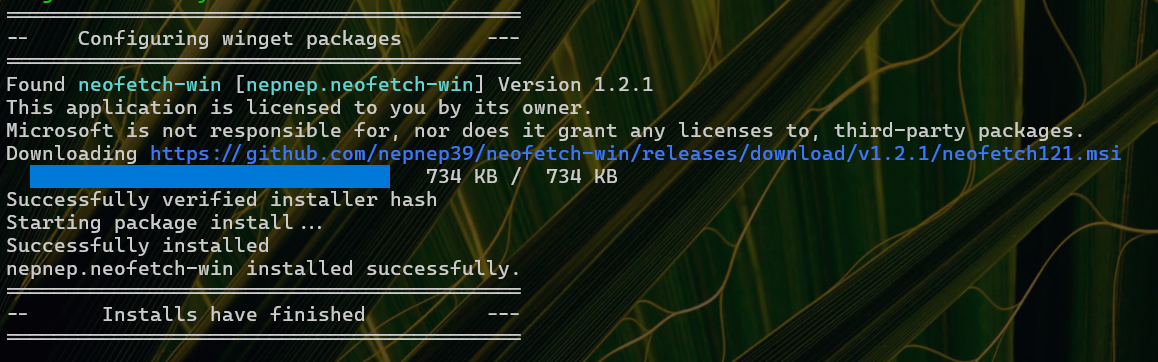
In summary, says Copilot: “this command downloads a script from https://Christitus.com/win and then executes it immediately on your system.” It’s what pops up the partial console that includes a checkbox for Neofetch, like so:
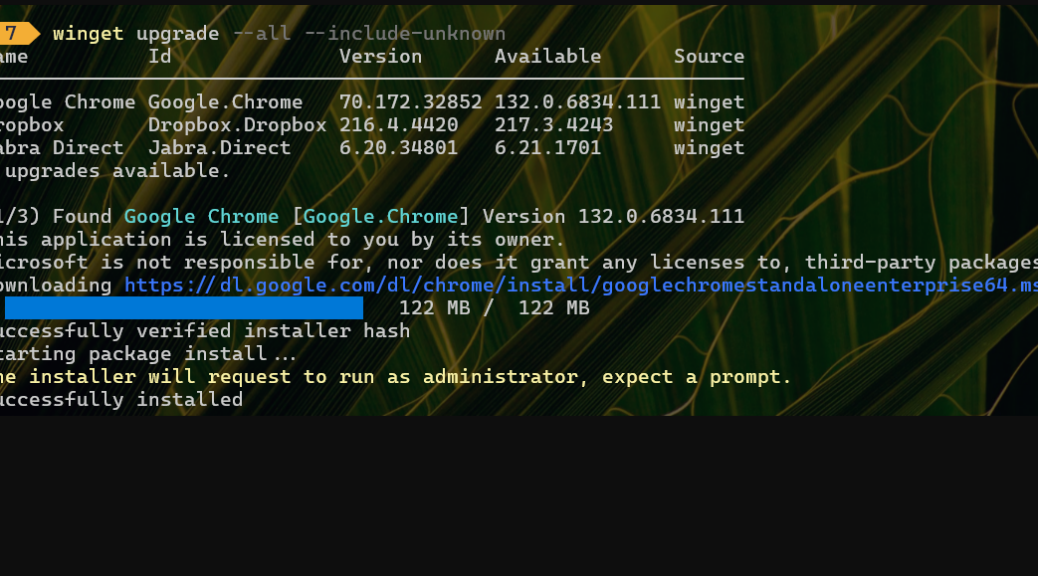
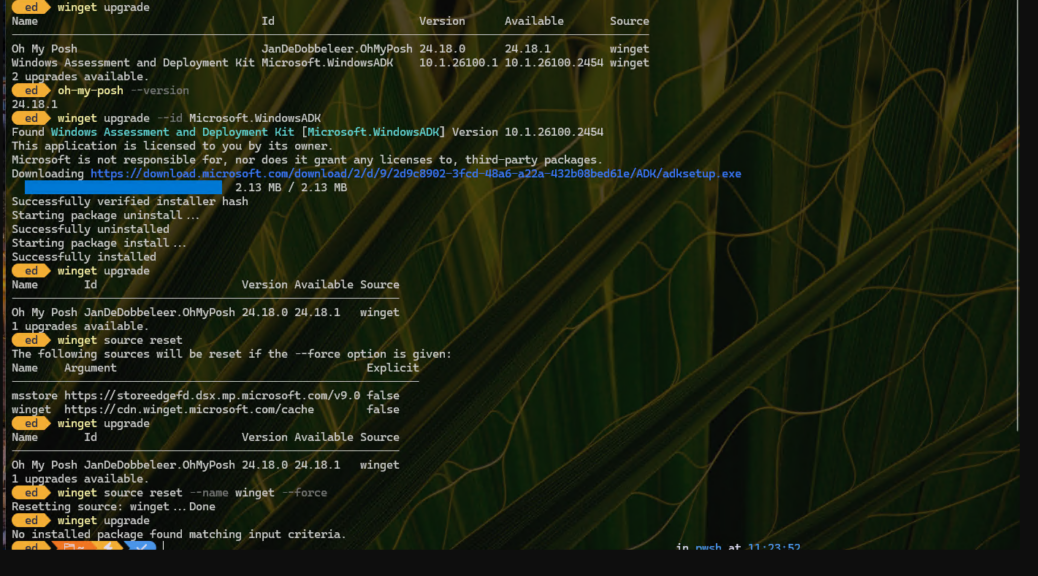
 And when I clicked on Install/upgrade selected in the console pop-up window, it showed the following output as it used WinGet to handle the Neofetch install:
 I’m jazzed. I need to spend more time with this Chis Titus tool and see what ELSE it can do. Lance1 was certainly right in his low-key estimation of its utility. I’ve already found it handy, so to speak. Cheers!