Now that I have a Snapdragon X2 PC with a “REAL” version of Windows 11 26H1 installed, I no longer needed the “experimental” version on the Lenovo ThinkPad P16 Gen 3 Mobile Workstation. SO I decided to clean install Windows 11 Pro for Workstations 25H2 on that machine instead. Wow! Did I ever choose a wicked path to follow. It turned out to be a long, long trip from 26H1 to 25H2 on P16G3 (machine name for the afore-named ThinkPad). Buckle up!
Why Such a Long Trip From 26H1 To 25H2 On P16G3?
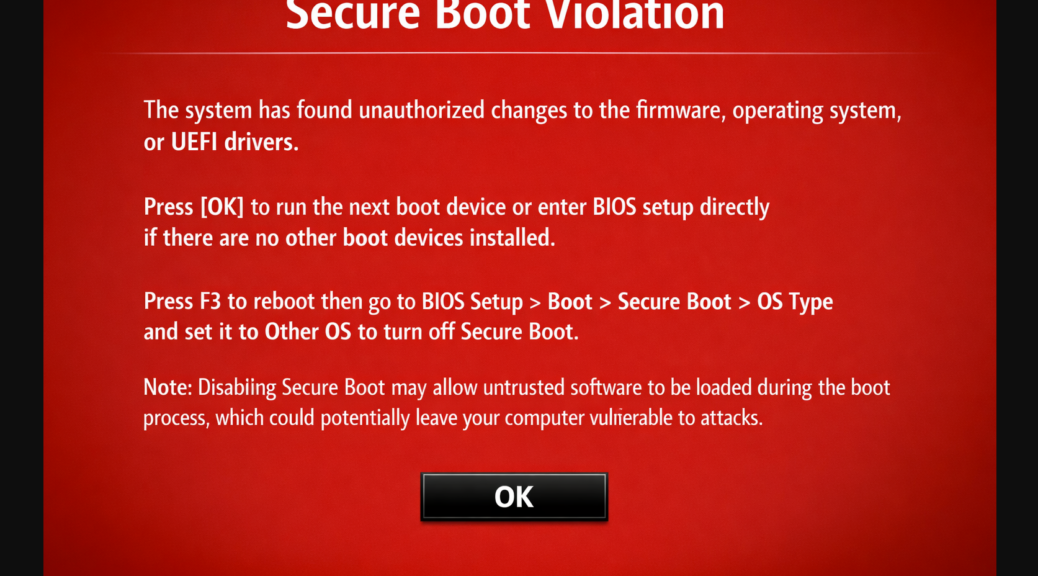
TLDR answer: Secure Boot foul-ups. After the install, I ran garlin’s Check_UEFI-CA2023.ps1 script on my ThinkPad P16 Gen 3, fully expecting the usual audit output I see on other Windows 11 machines. Instead, I got something that stopped me cold — a warning that certain Secure Boot certificate operations were blocked. The focus keyword here is Secure Boot Deployed Mode ThinkPad P16 Gen 3, and if you’ve landed on this post, you’re probably staring at the same bewildering output I was.
Here’s the short version: the machine was stuck in UEFI Deployed Mode — the strictest Secure Boot state in the UEFI specification. Windows reported Secure Boot as “On,” everything looked fine in Windows Security, and yet the Secure Boot certificate update operations the script needed to perform were completely blocked. No error. Just a quiet wall.
As it turns out, Lenovo began shipping 2024-and-newer ThinkPads — including the P16 Gen 3 — in Deployed Mode by default. That’s a deliberate policy change, not a quirk or a misconfig. And once I understood what it meant, the fix turned out to be a two-minute BIOS menu operation. Let me walk you through it.
What Is UEFI Deployed Mode, Exactly?
The UEFI specification defines four platform security modes, and it helps to know all of them before you go poking around in the BIOS.
| Mode |
Platform Key (PK) |
DeployedMode Flag |
Can Modify Secure Boot Variables? |
| Setup Mode |
Not installed |
Off |
Yes — fully open |
| User Mode |
Installed |
Off |
With proper authentication |
| Audit Mode |
Not installed |
Off |
Yes — for testing only |
| Deployed Mode |
Installed |
On |
No — physical BIOS access required |
Deployed Mode is the strictest of the four. The vendor’s Platform Key (PK) is installed, and a separate DeployedMode flag is set to active — which means no software running inside Windows, no matter how privileged, can touch the Secure Boot variables: PK, KEK, db, or dbx. The firmware physically refuses those writes. Therefore, any tool that tries to update Secure Boot certificates from within the OS is going to hit a hard stop.
Here’s the generational split that matters: ThinkPads from 2023 and earlier shipped in User Mode, where the PK is installed but the DeployedMode flag is off, leaving the certificate database accessible via authenticated software. The P16 Gen 3 — along with other 2024-and-newer Lenovo models — ships in Deployed Mode by design. That’s a meaningful architectural difference, and it’s why older tutorials and community scripts don’t account for it. [Source: Lenovo CDRT Docs — Guide to Secure Boot Modes]
Garlin’s Scripts Hit A Wall
Let me be clear: garlin’s PowerShell scripts are excellent community work. The Check_UEFI-CA2023.ps1 and Update_UEFI-CA2023.ps1 scripts are the most thorough tools available for migrating from the expiring 2011 UEFI CA to the 2023 UEFI CA. That’s a transition Microsoft is pushing hard as it tightens Secure Boot enforcement. However, they presuppose a machine in User Mode, where certificate variable writes are at least possible with the right credentials.
On a machine in Deployed Mode, that presupposition falls flat. The firmware’s DeployedMode flag instructs the UEFI runtime to reject all Secure Boot variable modifications originating from the OS environment — full stop. Garlin himself acknowledges as much: you can’t make certain changes while the vendor’s PK is in place and the DeployedMode flag is active. The scripts detect this condition and report it, which is exactly what I saw.
There’s a second layer to this on my specific machine. The P16 Gen 3 runs Windows 11 Pro for Workstations — a meaningfully different edition from Home, Pro, or Enterprise. Pro for Workstations ships with Virtualization-Based Security (VBS) and HVCI enabled by default and uses an edition-specific SkuSiPolicy.p7b file. In addition, it’s designed for domain and enterprise management workflows. The scripts were built around the more common consumer and business editions; Pro for Workstations introduces just enough architectural divergence that some operations require extra care. As a result, even if Deployed Mode weren’t in the picture, this wouldn’t be a straight plug-and-play situation.
The Fix: Exiting Deployed Mode via BIOS
Here’s what I did. The good news is that Lenovo provides a clean, supported path to exit Deployed Mode directly from the BIOS Setup interface — without clearing Secure Boot keys, without entering Setup Mode, and without reinstalling anything. The machine transitions from Deployed Mode to User Mode: the PK stays installed, Secure Boot stays on, and the OS-level certificate update path opens back up.
⚠ Warning — Read Before You Touch Anything
Do NOT select “Reset to Setup Mode” or “Clear All Secure Boot Keys” in the BIOS menu. Either action removes the Platform Key entirely, disables Secure Boot, and requires full manual key reinstallation to recover — a process that is very much not two minutes. If you’re unsure at any step, “Restore Factory Keys” is a safe fallback that gets you back to Lenovo’s shipped state.
Step-by-Step: Exit Deployed Mode on the ThinkPad P16 Gen 3
- Enter BIOS Setup. Restart the machine. Press F1 (or Fn+F1 if function-key lock is on) repeatedly at the Lenovo logo during POST. The ThinkPad UEFI BIOS Setup menu opens.
- Navigate to Security → Secure Boot . Use the arrow keys. You’re looking specifically for the sub-entries one level down.
- Select “Exit Deployed Mode.” This is the one you want. Confirm the action when prompted. This clears the DeployedMode flag only — the Platform Key remains installed and Secure Boot stays active. The machine moves from Deployed Mode to User Mode.
- Save and exit. Press F10 and confirm the save. The system reboots.
- Verify in Windows. Open
msinfo32 (Win+R → msinfo32 → Enter). Under System Summary, confirm: Secure Boot State = On and Platform Mode = User Mode. Both should now read correctly.
- Re-run garlin’s Check script. Open an elevated PowerShell prompt and run
Check_UEFI-CA2023.ps1 again. The Deployed Mode warning should be gone, and the script should now report actionable certificate update steps as intended.
💡 Tip
If “Exit Deployed Mode” doesn’t appear in your Key Management menu, confirm you’re running a current BIOS version. Lenovo has updated the P16 Gen 3 firmware several times since launch — older BIOS revisions may expose the option differently or label it under a slightly different path. [Source: Lenovo Support HT515493]
Bottom Line
The ThinkPad P16 Gen 3’s Deployed Mode is a feature, not a bug — Lenovo added it to give enterprise customers the highest available firmware integrity assurance right out of the box. Garlin’s scripts are genuinely excellent community tools for the Secure Boot CA 2023 migration, but they presuppose User Mode and a standard Windows edition. Alas, on the P16 Gen 3 running Pro for Workstations, those assumptions don’t hold without first making one BIOS menu change. That said, once you exit Deployed Mode and land back in User Mode, the standard Windows Secure Boot update path works exactly as intended — and the whole detour costs you about two minutes and one reboot.
One more thing: Garlin will tell you to edit the registry and run a scheduled Secure-Boot-Update task. Works on most Windows editions, but not on Pro for Workstations. Follow his advice, unless you’re running that version. I wasted hours until I figured out it just wouldn’t work. Sigh.