Category Archives: PowerShell

Updating Outdated Win11 Boot Media

There’s a scenario that may feel familiar to plenty of Windows power users and IT admins. You’ve got a USB flash drive, aka UFD, sitting on your desk. You carefully imaged it months ago using MCT, or a backup too, or Rufus, or whatever. It booted perfectly, it installed or ran cleanly, and life was good. Fast forward to today: alas, that once-trusty UFD is probably out of date. In fact, if you try to boot using that UFD, you may get a “Secure Boot Violation” error message from UEFI and nothing more. That’s why updating outdated Win11 boot media is a real maintenance item, especially after Patch Tuesday rolls through and reshuffles key files inside the Windows boot chain.

Why bother? Because Patch Tuesday updates don’t just patch the running OS on your machines. They also advance critical files that get embedded in installation media — things like Secure Boot policy manifests, component catalogs, and EFI boot binaries. Hence, a UFD built on a pre-patch image may carry stale versions of those files. Indeed, subtle boot-time validation mismatches are possible. Worse, your installation media might silently enforce an older policy against a fully updated target system.

In this post, I’ll walk through exactly what changes, which files on your UFD need attention, and explain how to make things current, step by step. Spoiler alert: I also advise against such repairs unless they’re absolutely necessary. It’s much easier to generate fresh boot media than to repair outdated UFDs.

Why Updating Outdated Win11 Boot Media Matters

One might think of Patch Tuesday as a monthly ritual that involves rebooting workstations and crossing your fingers that nothing breaks. Fair enough. However, other side effects come from updates. That is, they reach inside the Windows installation ecosystem and bump version numbers on files that govern how setup media validates and boots a system.

The most relevant example for this post, and the primary driver for updating outdated Win11 boot media right now, is SkuSiPolicy.p7b. The most recent Patch Tuesday advanced this file from version 3.0.0.16 to version 3.0.0.17. That’s a tiny increment, but carries real significance.

So, what exactly does SkuSiPolicy.p7b do? In short, it’s a Secure Boot SKU policy file. It governs which Windows editions (SKUs =Home, Pro, Enterprise, Education, and so on) that Secure Boot views as trusted and bootable.

When the running OS expects version 3.0.0.17 and your UFD’s boot chain presents version 3.0.0.16, you get validation mismatches. Those mismatches may not always produce a hard error, but they represent a policy drift you don’t want living in your production boot media. Worst case: no boot with the dread “Secure Boot Violation” error message showing (see my August 4 post for an illustration).

Bottom line: whenever SkuSiPolicy.p7b advances, it’s time to audit your UFDs. You may also end up having to update or replace/regenerate them.

Possible UFD Deltas After Patch Tuesday

Here’s the thing: SkuSiPolicy.p7b doesn’t live in just one place on your UFD. It lives in multiple places. Some are obvious, others live inside image files. Plus, other boot-chain components may also need refreshing. The following table lays out that landscape, where the numbered list that follows briefly explains each item.

UFD Component Location on UFD Affected by SkuSiPolicy Bump? Action Required
SkuSiPolicy.p7b \sources\ Yes — primary location Replace with updated version
boot.wim \sources\ Yes — embedded in index:2 Mount, update, unmount/commit
install.wim / install.esd \sources\ Yes — per-edition indexes Mount each index, update, commit
efisys.bin / efisys_noprompt.bin \boot\ Occasionally Replace if ISO version is newer
bootmgr.efi / bootx64.efi \efi\boot\ or \boot\ Occasionally Replace if ISO version is newer
cdboot.efi \boot\ Rarely Check version; replace if needed
winpe.wim / WinRE.wim Varies (recovery partition) Yes — if recovery env. included Mount, update, commit

Working through the List

Now let’s go through each item in the same order as the table:

  1. p7b (\sources\SkuSiPolicy.p7b on the UFD): This is the standalone Secure Boot SKU policy file that Windows Setup reads directly during the installation process. As noted, this file advanced from version 3.0.0.16 to 3.0.0.17 on the most recent Patch Tuesday. This is the clearest, most unambiguous indicator that your boot media needs updating or replacing. You must replace it with the current version, which you can extract from a freshly downloaded Windows 11 ISO or from a mounted updated WinPE image.
  2. wim (\sources\boot.wim): This is the WinPE and Windows Setup environment image. It contains two indexes: index:1 is the minimal WinPE environment (the initial RAM disk boot stage), and index:2 is the full Windows Setup environment. Both indexes embed their own copy of SkuSiPolicy.p7b inside \Windows\System32\. Index:2, in particular, participates in Secure Boot policy enforcement during setup and therefore should be updated. Index:1 is discussed separately later in this post.
  3. wim / install.esd (\sources\install.wim or \sources\install.esd): This is the main OS image that actually gets deployed to the target drive. Each edition index (Home, Pro, Enterprise, etc.) embeds its own copy of SkuSiPolicy.p7b inside \Windows\System32\ within the image. Therefore, each applicable index needs to be individually mounted and updated. Note that install.esd files are compressed and cannot be mounted directly — they must first be converted to install.wim format using DISM’s /Export-Image with /Compress:none before mounting.
  4. bin / efisys_noprompt.bin (\boot\ folder): These are EFI boot sector binary files. They are not directly version-stamped by SkuSiPolicy.p7b changes; however, when a cumulative update also updates the broader boot chain, newer versions of these files may ship in the refreshed ISO. Consequently, it’s worth doing a file-date comparison between your UFD’s copies and those in the freshly downloaded ISO.
  5. efi / bootx64.efi (\efi\boot\ or \boot\ folder): The EFI boot manager binaries. The same considerations apply as for efisys.bin: they don’t change with every Patch Tuesday, but when they do advance, you’ll want the fresh copies on your UFD. Always compare versions against a current ISO before deciding whether to replace.
  6. efi: This EFI binary handles optical-media boot paths. If your UFD was created from an ISO (as most are), this file is present. It is, however, less commonly updated than the other EFI binaries. Worth checking, but don’t lose sleep over it.
  7. wim / WinRE.wim — If your UFD includes a Windows Recovery Environment, that image also embeds SkuSiPolicy.p7b. The update workflow is identical to the boot.wim process: mount the image, overwrite the policy file inside \Windows\System32\, commit, and unmount.
Note

Not all of these components will change with every Patch Tuesday. The SkuSiPolicy.p7b version bump is your clearest indicator that a media refresh is warranted. On August 11, for example, the version jumped from 3.0.0.16 to 3.0.0.17. OTOH, EFI binaries may remain unchanged over several update cycles.

How to Update Each Affected UFD Item

Alright — here’s where we roll up our sleeves. The process is methodical, but it’s not complicated. Follow these steps in order, and you’ll have a fully refreshed UFD by the time you’re done.

Step 1: Gather Your Prerequisites

Before you touch any files, have the following at your disposal:

  • DISM — Built into Windows 10 and Windows 11. No additional download required. Run all commands from an elevated command prompt (right-click > Run as administrator). You MUST run powershell.exe (version 5.1) not PowerShell 7 (the app, or from inside Windows Terminal). Why? Because the DISM wim mount commands don’t work inside the newer PS version.
  • A fresh Windows 11 ISO — Download the current release directly from Microsoft’s Media Creation Tool at com/software-download/windows11, or from MSDN/VLSC if you have a volume license subscription. Do not use an ISO that’s more than a few weeks old — the whole point is to work from a current image.
  • Sufficient disk space — Mounting WIM images requires working space. Budget at least 15–20 GB on your working drive (typically C:\) for mount directories, working copies, and temp files.
  • A writable UFD — Sounds obvious, but double-check that your UFD’s write-protect switch (if it has one) is off. I’ve also learned the hard way that some UFDs work when building Secure Boot compliant media, and others don’t. If you get stuck, try switching to a faster, newer name brand device (I’ve had good luck with never Kington Data Travelers recently, for example).
  • Ownership and permissions — Some protected files on the UFD or within mounted images may require you to take ownership before overwriting them. We’ll cover that in detail in tomorrow’s post. It’s kind of a doozy!

Step 2: Extract the Updated SkuSiPolicy.p7b from the Fresh ISO

Mount the fresh ISO in Windows Explorer (double-click the ISO file — Windows will mount it as a virtual drive, typically D:\). Then, navigate to D:\sources\ and copy SkuSiPolicy.p7b to a working folder on your local drive. For example:

mkdir C:\work copy D:\sources\SkuSiPolicy.p7b C:\work\SkuSiPolicy.p7b

This extracted file is your authoritative source for all subsequent update steps. Keep it handy — you’ll be copying it into several locations.

Step 3: Update the Standalone SkuSiPolicy.p7b on the UFD

This is the simplest step. Simply overwrite the existing file in \sources\ on your UFD. Assuming your UFD is drive E:\:

copy /Y C:\work\SkuSiPolicy.p7b E:\sources\SkuSiPolicy.p7b

The /Y flag suppresses the overwrite confirmation prompt. Done. One location down, several to go.

Step 4: Update boot.wim (Index:2 — Windows Setup)

This requires DISM to mount the image, copy in the updated policy file, and then commit the changes on unmount. First, create your mount directory:

mkdir C:\mount\boot

Then, mount index:2 of boot.wim from your UFD:

Dism /Mount-Image /ImageFile:”E:\sources\boot.wim” /Index:2 /MountDir:”C:\mount\boot”

Next, copy the updated SkuSiPolicy.p7b into the mounted image’s \Windows\System32\ folder:

copy /Y “C:\work\SkuSiPolicy.p7b” “C:\mount\boot\Windows\System32\SkuSiPolicy.p7b”

Finally, commit and unmount:

Dism /Unmount-Image /MountDir:”C:\mount\boot” /Commit

Warning

Never terminate a DISM mount session midway. If your session is interrupted (e.g. power loss, unexpected reboot) use Dism /Cleanup-Mountpoints to recover before attempting to remount. Partially committed mounts can corrupt your WIM.

Step 5: Update install.wim (Each Edition Index)

The install.wim (or install.esd) update is the most time-consuming step, because you need to process each edition index individually. Start by listing the available indexes:

Dism /Get-ImageInfo /ImageFile:”E:\sources\install.wim”

This will show you something like Index 1 = Home, Index 2 = Home N, Index 3 = Pro, Index 4 = Pro N, and so on — depending on which edition set your ISO contains. For each index you wish to update, repeat the mount-copy-commit workflow:

mkdir C:\mount\install  REM — Example for Index 3 (Pro): Dism /Mount-Image /ImageFile:”E:\sources\install.wim” /Index:3 /MountDir:”C:\mount\install” copy /Y “C:\work\SkuSiPolicy.p7b” “C:\mount\install\Windows\System32\SkuSiPolicy.p7b” Dism /Unmount-Image /MountDir:”C:\mount\install” /Commit

Repeat for each index. It’s tedious, admittedly — but it’s the thorough approach.

A note on install.esd: If your UFD uses install.esd rather than install.wim, you cannot mount it directly. Therefore, you must first export it to an uncompressed WIM:

Dism /Export-Image /SourceImageFile:”E:\sources\install.esd” /SourceIndex:1 /DestinationImageFile:”C:\work\install.wim” /Compress:none

Repeat the export for each index you need to update, then mount, update, and commit the resulting install.wim. When finished, copy the updated WIM back to your UFD (replacing the original ESD, or alongside it as a WIM if your media configuration supports that).

Step 6: Replace EFI Binaries (If Newer Versions Exist in the ISO)

Compare the file dates on the following pairs — ISO source vs. UFD destination — and replace only if the ISO version is newer:

  • D:\boot\efisys.bin → E:\boot\efisys.bin
  • D:\boot\efisys_noprompt.bin → E:\boot\efisys_noprompt.bin
  • D:\efi\boot\bootx64.efi → E:\efi\boot\bootx64.efi
  • D:\boot\bootmgr.efi → E:\boot\bootmgr.efi

If the ISO’s copies are dated more recently, copy them over. If they match, leave your UFD copies alone — there’s no point in replacing identical files.

Garlin’s check_bootmedia Reports a Non-Problem

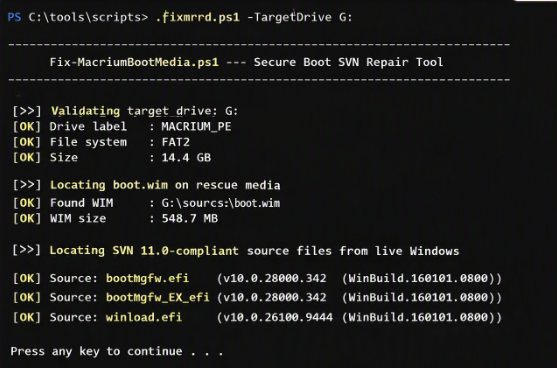
Here’s the thing: if you run the check_bootmedia script — a tool from Garlin’s GitHub repo that inspects boot media for version consistency across boot-related files — you may encounter a flag that looks alarming at first glance in your freshly-updated UFD. Specifically, the script reports that boot.wim’s index:1 (the base WinPE environment) contains an older version of SkuSiPolicy.p7b than at index:2 (the Windows Setup environment) after you’ve completed Step 4 above. You can see its output for my updated UFD (Drive I:) in the lead-in graphic for this blog post.

Take a breath. This does not actually represent a real problem. Indeed, this UFD booted right into the Windows 11 installer (as it should). Here’s why the info may look scary, but isn’t:

  • What index:1 actually does: Index:1 in wim is the minimal WinPE environment — the initial RAM disk stage that loads just enough of an operating environment to hand control over to the Windows Setup process. It is responsible for loading drivers, initializing hardware, and presenting the early pre-Setup UI. It does not participate in Secure Boot SKU policy enforcement during a normal Windows installation.
  • Where SKU policy enforcement actually happens: The actual Secure Boot SKU policy enforcement — the part that p7b governs — occurs at the OS loader level. That means it relies on index:2 of boot.wim and the standalone \sources\SkuSiPolicy.p7b on your UFD. Both of those, as a result of Steps 2–4 above, are now current.
  • Why check_bootmedia flags it anyway: The script is thorough — admirably so. It compares p7b versions across all image indexes and the standalone sources copy, and reports any mismatch it finds. For completeness and consistency-checking purposes, that’s the right behavior. However, in practice, having an older SkuSiPolicy.p7b sitting inside index:1 of boot.wim creates no functional issue whatsoever during a Windows installation.
  • Can you update index:1 anyway? Yes, absolutely — and if strict consistency is important to you (perhaps for audit or compliance reasons), go ahead. Use the same DISM mount/update/commit workflow with /Index:1 instead of /Index:2. It won’t hurt anything.
Bottom Line

If check_bootmedia is the only tool reporting a version discrepancy, and the discrepancy is limited to boot.wim index:1, you can safely disregard that flag. Your media is functionally correct. The flag is informational — a cosmetic inconsistency, not a real-world boot problem. I had that situation pop up on a test UFD, and it booted into the Windows 11 Installer just fine (no Secure Boot issues presented).

Wrapping Up: Key Takeaways

Let’s bring it all home. If you’ve made it this far, you now have a solid handle on why updating outdated Win11 boot media matters, what files are involved, and fixed involved. Here’s the condensed version for your notes:

  • Patch Tuesday can advance p7b and other boot-chain files. The most recent update bumped SkuSiPolicy.p7b from version 3.0.0.16 to 3.0.0.17. That’s your cue to refresh your UFDs.
  • Multiple UFD locations are affected, not just \sources\. The policy file is embedded inside wim (index:2), inside each edition index of install.wim, and potentially inside recovery environment images as well. All those locations need fixing for a complete update.
  • The Garlin check_bootmedia flag for wim index:1 is interesting, not definitive. Index:1 doesn’t enforce Secure Boot SKU policy during Windows installation. You can update it for strict consistency, but it is absolutely not required for correct boot media behavior.
  • EFI binaries deserve a version check, not an automatic replacement. Compare bin, bootmgr.efi, and bootx64.efi from your UFD versus a fresh ISO; replace only if the ISO copies are newer.
  • Tomorrow’s post covers ownership and permissions for protected files. For good reason, MS goes out of its way to protect boot files and images. Thus, there are certain steps you must take before you can overwrite system-owned files inside mounted WIM images. Stay tuned: I’m writing a whole ‘nother post on this topic. Again: it’s a doozy, and taught me more about ICACLS than I ever wanted to know.
  • Keeping boot media current is a best practice for Windows IT admins and power users. Stale media isn’t just a minor annoyance — it’s a policy gap. A few DISM commands and twenty minutes of your time is all it takes to close it.

Ask Yourself: Is Repair Really Needed?

Determining repairs took me the better part of day, and then getting things fixed in Windows 11 installation media for the SkuSiPolicy version bump. I could’ve simply grabbed a fresh Media Creation Tool (MCT) from the download Windows 11 page, and built a new UFD in under an hour.

Now that I’ve been through this ordeal, I’ve learned a valuable lesson. Don’t fix a boot media UFD unless you absolutely must. If you can regenerate a fresh, new updated one, do that instead. It’s faster and much, much easier that way. Here in Windows-World, going the long way around sometimes underscores the value and importance of workable shortcuts. My advice: take this shortcut, if you can. Otherwise, you’ll spend real time going the long way!

Facebooklinkedin
Facebooklinkedin

Where’s My WIMMount?

There I was on my primary desktop Flo6, running what should have been the most unremarkable task in a Windows admin’s day: mounting a WIM image offline with DISM. The command ran. Nothing blew up dramatically. It just… sat there, and did nothing. No cryptic error code, no helpful message, and zero indication of what went sideways. Welcome to the world of WIMMount driver missing DISM failures — where the tool you depend on vanishes without so much as a farewell note. Hence the question: “Where’s my WIMMount?”

DISM mount failures are maddening precisely because they leave no obvious breadcrumbs. You stare at the console, you re-read the command three times over, and everything looks good. Spoiler: the problem isn’t syntax. It’s something deeper and darker. Let me explain…

“Nowhere” Answers “Where’s my WIMMount?”

WIMMount, aka winmount.sys, is kernel-mode filter driver. Windows uses it to mount WIM (Windows IMaging format) files as virtual volumes. It’s the plumbing behind the scenes that works with DISM to let you mount, unmount and operate on images to inspect them, analyze them, or change them. Indeed the driver does the heavy lifting with images at the file system level.

Without WIMMount, mount operations fail with errors like 0x8007007b (“filename, directory name, or volume label syntax is incorrect”) or 0x80070002 (“system cannot find the file specified”). Neither error message tells you “hey, your kernel driver is gone,” which is half the problem. The driver ships both with the Windows ADK (Assessment and Deployment Kit) and, on most builds, inside Windows itself.

Diagnosing the Problem on Flo6

My first instinct was stale mount points. I’ve been burned by those before. So I ran DISM /Cleanup-Mountpoints from an elevated prompt. No joy — it completed cleanly and changed nothing.

Next stop: component store health. Running DISM /Online /Cleanup-Image /ScanHealth returned errors suggesting corruption in the component store itself. Interesting, but not yet the smoking gun.

Then I ran the command that cracked the case open: sc query wimmount. The response was interesting: a big fat nothing. Further investigation showed the service existed nowhere.  Indeed, the WIMMount driver was entirely absent from Flo6. Not stopped. Not disabled. Gone. A quick peek at HKLM\SYSTEM\CurrentControlSet\Services\WIMMount in the registry confirmed it: the key didn’t exist. No driver, no service, no mount. Mystery illuminated, though the hard work still lay ahead.

Repair Attempts — What I Tried

First, I reinstalled the Windows ADK, hoping that would drop wimmount.sys back into place. Setup completed without complaint. But running sc query wimmount again afterward returned the null response. The binary was still missing from C:\Windows\System32\drivers\.

I got creative and tried manually registering a service entry: sc create wimmount binPath= "C:\Windows\System32\drivers\
wimmount.sys" type= kernel
. The service record was created, but starting it threw error 2 — “The system cannot find the file specified” — because the .sys binary itself was nowhere on disk. You can’t register a ghost.

I ran SFC /scannow, which found and repaired a handful of files. DISM was not one of them; wimmount.sys apparently isn’t tracked by Windows File Protection on this build. I then tried DISM /Online /Cleanup-Image /RestoreHealth — it ran to completion but didn’t restore the missing driver either. The conclusion was unavoidable: the driver binary and its registry entries had been removed or never correctly installed, perhaps a casualty of a failed or partial ADK setup, or an aggressive third-party cleanup utility that decided wimmount.sys looked expendable.

Ultima Ratio Regum: Windows Reinstall

At this point the path forward became clear, if a little painful. With the WIMMount binary missing, no repair tool (e.g. ADK reinstall, SFC, or DISM RestoreHealth) would bring it back. The component store itself must have been partially corrupt, which ruled out any confidence in an in-place repair of individual files.

I went with an in-place upgrade repair install to preserve apps and data. I used Settings > System > Recovery > Reinstall Windows. After the reinstall, I ran sc query wimmount immediately — STATE: STOPPED. DISM mount commands worked on the first try (and STATE changed to RUNNING). The entire diagnostic-and-repair saga, start to finish, consumed the better part of a day that a reinstall would have resolved in under an hour.

Lesson learned, yet again: when a kernel-mode driver disappears entirely from the system, a reinstall is almost always faster than hunting down a manual fix. The math rarely favors the manual route.

If your DISM mount commands start failing and you can’t figure out why, make sc query wimmount the second command you run. Like, immediately after the obvious syntax check. Ruling out a missing WIMMount driver takes fifteen seconds and can save you hours of chasing component-store rabbit holes. wimmount.sys is a small but essential cog in the DISM machinery. When it’s gone, DISM mount abilities suffer, too.

Here in Windows-World, the little things sometimes matter a lot. This was one of those times. I’m glad to have survived!


Facebooklinkedin
Facebooklinkedin

Pending Update Hangs WinGet

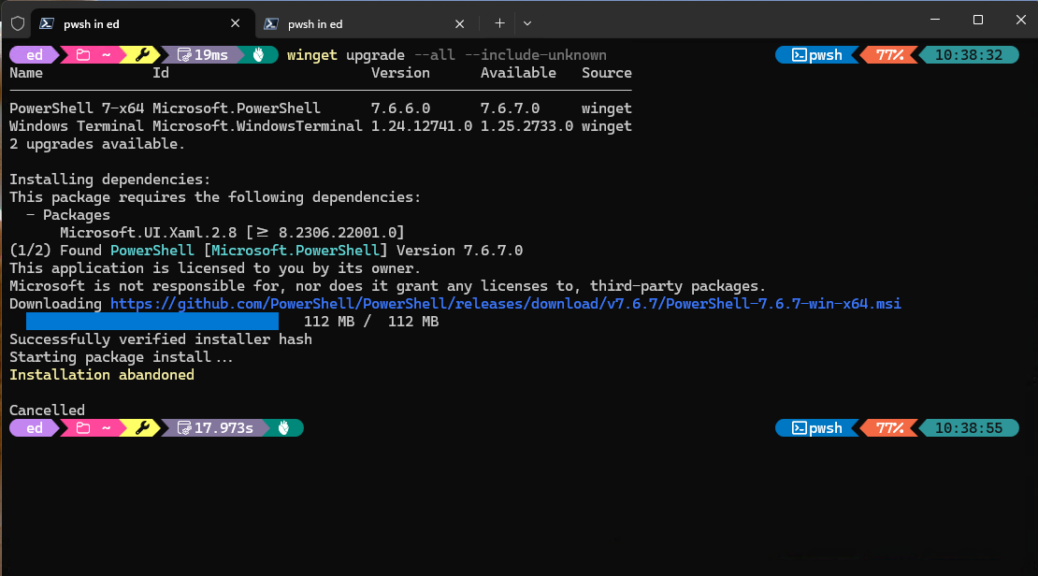
Yesterday was Patch Tuesday (Aug 11), so I got a change to watch something go down I’d  not yet seen. Just before lunch, I fired off a quick winget upgrade --all --include-unknown. I figured it would chew through those updates in time for me to switch to sandwich construction. Wrong! Instead, WinGet got stuck and sat frozen, spinning its wheels on a package install. Only slowly did it dawn on me I’d just gone through the monthly update cycle. Further inspection showed … sure enough … a pending update hangs WinGet (or rather, a pending restart from said update gums up the works). Let me explain…

Why Pending Update Hangs WinGet

The most common culprit is a prior installation that never cleanly resolved or completed. Windows Package Manager tracks install state in its internal database, and if a previous run was interrupted (by a power cut, forced close, network drop, etc.) that package can stay flagged as “installing” or “pending.” As a result, subsequent upgrade attempts collide with that ghost state and stall out.

In addition, App Installer (Microsoft.DesktopAppInstaller) itself may be out of date. WinGet is delivered as part of App Installer via the Microsoft Store, and an outdated build can exhibit hang behavior. That goes double after a major Windows update reshuffles underlying framework dependencies. Therefore, ruling out a stale WinGet client is always step one before you go deeper.

Source index staleness is another common trigger. WinGet pulls its package catalog from indexed sources. When those indexes go stale or become partially corrupted, upgrade queries can time out or loop indefinitely. Finally, UAC and permission conflicts can silently block the installer process. This happens mostly often if you’re running without elevation or if a previous elevated session left a lock on a staging directory. Watch for exit code 0x8A15000F (installer still running). That’s Windows Package Manager’s way of telling you it thinks something is already in flight. (See the WinGet exit codes reference for deets.)

What happened to me yesterday was that the pending restart left some unresolved packages in limbo, including the AppInstaller itself. A quick restart took care of those gotchas, and allowed WinGet to do its thing unimpeded.

Fixing a WinGet Pending Update Hang

Work through these fixes in order. Each one resolves a progressively deeper layer of the problem, so start at the top and stop as soon as WinGet is moving again.


winget upgrade --all --include-unknown
winget source update
Install-PackageProvider -Name NuGet -Force Install-Module -Name Microsoft.WinGet.Client -Force -Repository PSGallery Repair-WinGetPackageManager -Force -Latest
winget upgrade --id --silent
winget source reset --force

And, of course, if it’s Patch Tuesday, or some kind of Windows Update has been applied recently, check for an restart notification first. If one is pending, get it out of the way. That’ll keep it out of WinGet’s way, too. Here in Windows-World, it never pays to overlook the obvious. Cheers!

Tip: Check the Logs
When a hang is stubborn, the logs will tell you exactly where the process is choking. Run winget --info to find your log directory, or navigate directly to:
%LOCALAPPDATA%\Packages\Microsoft.DesktopAppInstaller_
8wekyb3d8bbwe\LocalState\DiagOutputDir
(reassemble onto single line to cut'n'paste, or do like me and point Everything at DiagOutputDir).
You can also append --logs or --verbose-logs to any WinGet command to capture a full diagnostic trace of that specific run.

Facebooklinkedin
Facebooklinkedin

Spiffing Up P3 Ultra WinTerm

Having just restored the ThinkStation P3 Ultra Gen 2 to a clean, plain-vanilla Windows 11 image, I’m now tweaking things to make them comfortable and right. One of my primary targets for improvement is the command line. In turn, that has me spiffing up P3 Ultra WinTerm to get things the way I like them.

What Spiffing Up P3 Ultra WinTerm Entails

What follows is the four-layer stack I put together on the P3 Ultra to make Windows Terminal customization actually mean something. You can see the results in the lead-in screenshot above: a segmented Oh My Posh prompt, a rendered 7-Zip application icon courtesy of winget sixels, and a gloriously color-coded directory listing from Terminal-Icons. Here’s how it all fits together.

WinTerm Customization: Font Foundation

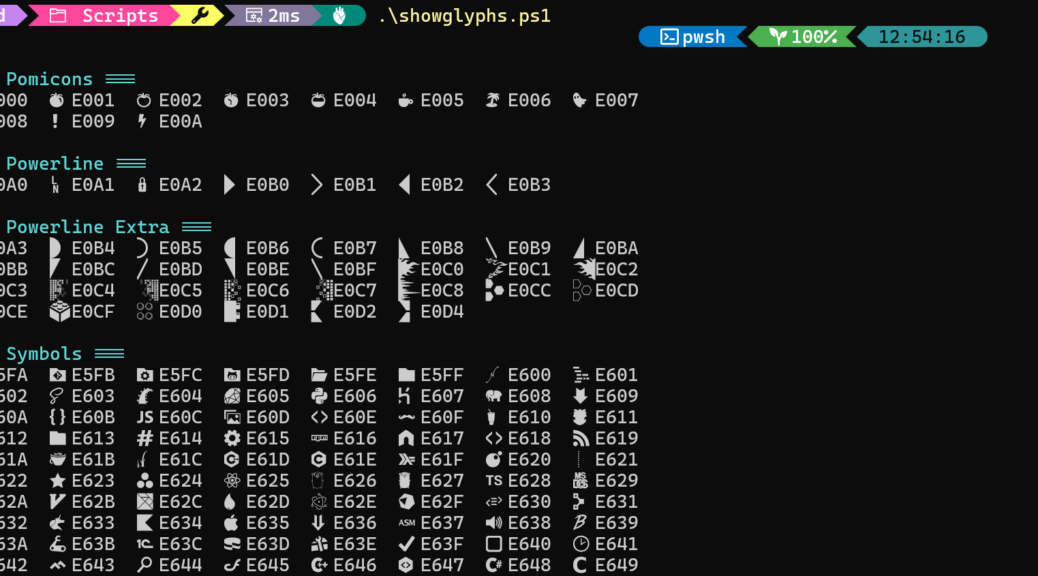
The very first thing I do after any clean Windows install — before the wallpaper, before the taskbar tweaks, before I remember I’m supposed to be “keeping it minimal” — is set up a proper terminal environment. On the P3 Ultra running 25H2, that meant opening Windows Terminal and immediately confronting the default Cascadia Mono font, which is fine in the way that a gas-station sandwich is fine. It works. You’re not going to brag about it.

The secret to this entire Windows Terminal customization stack is that absolutely everything else — the Oh My Posh prompt glyphs, the Terminal-Icons file badges, the whole visual language — depends entirely on a Nerd Font being the active terminal font. Without one, every single glyph-based feature renders with less pizazz. You get a terminal that looks like it’s having a small crisis. Not the aesthetic I’m going for.

My pick is CaskaydiaCove Nerd Font Mono v3.4.0 — the Nerd Fonts project’s officially patched version of Microsoft’s own Cascadia Code. That lineage matters. indeed, it looks completely native in Windows Terminal because it essentially is Cascadia Code, just supercharged with 10,000+ additional Nerd Font glyphs packed into the private-use Unicode ranges.

I installed it per-user to %LOCALAPPDATA%\Microsoft\Windows\Fonts, then promoted it system-wide since the P3 Ultra session was already running elevated. One JSON edit in Windows Terminal settings (hit Ctrl+Shift+, to open the file directly), setting “face”: “CaskaydiaCove Nerd Font Mono” inside profiles.defaults.font, and that foundation is laid.

OMP Puts Prompts Right

Oh My Posh (OMP) is the tool that turns my drab PS C:\Users\ed> prompt into a segmented, information-dense status bar that actually tells me things I want to know. In my current setup — visible in the screenshot — the left side shows my username (ed), the current directory, a key glyph, the terminal icon, and the last command’s execution time. The right side displays the shell name (pwsh) and a live clock. It looks and feels sharp. Frankly, it’s the main reason I get excited about a new terminal setup.

Speaking of execution time: the screenshot shows a 0ms result for a quick winget list –details 7zip run, which is gratifying. Less gratifying but no unexpected is the 990ms that appears on the subsequent dir command. That’s Terminal-Icons loading its full icon map on first call, not OMP behaving badly. Well. Mostly not OMP behaving badly. The 990ms is the price of a pretty terminal, and I have decided it is worth it in the same way I decided heated seats were worth it when I bought my last car. Once you have the temperature drops below freezing, the idea of going without feels almost uncivilized.

OMP installs cleanly via winget with winget install JanDeDobbeleer.OhMyPosh. Then, getting it running in PowerShell 7.6.4 (the version running on the P3 Ultra, as you can see in the startup banner in the screenshot) takes exactly one line added to your $PROFILE. That’s an oh-my-posh init pwsh call pointing at your chosen theme JSON. That’s it. Minimal friction, maximum visual payoff.

Winget Icons: Sixel Graphics Come to Life

Here’s the one that still makes me do a small double-take every time I see it: that 7-Zip logo in the terminal is not ASCII art. It is not a colored block approximation. It is the actual, rendered 7-Zip application icon, displayed as a real bitmap inside the terminal window, courtesy of sixel graphics support added to winget in Preview build 1.29.50 and later.

Important: Two Different Settings Files

Enabling sixels requires editing winget’s own settings file — opened with winget settings — not Windows Terminal’s settings.json. These are two entirely separate JSON files. Editing the wrong one produces a very confusing non-result, and I say that with the authority of someone who absolutely did exactly that on the first attempt.

Once you’re in the right file, the change is simple: add “visual”: { “enableSixels”: true } to the JSON, do a full restart of Windows Terminal (not just a new tab — a full close and reopen), and then run –winget list -details [packagename] to see the icon appear. Coverage is currently somewhere around 25–30% of installed packages — Win32 (exe/msi) apps show icons reliably. MSIX packages mostly don’t yet. But seeing 7-Zip’s logo materialize in a terminal window never quite gets old.

Terminal-Icons: Color-Coded Dir Listings

The final piece of the stack is Terminal-Icons. This PowerShell module by Brandon Olin transforms your Get-ChildItem output from a monochrome wall of filenames into a color-coded, glyph-annotated directory listing .. Bonus: it’s easier to scan at speed. Folders get folder glyphs in teal. JavaScript files get the JS badge in orange. Binaries, config files, images, and scripts each get their own visual treatment, all driven by the Nerd Font glyph library that CaskaydiaCove Nerd Font Mono v3.4.0 provides.

Installation requires a single PowerShell line: Install-Module -Name Terminal-Icons -Repository PSGallery -Force. Permanent activation requires adding Import-Module Terminal-Icons to your $PROFILE. After that, dir, ls, and Get-ChildItem all pick up the icons and colors automatically — no further configuration needed. It simply works, which in my experience is not always a given with PowerShell modules.

OK, I’m Happy Now…

Installing this stack — CaskaydiaCove Nerd Font Mono, Oh My Posh, winget sixels, and Terminal-Icons — took me about 10 minutes. The result is exactly what you see in that lead-in screenshot: a terminal that looks like it means business, with a prompt that tells me what I need to know, icons that let me spot my packages and files at a glance, and one very satisfying 7-Zip logo that I have already shown to more colleagues than strictly necessary. It is, as I said to myself at the time, a very spiffed-up terminal. Round Rock, TX never looked so good from a command line. Here in Windows-World, I count that as an accomplishment, of sorts…


Facebooklinkedin
Facebooklinkedin

PC Manager Browser Space Is Mostly Volatile

I just ran PC Manager’s Deep Cleanup on my Flo6 desktop. As usual, it cleaned a lot of what it found: 11.4 of 14.6 GB wound up gone. Also, as usual it shows around 3GB remaining for my three browsers — namely, Firefox, Chrome and Edge. So I asked Copilot: why do these programs show up in their numbers? It opines (and I concur) that PC Manager Browser space is mostly volatile. Indeed the figure is kind of illusory. It’s worth understanding before treating browser cache cleanup as a valid way to recover disk space.

Take a look at the final results from my Deep Cleanup just now from the lead-in screencap. Notice that it shows 1 GB for Firefox, 1.6 GB for Chrome and ~277 MB for Edge. Keep those numbers in mind.

Why Say: PC Manager Browser Space Is Mostly Volatile?

Here’s the core issue: browser cache is engineered to be ephemeral. It’s written, read, and purged in a continuous cycle governed by cache-expiry headers, per-origin storage quotas, and the browser’s own self-management routines. The moment you fire up your browser after a cleanup and start clicking around, the cache begins refilling. Within 30 to 60 minutes of ordinary browsing, most browsers will have rebuilt several hundred megabytes of cached content — sometimes more, depending on how media-heavy the sites you visit are.

Chrome and Edge both enforce internal storage quotas and will self-evict stale or low-priority cache entries automatically when those quotas are approached. In other words, the browser is already managing this space on your behalf, without you lifting a finger. Firefox operates similarly under its own quota management framework.

In short: you didn’t “save” 2 GB when you cleared browser cache. You borrowed 2 GB temporarily — until your next browsing session rebuilt most of it. Sort of like the storage equivalent of pushing water uphill.

Check out these numbers: they represent the memory footprint for my three browsers.

Note that those numbers fall near the potential savings that PC Manager reports for each one. That’s no coincidence, it simply represents reclaiming space that the browsers will suck back up as soon as you turn them back on, and open some tabs.

What Real, Valid Savings Look Like

Contrast browser cache with the categories that represent genuinely permanent space recovery. Windows Update cleanup files — the old installer packages and superseded component stores left behind after updates — can run anywhere from 500 MB to 2 GB, and once deleted, they do not return. Windows Error Reporting logs are similarly non-regenerating under normal conditions. The Recycle Bin is obvious. Orphaned app data left behind by software you’ve already uninstalled is another solid target. Thumbnail cache does rebuild, but far more slowly than browser cache, so it offers a more durable short-term gain.

A typical monthly cleanup on a moderately used Windows 10 or 11 machine might yield up to a 5 GB of truly permanent, non-regenerating space. That’s a lot less dramatic than the headline figure PC Manager flashes at you — but it’s real. And it stays real.

Do You Need to Clean Browser Cache?

Maybe, but go into that effort with adjusted expectations. Clearing browser cache could deliver a brief responsiveness improvement. Thus, if the cache has grown bloated with stale or corrupt entries, or to make room in storage-intense scenarios, such as recording a long screen capture session, installing a large application, or freeing up breathing room on a drive that’s genuinely running tight. Otherwise, don’t expect much either in the short or long term.

If you’re truly short on disk space, PC Manager’s Large Files finder and the Windows Update Files cleanup row are far more useful targets. The browser cache, left alone, will look after itself. That’s the point!

Here in Windows-World keeping things clean does have its reward. But some things are more worth cleaning up than others. Browser cache is near the end of that list, and best left alone.

Facebooklinkedin
Facebooklinkedin

Jumping WinGet’s Install Technology Hurdle

Wow! It’s hard to believe that WinGet has been around for over 6 years now (it made its debut on 5/19/2020). Over those years I’ve seen the upgrade block shown in the lead-in graphic many times. I’ve also learned to deal with it in more roundabout ways. Let me call this jumping WinGet’s install technology hurdle, so I can explain one particular technique worth investigating.

What Jumping WinGet’s Install Technology Hurdle Means

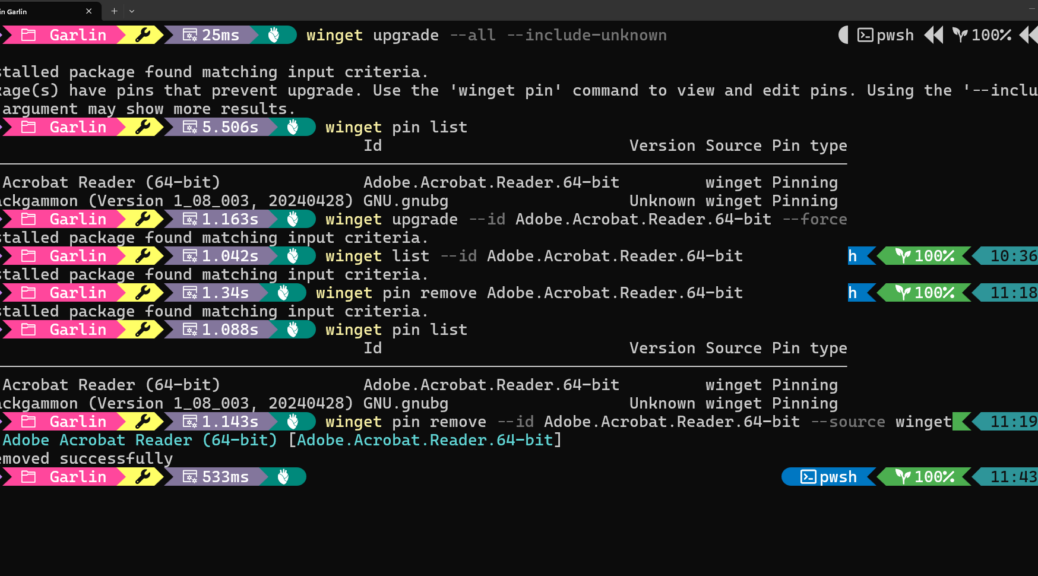
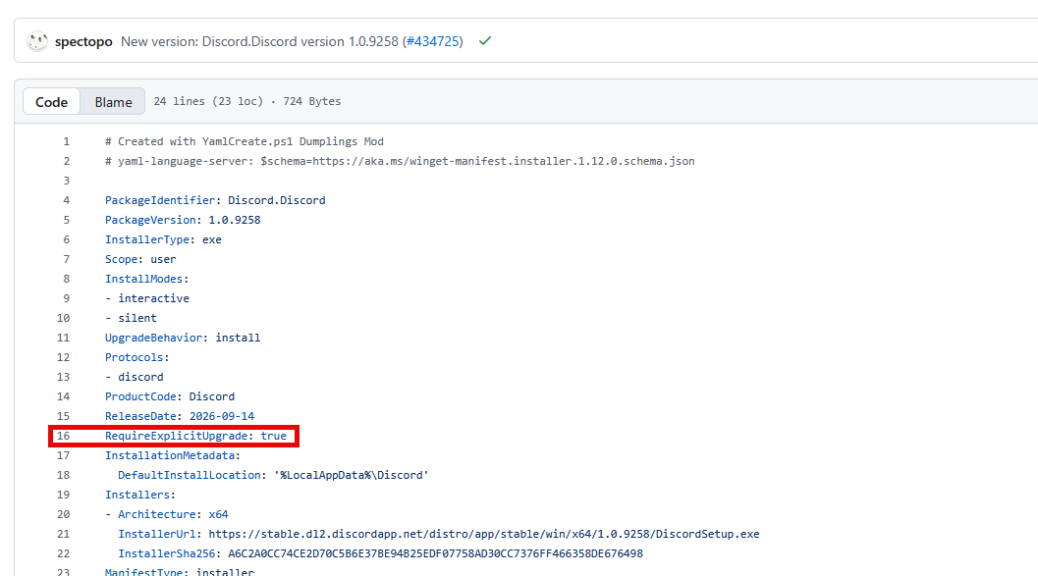
The text at the head of the screen cap recommends “Uninstall each package, then install the newer version.” This will work if there’s no other way. But if — as you can see is the case with Oh My Posh (OMP) — there’s an internal update mechanism, this often works just fine without requiring wholesale removal (uninstall old version) and replacement (install new one).

Indeed, it just so happens that OMP will happily update itself at the command line using the built-in command

oh-my-posh upgrade --force

So that’s what I did instead of running one WinGet command to remove the old package, and another to install the new one. This situation pops up when WinGet detects that a normal upgrade is not feasible. It blocks upgrades whenever the install technology changes from one release to the next. That’s how it avoids potential problems with the package and its supporting infrastructure that might otherwise occur.

But the teams who develop such packages know their inner workings. They can (and often do) support such upgrades because they understand how to hand off from the older install technology to the newer one. When I run into this situation, I look for a built-in update mechanism in the package (or its related app) itself. It will often jump the hurdle for me, and let me keep using WinGet thereafter. Indeed, I’ve done this myself with Adobe Acrobat too. Furthermore, GitHub documents similar cases with MS Edge, PowerShell 7, Oracle VirtualBox, LocalSend, and other packages as well.

But Wait…There’s More!

Even after I got to the latest version, I found a couple of older versions of OMP also installed. Ultimately, I DID have to uninstall those to make them go away. That’s because OMP lets multiple versions run in parallel. This time, I used msiexec and the GUIDS (for the no-longer-wanted versions) for that purpose

msiexec /x "{97557535-43B6-44EF-BA97-86563C1AC80A}"
msiexec /x "{85B43182-5A11-40E5-9E09-7EF6EB1CFDF7}"

Now, I’ve got just the one (updated) version and a clean Oh-My-Posh setup. Here in Windows-World, it’s always something. Thank goodness that Copilot was able to help me steer through the wreckage, and clean up the older versions properly. Now I see only the latest version when I run winget list, and OMP is working as it should be. AND I solved a problem I didn’t know I had. Good-oh!

Facebooklinkedin
Facebooklinkedin

WinGet Shows More Icons

Here’s an interesting and welcome observation. Installing updates this morning, I noticed that 7 of 10 packages showed icons as Winget did its upgrade thing. (And this came from the 2018 vintage ThinkPad X380 Yoga!) Anecdotally, that’s way up from when icons first started showing up Windows Terminal in early March of this year. I’m delighted to see that WinGet shows more icons than ever before. Mostly that happens as more developers start including the necessary image references in their package metadata. In my sample screenshot (5 packages) every one has an associated icon. I’m jazzed!

Why WinGet Shows More Icons Nowadays

Lots of popular apps now include icon Url fields in their metadata (that’s where those images come from: e.g. VLC, Chrome, FireFox, NotePad++, MTPW, etc.). Microsoft has definitely upped its support for icons as well (e.g. Edge, PowerToys, Terminal, VStudio, .NET runtimes, and more). Indeed, there seems to be a growing wave of developer support as more and more packages now sport icons as WinGet interacts with them.

At the same time, says Copilot, “the WinGet backend now caches and serves icons [more] reliably.” These days icons are cached in the content delivery network (CDN), retrieval is faster and better, and broken URLs are getting fixed. The net-net is that more icons are appearing because there are more of them around, and the mechanisms to show them are working better, too.

Here in Windows-World, that counts as progress. Plus, I love the eye-candy that icons provide within the mostly monochrome Windows Terminal environment. How could you not? Good stuff!

If you’ve not yet turned icons on in your Terminal evironment just yet, never fear. I posted about this on April 10 (2026) in an item entitled How to Light Up Winget Icons. Follow its instrux if you’d like to see them for yourself.

Facebooklinkedin
Facebooklinkedin

WinGet List/Install Orders Seldom Match

If you run winget upgrade --all --include-unknown regularly, you have probably noticed something odd. The packages listed in the upgrade table rarely install in the order they appear. I hit this recently on my ThinkPad X12 Hybrid Tablet, where six packages needed attention: Google Chrome, Microsoft Teams, MiniTool Partition Wizard Free, Oh My Posh, Patch My PC Home Updater, and Windows App. They were listed in one sequence but installed in a noticeably different one. The explanation stems from WinGet’s dependency resolver. It’s worth understanding, and explains why WinGet list and install orders seldom match each other.

Why Do WinGet List/Install Orders Seldom Match?

As you can see in the lead-in screencap, the upgrade table that WinGet displays before installation is sorted alphabetically by package display name — that is the first (Name) column, not the Id column. It’s purely cosmetic: WinGet queries its source index, collects available updates, and orders the results for human readability. The order in that table carries no weight when determining which package installs first. Think of it as a shopping list arranged by aisle label, not a build sequence.

Install Order Shows a Dependency Graph

Before the first installer touches the PC, WinGet’s dependency resolution engine reads every package manifest in the upgrade set. It constructs a directed acyclic graph (DAG) of declared dependencies. Next, it runs a topological sort namedGetInstallationOrder() on the winget source. That produces an install sequence where no package arrives before its pre-reqs are satisfied. This re-ordered queue need not follow name or ID order.

The X12 Hybrid Tablet Run

In the screencap, you see the raw WinGet output from a recent run on the X12 Hybrid Tablet. Six packages are available, listed in alphabetical order by display name — Chrome, Teams, MiniTool, Oh My Posh, Patch My PC, Windows App. The three declared VCLibs and Windows App Runtime dependencies follwing that list reinforce that notion that other elements than those that appear are in the mix. In the end, the actual install order was MiniTool Partition Wizard, Patch My PC…, Chrome, Teams, Windows App, and finally, Oh-My-Posh.

When List Order and Install Order Do Align

Occasionally the two sequences match — but that is coincidence, not design. It happens when none of the packages in the upgrade set declare inter-package dependencies and WinGet’s internal queue order happens to mirror alphabetical sequence. As soon as one package declares a dependency on another — or on a shared runtime — the topological sort reshuffles the queue and the coincidence evaporates.

A Practical Takeaway

No need to manage this manually. Winget’s dependency resolver handles the sequencing reliably. Indeed, fighting it with flags like --skip-dependencies is rarely worth the risk. Tyring to drive this yourself, you might end up with a package that installs against a runtime version it does not actually support. Trust the DAG, watch the dependency notice block that appears before the first installer fires, and you will get a clear picture of why the WinGet upgrade install order looks the way it does.

Next time you notice that WinGet installs packages out of listing order, check the dependency notice block at the top of the install run. That block is where WinGet “shows its work.” That’s where the topological sort result gets laid out in plain text. It is one of those quiet, well-engineered behaviors that rewards users who take a moment to read the output carefully.

Further proof of my earlier contention (see this June 27 post) that “WinGet knows more than it says.” I think so, but you can make  your own judgement. Here in Windows-World, there’s plenty of room for multiple takes on what’s REALLY going on. This is mine…and I’m sticking to it!


Facebooklinkedin
Facebooklinkedin

WinGet Upgrade Knows More Than It Says

In running through my usual morning Winget Upgrade drill, I noticed that it found 3 upgrades, but applied only 2. As you can see in the lead-in screencap, it concluded its efforts with a line that reads “1 package(s) have upgrades blocked because newer versions use a different install technology…” To me, this means that WinGet Upgrade knows more than it says, because process of elimination reveals that Microsoft Edge is the missing item.

Why Say: WinGet Upgrade Knows More Than It Says

Microsoft Edge is deeply embedded into the Windows 11 OS.  Indeed, Windows 11 uses WebView 2 as a system component. That also powers the Settings app, widgets, Copilot, Teams, Outlook (new), the MS Store, and more. That’s why Edge usually updates more easily from within its own UI anyway.

In this particular case, something about the install technology changed moving from Version 149.0.4022.96 to Version 149.0.4022.98. That forces WinGet to keep its mitts off, unless users uninstall the old and then install the new in two separate operations.

I elected to jump into the app, do the upgrade, then returned to Windows Terminal to run WinGet Upgrade –all –include-unknown again. As you can see in the lead-in graphic (if you right-click that image to display it in its own browser tab), with Edge manually updated already beforehand, the next check returns “No installed package found matching input criteria.” In WinGet parlance that means “no items need updating here.”

In Windows-World, what you see can sometimes tell you more than what your app or tool output tells you. This is a definite illustration, and explains why I assert that the Windows package manager (i.e. WinGet) and its upgrade facility knows more than it says. Cheers!

Facebooklinkedin
Facebooklinkedin

WinGet Copilot CLI Update Gets Interesting

By design, the WinGet package manager is pretty conservative about working on apps that are running. With Copilot now active on my desktop most of the time, and even accessible in Windows Terminal (or rather, Intelligent Terminal) this goes double. Yesterday, in fact, my attempt at a WinGet Copilot CLI upgrade gets interesting when it fails with an “access denied” error message. Let’s figure this out, and apply a dead-easy fix.

What to Do When WinGet Copilot CLI Update Gets Interesting

You can see the first Winget failure, the fix, and a successful upgrade in series in the lead-in screencap. That fix provides a way to get Copilot out of the way so WinGet can do its thing without the possibility of messing anything up. Figure that Copilot is nearly always on my systems these days into your consideration and the runtime context.

That fix is:

Stop-Process -Name Copilot -Force -ErrorAction SilentlyContinue

Now, let me explain what’s going on, and this fix does the trick.

Why the First WinGet Upgrade Failed

The root cause is straightforward Windows behavior. The operating system won’t let any process overwrite a running executable. If you had an active terminal session that loaded the Copilot CLI — or any background shell or process that previously invoked it — the old copilot.exe is locked. The installer cannot swap in the new binary, so it fails, and reports explanatory error info.

This is not a WinGet bug. But WinGet could arguably handle it more gracefully. It could detect running processes before the upgrade begins and warn the user. Instead, it downloads everything, then fails at the last step. That may be disconcerting, or perhaps even frustrating, but it’s easily fixed.

The Fix: Kill All Copilot Processes, Then Retry

The fix is a two-step sequence. First, kill any running Copilot processes. Then retry the WinGet upgrade. In PowerShell, do that by running these two commands in sequence:

Stop-Process -Name copilot -Force -ErrorAction SilentlyContinue
winget upgrade GitHub.Copilot

[Note the first two lines are actually a one-liner with a spillover resulting from local formatting; run as a single command.] That’s what the screenshot at the top of this post illustrates. The first command runs cleanly even if no matching process exists. The
-ErrorAction SilentlyContinue flag does that by design and intent.

The second winget upgrade command then finds the package again, verifies the hash, extracts the archive, and this time completes successfully. You will see two confirmations appear: “Overwriting existing file” for the WinGet Links path, and “Command line alias added: ‘copilot’.” Then, finally: “Successfully installed.”

Noteworthy Postscript

A couple of additional observations from this experience deserve mention. First, note that Copilot CLI lists Microsoft.PowerShell (version 7.0.0 or later) as a required dependency. If you have not yet upgraded to PowerShell 7.x, WinGet may attempt to pull that in first. In this case, PowerShell 7.6.2.0 was already current, so that dependency check passed instantly.

Second, if you run WinGet from within VS Code’s integrated terminal, Windows Terminal, or any shell that has previously invoked gh copilot, (gh = GitHub, and is the target for copilot requests in a shell environment) you may hit this exact error. Opening a completely fresh PowerShell window before running the upgrade is often enough to sidestep the issue entirely. In that case, no Stop-Process is needed.

Third, this pattern is not unique to Copilot CLI. Any WinGet-managed package that ships as a standalone executable can run into this same locked-file problem during upgrades. Ditto for Web browsers (e.g. Chrome, Edge, Firefox, etc.) which many users, including your humble correspondent, tend to leave running all the time. For browsers the update may fail, it may not run at all, or you may need to “Relaunch” the browser so the updater applies that change file.

A Predictable Bump in the Road

WinGet is a solid package manager. It delivers smooth, hands-off upgrades nearly all the time. When it stumbles — as it did here — its error messages are descriptive enough for a quick diagnosis and fix.

One command to kill the offending process, a second WinGet command to retry, and you’re done. It is a minor contortion, but now you know that two-step. Here in Windows World, it’s good to keep tools current. To that end, don’t let a transient file lock slow you down. Fixed!

Facebooklinkedin
Facebooklinkedin