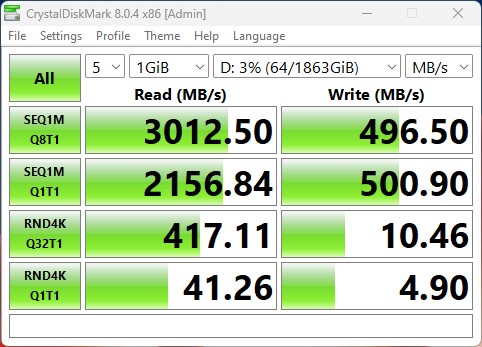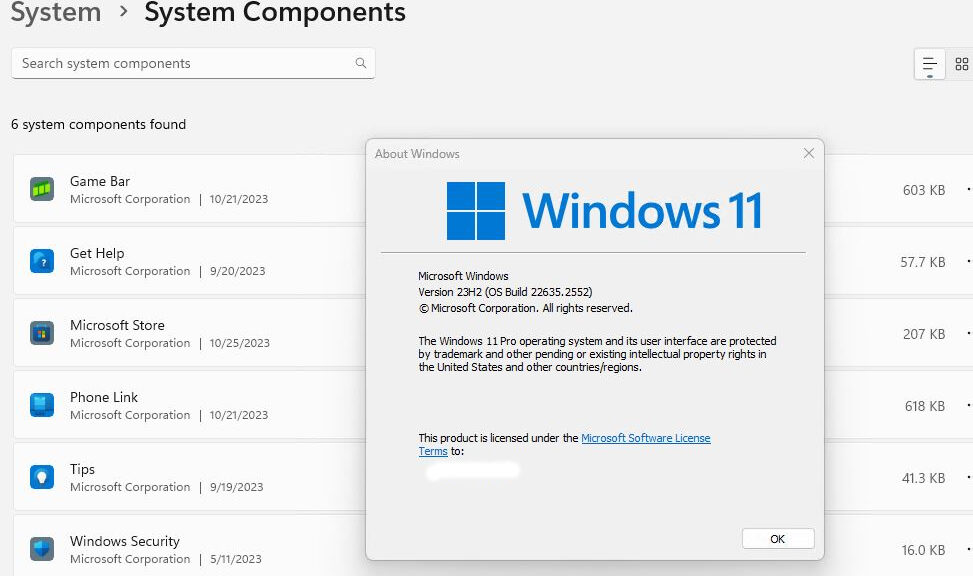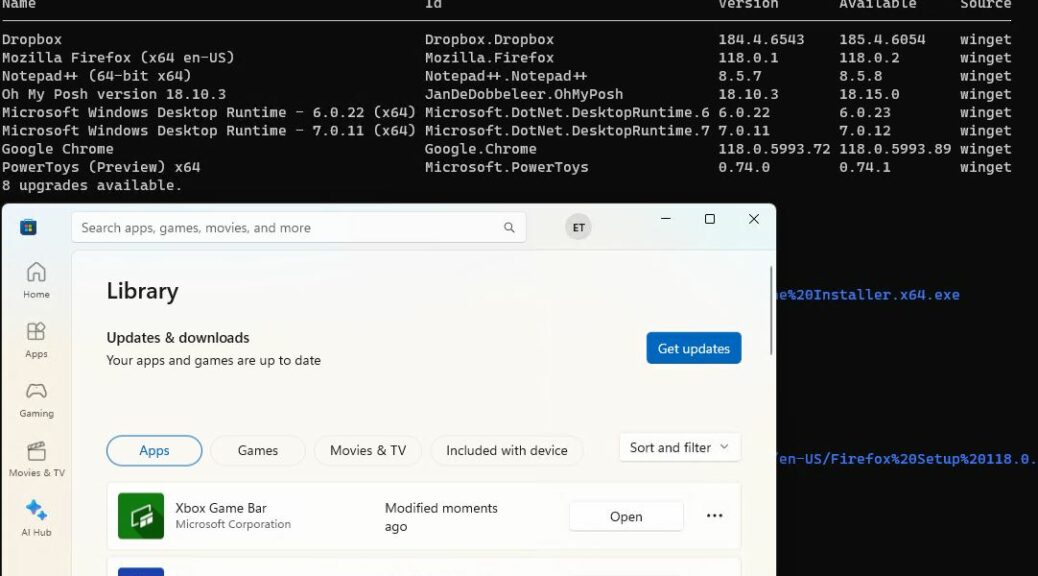
In everything but name, I’ve already been running Windows 11 23H2 for a while. That level of functionality has been trickling into Windows 11 since September 11 with the release of KB5030310 (a preview update). A few days ago, the release of KB5031455 took Windows 11 to Build 22621.2506. Note the version and build numbers in the lead-in graphic. They support my assertion that there’s little difference between the two.
Steps to Attaining Windows 11 23H2
Over at ElevenForum.com I’ve been reading about various ways to get to 23H2 in its Installation, Updates and Activation forum for the past few weeks. None of the easy methods outlined there did the trick for me. I wasn’t motivated enough to try the longer, harder ones — e.g. an in-place repair install using the recently published Windows 11 23H2 ISO (it’s now present on the Download Windows 11 page). Why not? I knew an enablement package for 23H2 was coming soon. (Note: for those not already hip, an enablement package is a small, quick update that simply turns on features and stuff already present in Windows but not yet visible or active.)
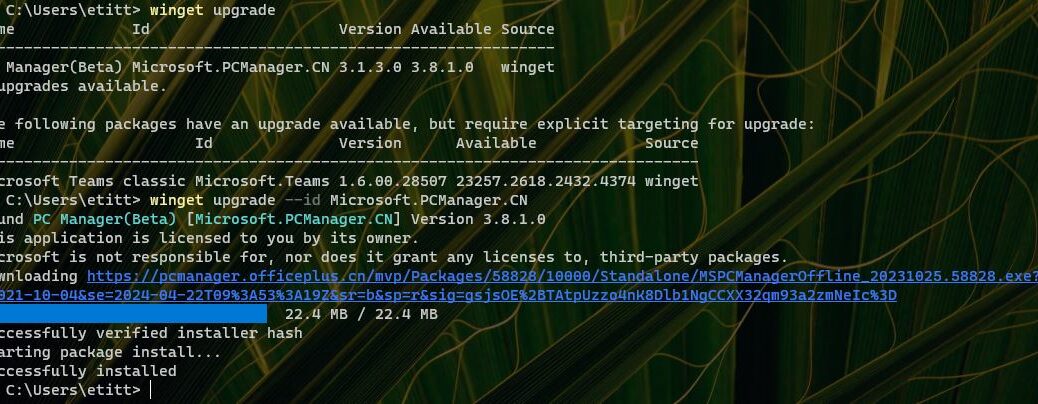
Today (or more precisely, yesterday) that changed with the release of KB5027397. It describes that very enablement package, and announces its availability. I’ve not been able to get WU to proffer it to me (though I did have pre-requisite KB5031455 already installed). Instead I grabbed the MSU link from ElevenForum admin @Brink (real name: Shawn Brink, a fellow WIMVP). It comes from an October 31 thread entitled KB5027397 Enablement Package for Windows 11 version 23H2 Feature Update.
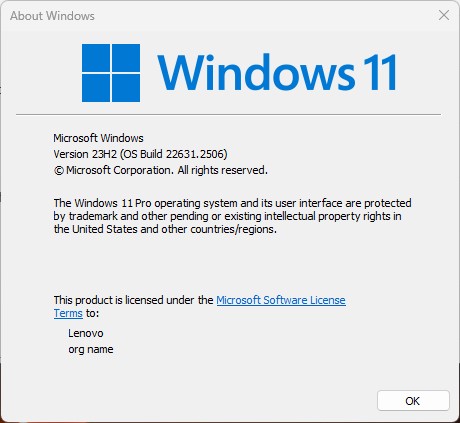
It’s a ZIP file, so must be unpacked before it may be run. But run it does — and quickly, too: the whole shebang was done in under 2 minutes on my Lenovo ThinkPad P16 Mobile Workstation. After a reboot, the target PC should produce nearly the same winver information shown above. Note the “Version 23H2” moniker in the second line of the fine print. Nerdvana!