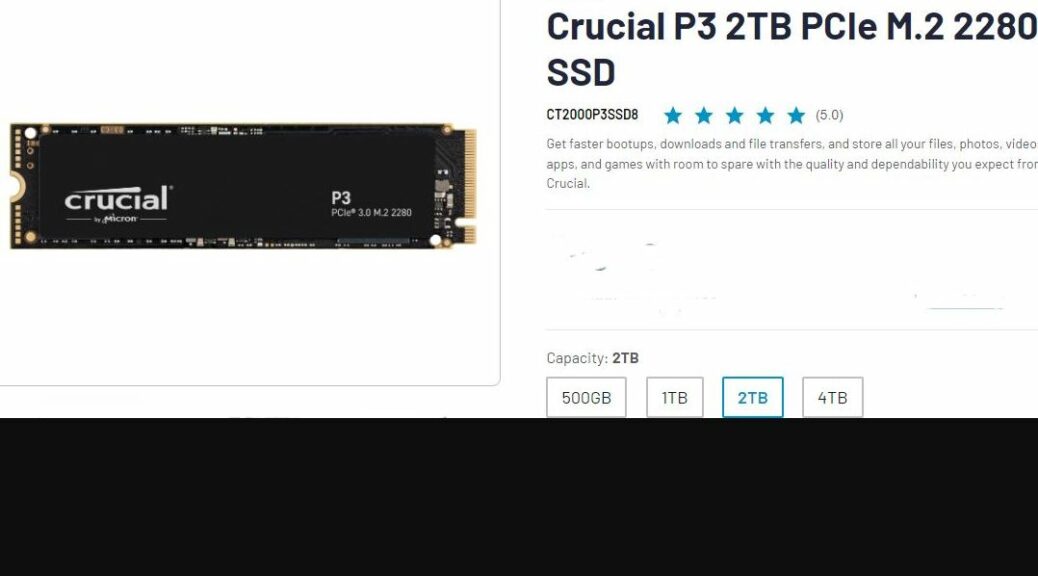
About a week ago, I picked up an on-sale SSD, mostly so I could do some off-the-cuff price/performance testing. I’ve got plenty of 1TB models here at Chez Tittel. Suprisingly, bringing up 2TB NVMe proves challenging as I fight with cables, connections and ports to get it recognized and formatted in Windows. Let me explain…
Why Bringing Up 2TB NVMe Proves Challenging
From the get-go, I had problems getting the SSD recognized in Disk Management. There could have been numerous factors involved:
- Power draw from a big NVMe
- My attempt to start in a CalDigit TS4 hub
- The el-cheapo NVMe enclosure I used
- The USB-C cable between enclosure and port
By the time I did get things working, I had changed all of those things (except the first, which comes from the SSD itself). I ended up working from a USB 3.0 port in my desktop PC instead of a TB4/USB4 port on a CalDigit TS4 hub. Then, I switched from a US$18 Fideco to a US$70 Sabrent EC-NVMe SSD enclosure (I have two, and both work quite reliably). I went from a TB3 rated USB-C cable to a TB4 rated one.
Though it took me the better part of an hour to work through all those changes, I finally got to the point where I could see and set up the NVMe drive inside Windows. Once that was done, I plugged it into my Lenovo ThinkPad P16 Mobile Workstation.
The Price/Performance Story
There’s still something hincky with this set-up or with the SSD itself. I didn’t get very good numbers out of CrystalDiskMark (lower numbers than many HDDs, in fact). But when I ran a full backup in Macrium Reflect, it created a 62GB image file in 06:33.
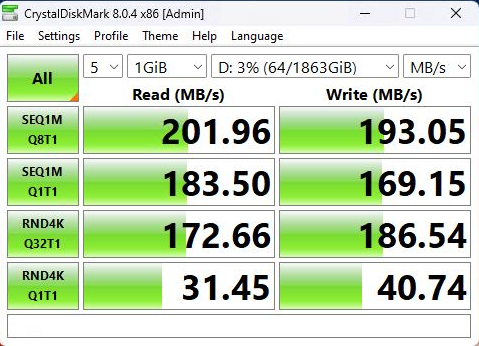
These numbers are about 20% of what I get from Gen4 (PCIe x4) NVMes in this same enclosure.
That’s a data rate of around 9.45 GB per minute (161.5 MBps or 1292 Mbps by my reckoning). It’s about one-third the speed of an image backup to a fast NVMe in the same enclosure. But faster NVMes cost more (a Crucial T700 goes for US$340; a Teamgroup Z540 for US$260; a Samsung 990 Pro for US$150), too.
One more thing…
On the theory that even the Sabrent enclosure is old enough to be overwhelmed by a 2TB NVMe drive, I swapped it into a 2022=vintage Acasis TB4 NVMe enclosure. And whereas the drive had been unrecognizable in a TB4 port before this switch, it now came up. Then look at the difference in the CDM numbers it now produces (funny thing: the other enclosure produces better random R/W numbers, this one is emphatically the other ‘way round). And in this enclosure Macrium Reflect finished in 02:21 rather than 06:33 (that’s on par with other, faster NVMes in the same enclosure).
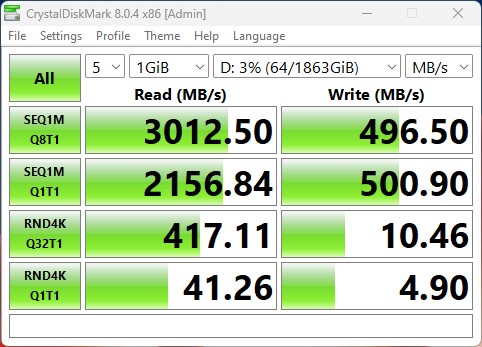
Emphatic block block differences in the Acasis enclosure!!!
One lesson I take away from this is that it’s important to remember that bigger capacity means a bigger power draw. Therefore, older and slower enclosures are less likely to provide the handling that bigger, newer NVMe SSDs need. I confirmed this by loading up the Sabrent Rocket 4 Plus that had been in the Acasis enclosure into the Sabrent enclosure: results were typical for a UASP NVMe (just over 1 Gbps for bulk transfers; better overall random R/W). That’s good to know!
All in all, I’m fine with what I’m getting from my US$84 outlay. I am looking for a capable enclosure that’s cheaper than the Acasis TB-401U (still costs US$140 on Amazon). This US $23 Sabrent USB-C 3.2 10Gbps model looks pretty good. I’ll follow up with its results when it shows up later this week…