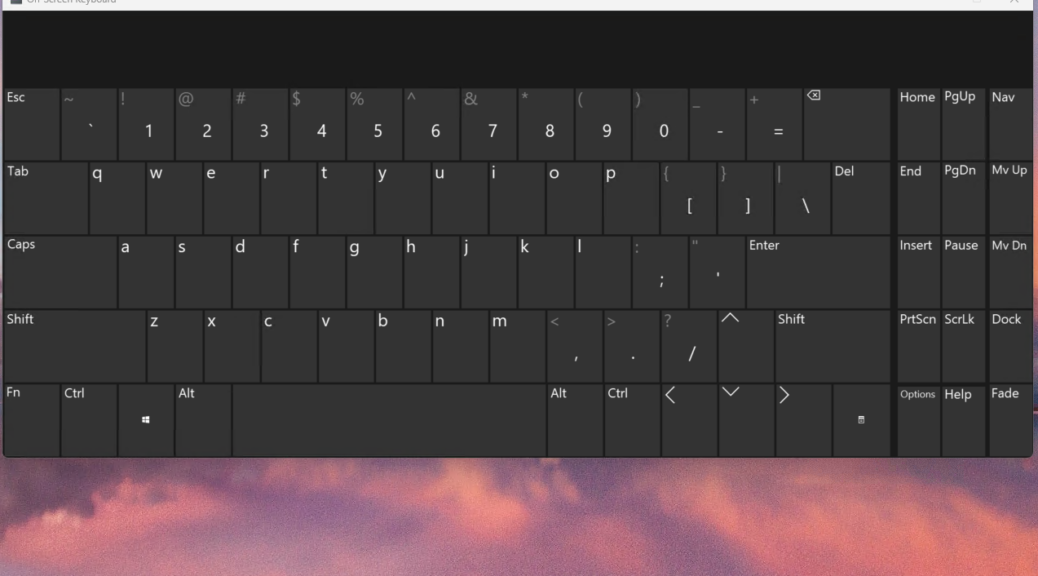
Consider this: Copilot itself tells me that my ThinkPad T14s Gen6 Copilot+ laptop should show a Copilot key on its onscreen keyboard. It definitely has one on its physical keyboard: I can see it right now, plain as day. But none of the fixes Copilot recommends gives me such a key, nor can I access settings for that keyboard either. As you can see in the lead-in screencap, the onscreen keyboard lacks Copilot key (it would normally appear between Right-Alt and Right-Ctrl on the bottom row). Sigh.
Does It Matter If Onscreen Keyboard Lacks Copilot Key?
Not really, because the Copilot icon is pinned to the taskbar by default. I’ve always been able to open it with a single click anyway. But what I find interesting is that Copilot itself says there SHOULD be such a key on the onscreen keyboard. It’s clearly not visible.
Copilot also says I should be able to access Settings for the onscreen keyboard as well. But when I open the On-screen Keyboard menu, it shows me only options for Restore, Move, Size, Minimize, Maximize and Close. No Settings anywhere, nor does right-click help, either.
It Gets More Interesting at MS Learn
So I truck over to MS Learn to examine its article Get to know the touch keyboard. It offers versions for both Windows 10 and 11 (the preceding link is for 11, because it’s the only one with Copilot key capability AFAIK).
There’s an interesting sentence in this document though. It says “Select the keyboard settings icon in the upper-left corner of the touch keyboard to view and switch between options.” That’s the same thing I’ve been doing to try to access Settings. I don’t see the things it tells me I should see.
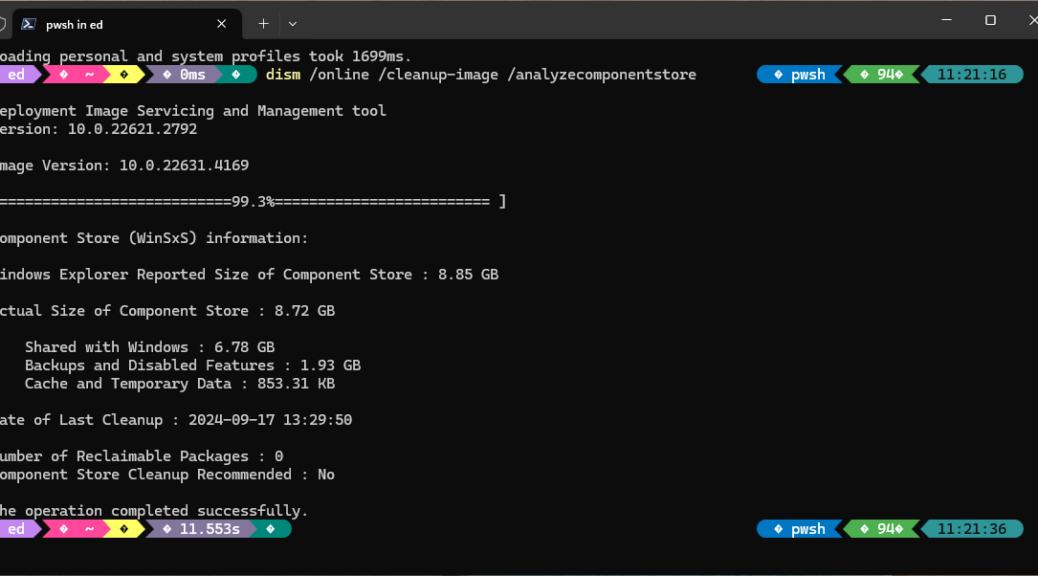
I’m left to draw one speculation: perhaps Lenovo didn’t update the onscreen keyboard for Windows 11 (24H2 or even earlier versions). I jump onto the P16 Mobile Workstation (23H2 Build 22631.4169). It shows me the exact same onscreen keyboard, with the same missing items. And indeed, it’s identical to the onscreen keyboard I see in Windows 10, too, with the same top-left icon menu and behaviors. Now, I think I have a clue…
Emailing Lenovo to ask about this. If I learn anything interesting I’ll be back in touch in this post… Isn’t that just the way things sometimes go, here in Windows-World? You betcha!