Microsoft Outlook, in both its local and cloud forms, is an interesting beast. For those with Microsoft 365 or similar subscriptions, that goes double. For such instances, Outlook uses OST (Online Storage Table) files, which maintain fluid, shared snapshots of Outlook “stuff” (e.g. messages, events, contacts, and so forth). Such files live mostly in the cloud on an Exchange server. Outlook also uses Personal Storage Tables (stored in PST files locally on a PC) as well. But while Outlook allows users to export and import from other files, OST files won’t support this activity: PST is your best bet.

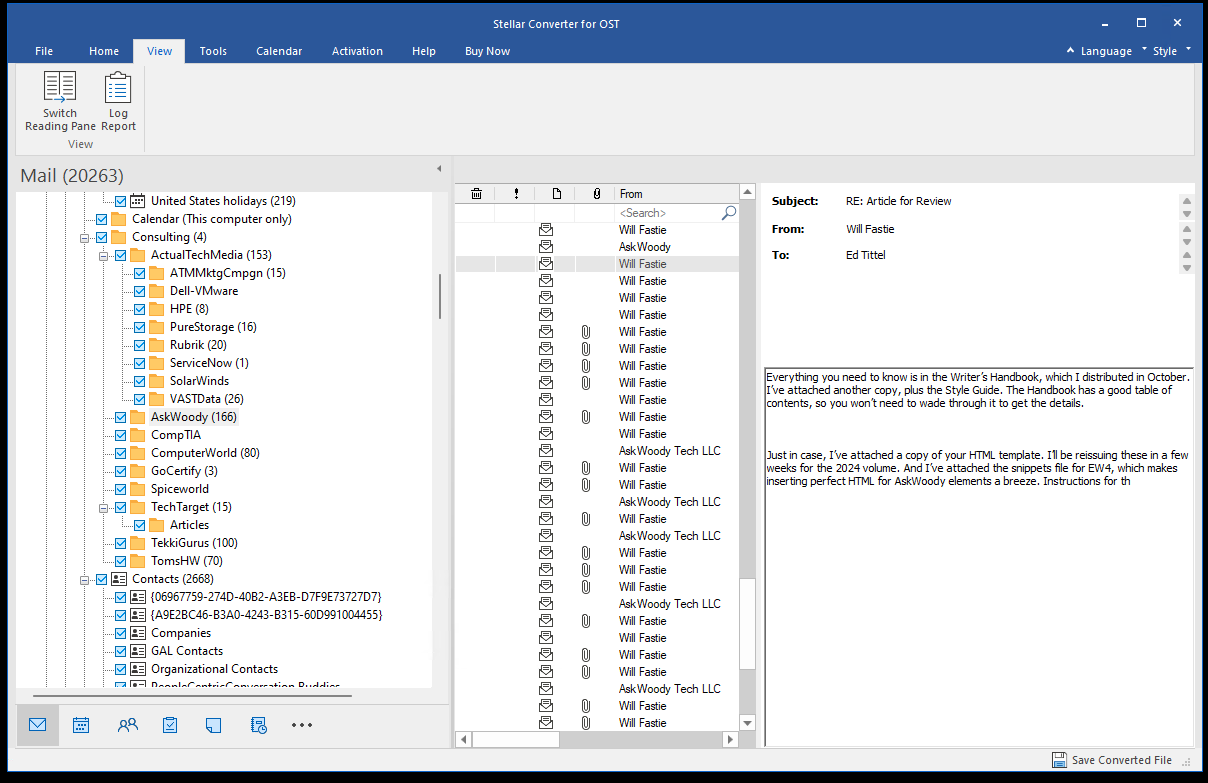
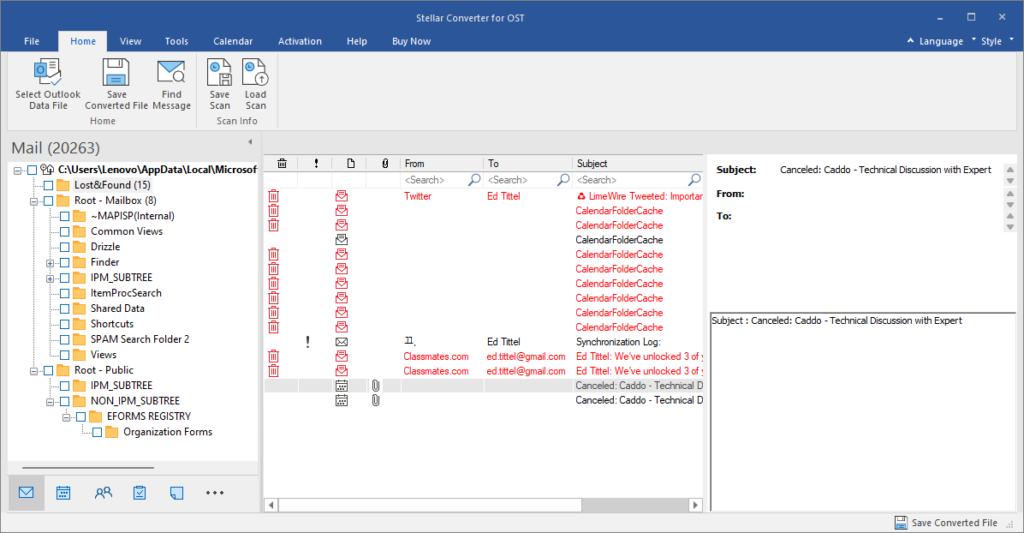
Here’s what STELLAR OST CONVERTER looks like, once you complete the initial conversion step.
Why Is Stellar OST Tool Worth Grabbing?
Simply put: the STELLAR CONVERTER FOR OST provides a quick and easy way to convert OST to PST files (local to the PC) with just a few mouse clicks. Indeed it can even recover “orphaned” OST files — those no longer readily available inside Outlook itself — by scanning folders where OST items live. It then happily converts everything it finds to PST.
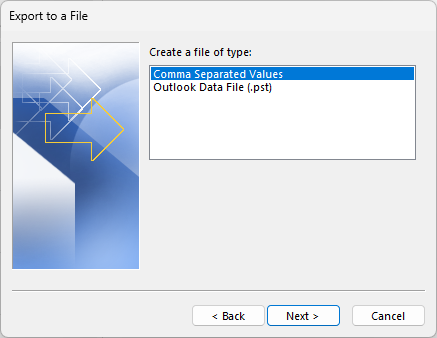
Outlook’s export/import capabilities embrace PST files, but NOT OST files.
As the preceding graphic shows, Outlook exports its contents to PST. A similar dialog for import shows those same options. OST, I’ll observe, is conspicuously absent. Thus, this tool provides a great way to create backup PST collections to match Outlook accounts and related file holdings. These can get quite large: mine is currently around 3GB in size (I’ve seen them as big as 14GB). Conversion takes awhile: about 15 minutes in all (7.5 to scan and enumerate, 7.5 to save) . That said, PST files are browsable repositories, and can restore entire Outlook data collections if necessary.
Exploring This Stellar Tool…
In graphic captioned “initial conversion step” above, you see the STELLAR CONVERTER FOR OST, showing the contents of the Consulting/AskWoody folder. As you can see, it captures all of my recent message traffic, and can show individual message contents in the reading pane at far right. The left-hand pane shows the folder hierarchy; the center pane shows message info. Note: deleted messages appear in red in their parent folders (as well as in Trash).
In fact, the STELLAR CONVERTER FOR OST offers several noteworthy additional capabilities:
- Handles large OST files: It took about 15 minutes, but STELLAR CONVERTER FOR OST handled my huge collection of Outlook data. That included messages, contacts and calendar data . The time to scan is roughly equal to the time to save what’s been scanned.
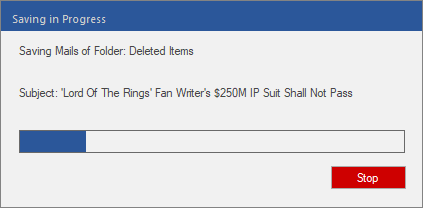
By some quirk of fate, the subject of the current message pops up as STELLAR CONVERTER FOR OST save handles Outlook message store.
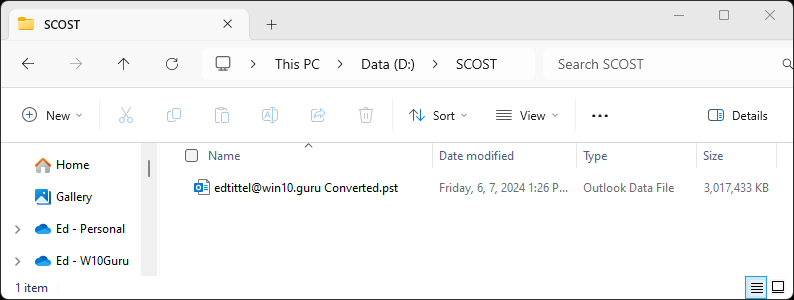
Once saved, the converted PST file weighs in at just under 3.0 GB (3,072MB).
- Handles encrypted OST files: STELLAR CONVERTER FOR OST can read and decrypt encrypted OST files, and save them in PST format. When mailbox or server synchronization issues impede server-based decryption, STELLAR CONVERTER FOR OST delivers them in readable PST form.
- Global purview for Outlook data files: STELLAR CONVERTER FOR OST finds and lists all OST files. That includes those from IMAP plus Exchange or Microsoft 365 message profiles. Users can easily select and scan OST files to extract specific items. STELLAR CONVERTER FOR OST also offers a powerful “Find” (search) function. It even shows orphaned messages in a Lost & Found folder, like this:
The Lost&Found folder in STELLAR CONVERTER FOR OST contains orphaned Outlook items — mostly Calendar stuff.
- Complete OST coverage: SSTELLAR CONVERTER FOR OST extracts everything from OST files. Beyond email messages, it handles attachments, contacts, calendars, tasks, notes, journals, and more. It even handles OST to PST conversion with no need for Exchange profiles.
But Wait: Still More Recovery…
Beyond these specifics, STELLAR CONVERTER FOR OST is useful for recovering from OST synchronization failures. These can occur when
- the client view of what’s current and correct diverges from the server’s view
- when mailbox issues (loss, damage, corruption) present themselves
- clients wish to recover deleted items no longer present in the Trash folder. You can see such deleted items in red in the preceding screencap (assume they’re more useful than canceled appointments, please).
OST conversion provides a PST upon which to base a new, shared view of Outlook contents and to re-establish proper agreement.
Vitally, STELLAR CONVERTER FOR OST offers recovery should the server behind Hosted Microsoft Exchange service be damaged or hacked. That is, this program can provide PST files from which to rebuild and restore mailbox data to Office 365 or Microsoft 365 servers. This same capability also enables quick migration from Hosted Exchange to O365 or M365 with minimal effort, and no risk of data loss. Good stuff!
STELLAR CONVERTER FOR OST Costs & Cons
STELLAR CONVERTER FOR OST comes in 3 versions: Corporate, Technician and Tookit, with respective licensing fees of US$79, US$149 and US$199. See their “Buy Now” page for a complete comparative features matrix. The TLDR version is that higher-priced versions offer more and better repairs: Technician adds batch file conversion, more advanced PST handling, exports to live Exchange and O365, plus Contacts in CSV format to the mix; Toolkit does all that, plus corrupt PST repairs, total mailbox restores, more format options, PST merge, password recovery, and a whole lot more. Of course, you’d expect to spend more for higher-end program versions, but they do come at higher costs.
For years, I’ve relied on Outlook to maintain a journal of all the emails I send and receive. It’s an astonishingly detailed and accurate record of my professional and financial life. STELLAR CONVERTER FOR OST provides me with the confidence that I can access and rely on my “email trail” to document and manage a busy working schedule, an upcoming calendar, and a sizable list of professional colleagues and contacts.
The more you rely on email to help run, document and prove up your activities, assignments responsibilities, and professional network, the more you need STELLAR CONVERTER FOR OST. It’s definitely worth having, if only as a way to insure yourself against loss of or damage to vital working assets.
[Note: I produced this item after Stellar contacted me to ask me to write and post the piece. I am invoicing them for a modest fee as well. That said, the opinions herein are my own, and I stand by my recommendation of this product.]