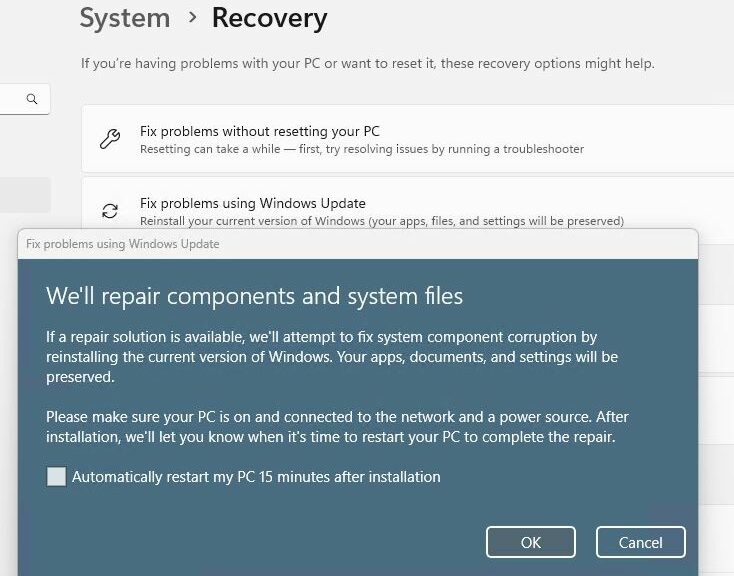
I’ve been waiting for this to show up for a while. Now it’s finally here. In build 23635.3130, Windows 11 Beta channel finally shows the “Fix problems using Windows Update” button. It appears in Settings → System → Recovery. You can see it in the intro screenshot above. I call this an “in-place upgrade repair” (sometimes, I add “install” to the end of that phrase) because it’s been a known technique for a decade and longer under that name. But when Beta Channel gets in-place upgrade repair, MS describes it as “Reinstall your current version of Windows” — a completely acceptable alternate label. Whatever you call it, it’s great to have it built right into the OS now.
As Beta Channel Gets In-Place Upgrade Repair, Use It!
The idea behind the in-place upgrade repair (install) is to replace all of the current — and suspect, or possibly damaged or deranged — OS files with known, good, working versions. This is a powerful Windows repair technique, and one of my go-tos when more focused troubleshooting tries and fails to fix things. This built-in version has the advantage of grabbing everything it needs from Windows Update and doesn’t require admins or power users to download and build an ISO, mount the image, and then proceed from there. It’s much more hands-off than that (but also more time consuming). No need to build custom ISOs at UUPDump.net, either.
Another Great Way to Fix Windows 11
As long as Windows is still running, this may be the best way to run the in-place upgrade repair install. But don’t pitch out your rescue media, boot drives, and especially not your backups. This tool can’t cover all contingencies. You’ll still need that other stuff when Windows won’t boot or run the setup.exe installer on which this maneuver depends. But even so, it’s a great addition to the Windows repair toolbox.
In fact, I can’t wait to try it out! Thus, I just fired it off on a test machine to see what happens. Here’s an approximate timeline rounded to the nearest 5 seconds:
00:20 Checking for updates
07:15 Downloading install files (“Downloading”)
32:45 Installing replacement OS (“Installing”)
02:20 Time from “Installing – 100%” to “Restart now” button
02:35 Time with “Updates are underway” prior to reboot
03:30 First reboot to second reboot (jumps to 54% after)
05:10 Second reboot to lock screen
02:15 Transition through “Welcome” to Desktop
Total time elapsed: 55:10
Trust me: this takes a LOT longer than mounting an ISO and running setup.exe to handle the repair install. OTOH, all I had to do was push a few buttons along the way. Just be prepared to give it some time.