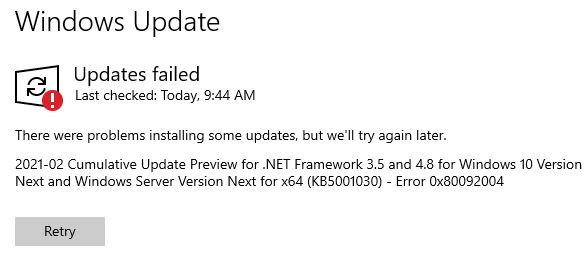
OK, then: i’ve recently reported a documented issue with KB5001030. It’s a CU Preview for .NET 3.5 and 4.8 and has been documented in the 21364 release announcement as a “known issue.” But now, a new cumulative update KB5003397 — a so-called “do-nothing update” which “does not include anything new and is designed to test our servicing pipeline” is out. However, my 21364 update woes continue because now I can’t install either one of these new updates. Sigh.
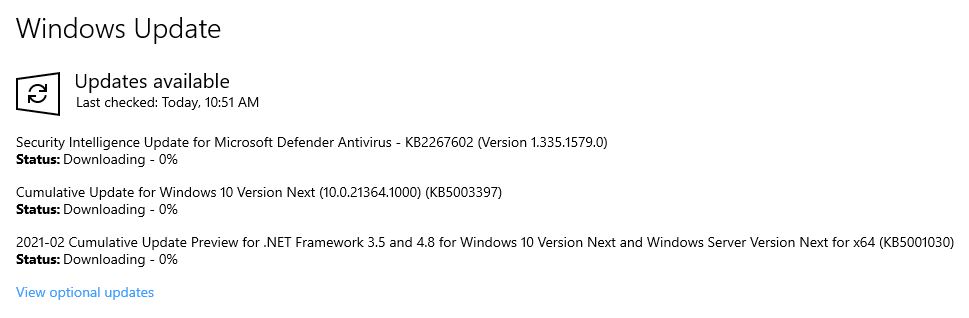
Nothing happens, in fact, when I try to update my Lenovo X220 Tablet. As the lead-in graphic above shows, it hangs while downloading at 0% completion. Running the update troubleshooter or even the TenForums Update Reset Batch Script doesn’t help either. Thus I say: my Dev Channel machines are stuck, going nowhere fast!
What Does 21364 Update Woes Continue Mean?
It means I can’t update either of my Dev Channel Insider Preview test machines successfully right now. I also think it means that I’m waiting on the next Feature Upgrade (a new version, in other words) to get things moving again. It’s a little hard to tell.
My gut feeling is the update pipeline is currently blocked for Dev Channel images (on my two test machines, at least). Usually, when things go sideways with Insider Preview updates I can figure out some way to get around the roadblock, though.
Later on today, or perhaps tomorrow, I’ll visit UUPdump.ml and see if they’ve got a 21364 image that can slipstream in those two troublesome updates. If so, I’ll build an ISO and use it to perform an in-place repair upgrade as a workaround. Right now, I’m increasingly convinced it might be my only way around this roadblock.
Stay tuned! I’ll report back and let you know if that works. It’s possible that working offline on the image might get around whatever is interfering online (it often does). We’ll see…