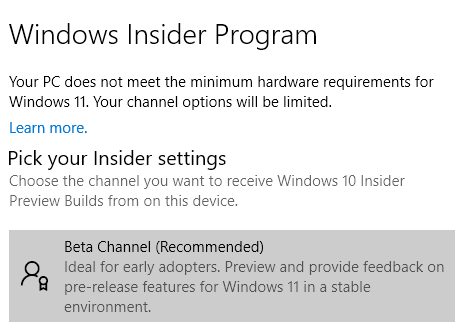
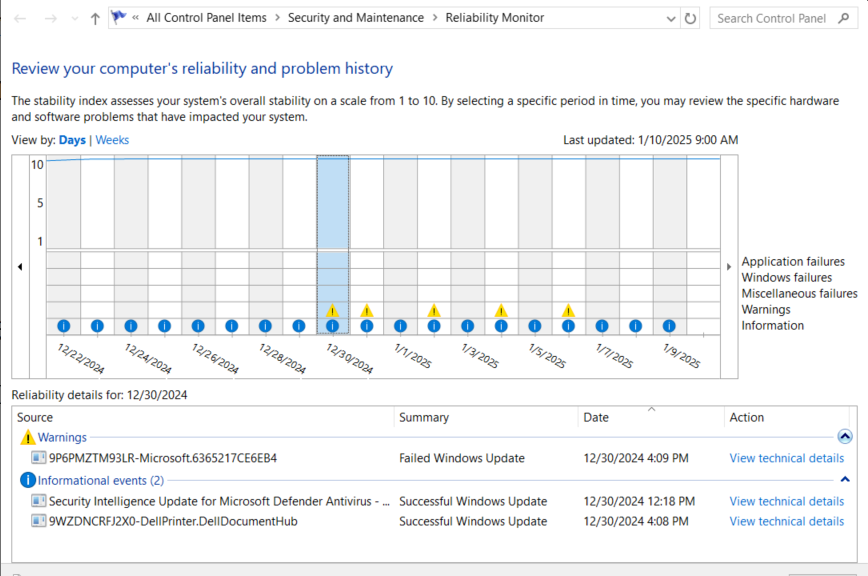
When I report a Windows puzzle, I usually like to provide a solution. But I just noticed something odd I may not have time to solve today. It looks to me like a weird Win10 Insider mismatch. Let me explain: my production PC is signed up for the Beta Channel, as you can see in the lead-in graphic. But a quick Winver run shows that PC running version 19045.5371 (see below). Alas, the current Beta Channel Insider Preview Build is 19045.5194. And there’s the mismatch in plain sight!
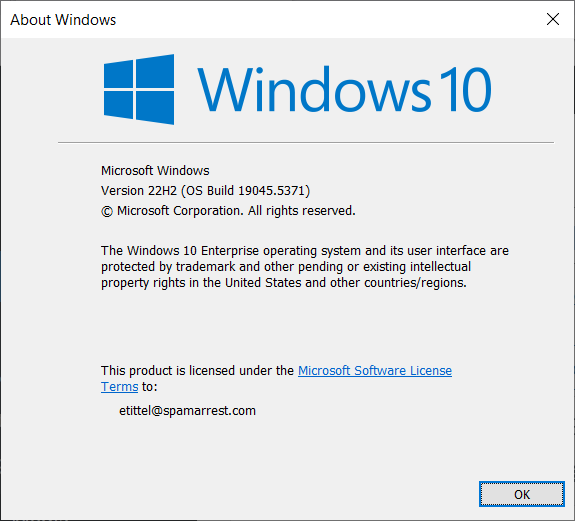
The Build number on this supposed Beta Channel PC corresponds to the current public/production release.
Fixing Weird Win10 Insider Mismatch
Upon closer examination, the Beta build is lower than the current production build. Looks like I want to switch to the Release Preview channel at Build 19045.5435 instead. Let me try that… No joy.
So then, I do some more poking around online, turns out I need to re-select the Beta Channel item (see lead-in graphic) and open its subsidiary window. That lets me switch to the Release Preview channel. Then when I pop back up two levels to re-run an update check, I get what I want:
Turns out my problem is an error in understanding how to switch from Beta to Insider Preview channel: problem solved!
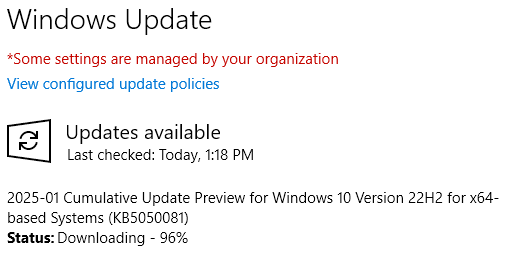
Looks like the download and install are working. I’ll be rebooting soon: installing has reached 100% but not yet flipped over to “Restart pending…” Now it’s installing again … 20% … taking much longer … 45% … 73% … 88% … done. Restarting now… AAAAND winver now shows 19045.5435.
Turns out it wasn’t a channel mismatch: I was on the wrong channel FWIW, Copilot tells me that MS is shutting down Beta Channel, but is continuing to release into the RP (Release Preview) Channel. Hence, my need to change channels to get to the right build level. Apparently, I missed that memo. All fixed now!
As always here in Windows-World, fixing things is easy when one knows what to do. This time, it took me a while — and some new info — to figure out what that was. Go figure!
