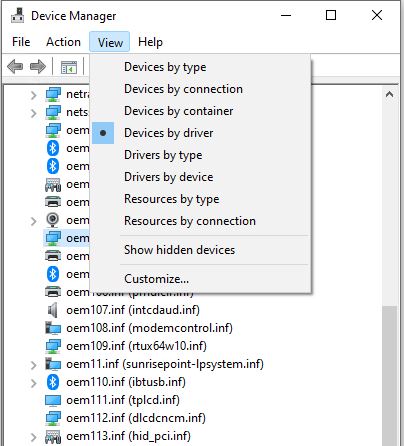
Here’s something new and interesting. Dev Channel Insiders can see a new View menu option in Device manager. That’s right: with Build 21370, DevMgr gets View Devices by Driver option.
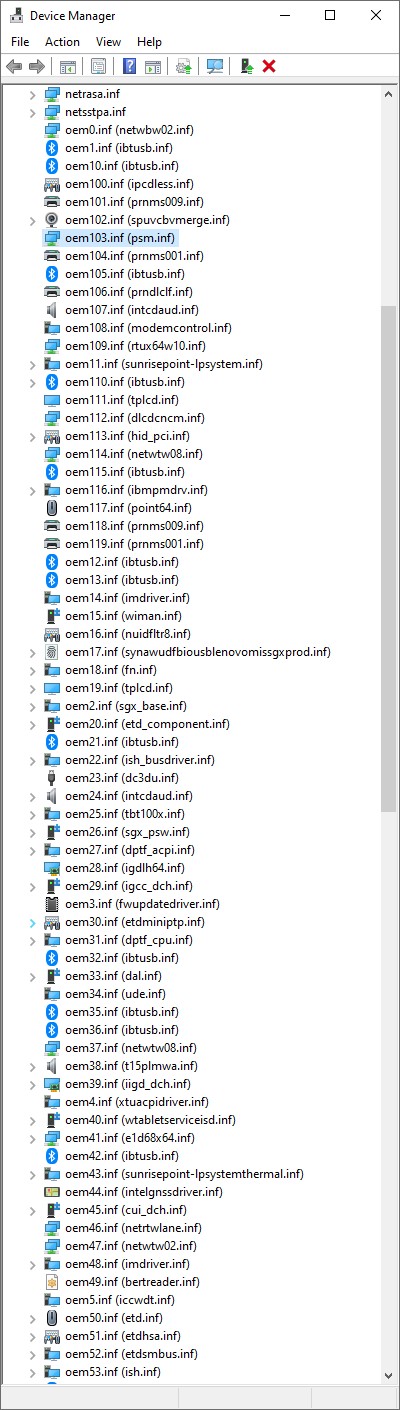
The menu element is shown in the lead-in graphic for this story, above. To the left, find a long version of that same screencap. It’s menu-free and shows just under half of the total listing that appears.
Please note: you can see all drivers listed using oemnnn.inf names. In fact, these are assigned as drivers get installed. To the right, you see the true driver name — e.g. netwbw02.inf for oem1.inf –which tells you it’s a Bluetooth networking driver of some kind.
This Lenovo ThinkPad X380 Yoga has 119 drivers installed. That’s a pretty normal count for a Windows 10 PC.
As I look at my other Windows 10 PCs, I see driver counts as low as the low 80s to as high as the low 200s. Actually, that number depends on how many devices (both Microsoft and third-party) are installed in some specific Windows 10 image. Indeed, what’s present and accounted for is what shows up in such tools and their listings.
Is DevMgr Gets View Devices by Driver Option Good?
The purpose of the change, according to Sergey Tkachenko at WinAero.com, is to “make it easier to see what hardware is using which drivers.” I’ve grown fond of the GitHub project DriverStore Explorer (RAPR.exe) for that same purpose, but it is nice to get easy access to the OEM numbers associated with drivers as in this view. Any device name with a carat to its left (e.g. oem11.inf) is actually the root of a device tree. Expand same by clicking the carat and you see various PCIe, LPC and PMC controllers for which it is a parent.
This view is pretty handy for understanding how some hardware elements in a PC are related to others. In fact, this makes for an interesting, informative and useful addition to Device Manager. It’s rumored to be targeted for inclusion in the 21H2 “Sun Valley” release of Windows 10. That’s far enough out that it could easily change. Stay tuned, and i”ll keep you informed. DevMgr has always been a fave tool for me, so I’m more than just a little interested.