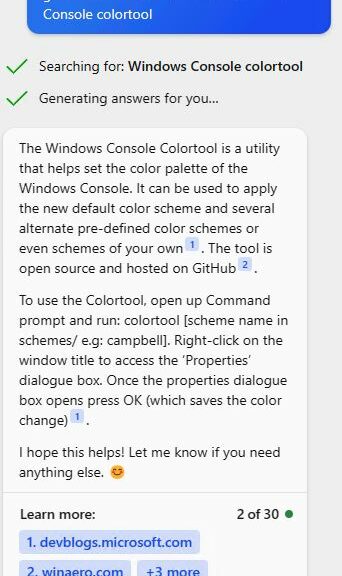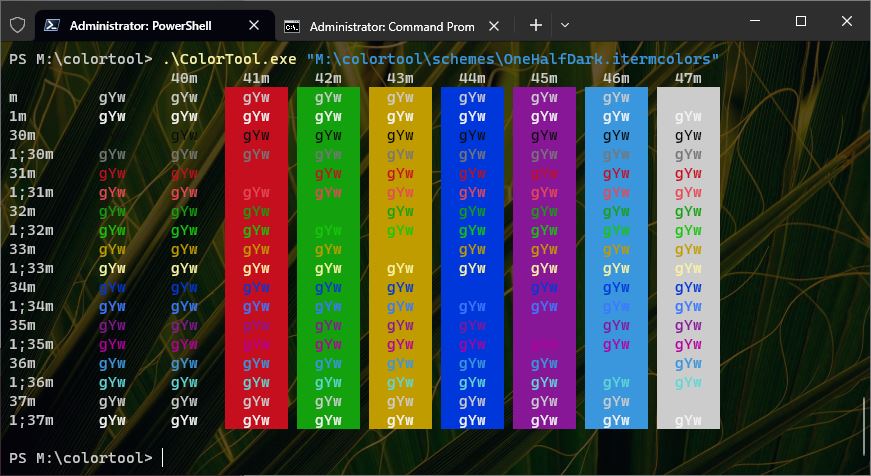
In my writing and research work for TekkiGurus, I’m pursuing a GitHub project that works within the Windows Terminal environment. It’s called ColorTool. Simply put, ColorTool shows the colors used in the console window; it also lets you tweak them. Its color charts are kind of interesting and I’ve trying to figure them out. MS has a tendency to show them inside an Ubuntu command session inside Windows Terminal. I show them as they pop up in PowerShell in the lead-in graphic. As I’m learning how this all works, I’m sussing out WinTerm color schemes, too.
Bing Chatbot Helps When Sussing Out WinTerm Color Schemes
I’ve been reading a lot, and asking around to try to learn how to decode the values that show up in the display form of a Windows Terminal color scheme. So far, it’s proved rather more challenging than I had expected. So far, I’ve been attacking output strings to tease out their meanings. This is what I’ve learned so far, mostly thanks to the Bing Chatbot in Windows 11 Canary (Build 25393):
- The string “gYw” that appears in the columns of rows 2-10) stands for gray, yellow and white. It uses prevailing foreground color, whatever that may be.
- The values 30m through 37m that appear as row heads (first column left) are ANSI escape codes for foreground colors
- The values 40m through 47m that appear as column heads (second column through 9th column left) are ANSI escape codes for background colors.
- Looking at the color chart, the text strings “gYw” show the foreground color, while the solid bar for each column shows the background color.
In profound contrast, Ubuntu puts foreground colors as columns, and background colors as rows. I also shows escape sequences instead of color names. Initially, this bamboozled me. But now I see what’s going on…
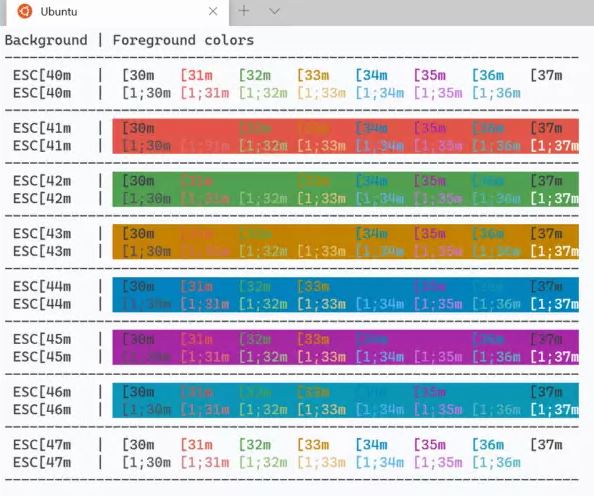
Notice that background appears as double rows with escape codes at left in column 1, and foreground colors appear as the text for escape codes in rows 2-9).
Wow, it’s all starting to make a certain amount of sense. And I mostly have the Bing Chatbot to thank for explaining such extremely low-level details. Apparently, those who work with terminal/console color charts know all this stuff already.
Now, I finally understand that a color scheme assigns a range of color values to the 8 ANSI escape codes for the foreground colors 30m through 37m (which may also be expressed as ESC[30m …). It does the same for the 8 ANSI escape codes for the background colors, too (40m through 47m, likewise ESC[30m).
OK, Now I Know What’s What
Suddenly, I feel armed with the information I need to make sense of the Windows Terminal color schemes and their related color charts. This should make my jobs of explaining them, and their customization, a WHOLE LOT easier. I’m jazzed…