Category Archives: Tips, Tricks and Tweaks

Want to know how to make the most out of your Windows 7 system?
Here we share the things we have learned for what to do (and what not to do) to make Windows 7 perform at its best.

Windows Wallpapers Live Elsewhere

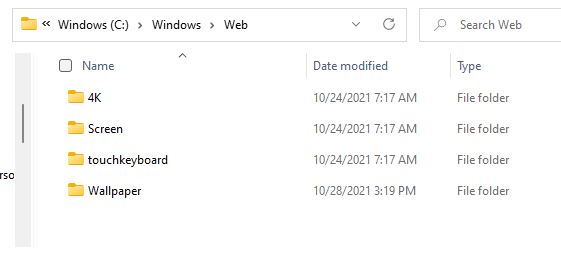
Here’s something I didn’t know, that you may not have known, either. Wallpaper images for both Windows 10 and 11 live in a separate folder hierarchy under C:\Windows\Web. That hierarchy appears as the lead-in graphic for this story. The parent folder spec is C:\Windows\Web. In Windows 11 each of the four subsidiary folder contains 2 or more images, all suitable for wallpaper use. When I say Windows wallpapers live elsewhere, I mean they live in their own private directory, as indicated.

If Windows Wallpapers Live Elsewhere, Visit Them

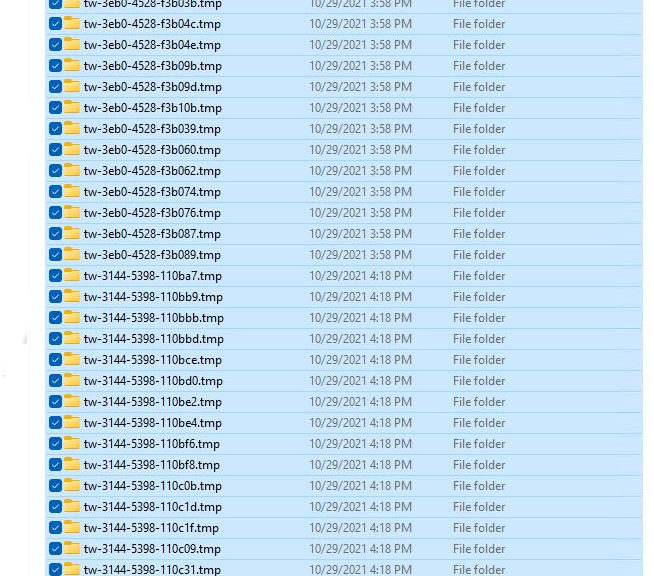
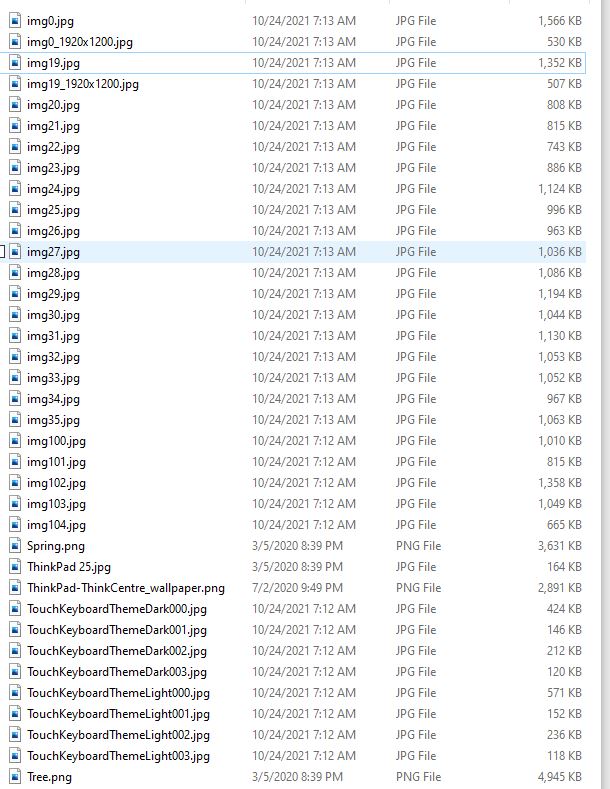
I spelunked around the four-folder hierarchy and found 37 images therein. Many of them are based on those twisting laminar surfaces that have come to stand for Windows 11. I copied all of them into a single directory so I could find them all in one place. The next screencap shows a listing of those images by filename. You’ll probably want to set a similar view to Extra Large or Large icons, so you can identify them by visual content (I did it this way for compactness).

WWindows Wallpapers Live Elsewhere.details

What to do With Windows Wallpapers

Overall, they’re an astonishing collection of images and graphics. Microsoft operates an image service named Spotlight, that curates over 4,000 high-quality professional images of nature, cities, objects, and more. All of these work well for desktop backgrounds and lockscreen images. I have an older app from Timo Partl (no longer in the Store, alas) that does a great job of visiting the Spotlight connection and downloading anything I don’t already have locally to a target directory. For those of you who, like me, like lots of variety in your lockscreens and backgrounds, this provides a trove of beautiful eye-candy of amazing variety and great quality.

I’m adding these wallpapers to that collection. I assume that means they’ll show up occasionally, as the forces of random selection dictate. Check out the 11 wallpapers and feel free view them as and when you like. Cheers!

Note Added Nov 4

I got a great tip from my fellow WIMVPs about this–namely Shawn Keene. He observes that if you open the Run box (WinKey+R) and type “web” into the box, then hit OK, it will open a fresh instance of File Explorer to that directory. Very handy!

Facebooklinkedin
Facebooklinkedin

Kill These Windows 11 tw*.tmp Folders

Here’s an interesting bit of news. After seeing reports about folders that end with a .tmp extension (!) in Windows 11, i found some on every machine I checked running that OS. These folders are invariably empty, and may be safely deleted. When I say: Kill these Windows 11 tw*.tmp folders, you shouldn’t suffer any adverse effects if you take that advice.

See a representative list in the lead-in graphic for this story. The folder spec is clearly spelled out therein. For the record, it is:

C:\Windows\System32\config\systemprofile\AppData\Local

Why Kill These Windows 11 tw*.tmp Folders?

Because they’re empty. Because you don’t need them. And because they can swamp the other, valid data in that folder. I read reports of “hundreds” to “tens of thousands” of such empty folders at WinAero and Ghacks.net. The largest number I found on any of my Windows 11 PC  was 94. Ironically, it was the one running Build 22000.258, a recent production 21H2 version. My other Beta and Dev Channel PCs had between 40 and 50 such folders in the same directory, by way of comparison.

After cleanup, here’s  what’s left in that folder on my i7-8850H X1 Extreme laptop:

Kill These Windows 11 tw*.tmp Folders.post-cleanup

Not much left after cleanup: 5 folders and a lone .tmp file
[Click image for full-sized view.]

Over at Ghacks, Martin Brinkmann correctly observes as follows. “Empty folders don’t take up much disk space and they don’t interfere with the operation of the system.” It’s not mandatory to clean them out yourself. But OCD inclined Windows users (like me) will nevertheless delight in doing so!

Note: According to Brinkmann’s in-story reference to Woody Leonhard (AskWoody) this issue appears in 2019 versions of Windows 10, through current versions, too. And right now, I count a whopping 1,115 of them on my production desktop as I send them to the Recycle Bin. Woo hoo!

Facebooklinkedin
Facebooklinkedin

PowerToys v0.49.0 Gets Video Conference Mute

Clint Rutkas and his team have been talking about it for months. I’ve been waiting to check it out myself. That’s right: in its latest release, PowerToys v0.49.0 gets video conference mute capability. Right now it’s available through GitHub, though I expect it’s just a matter of time before it comes via the Microsoft Store. The new control page in settings serves as the lead-in graphic for this story.

What PowerToys v0.49.0 Gets Video Conference Mute Means

I run at least 4 different video conferencing platforms regularly: Zoom, Teams, Blue Jeans, and Google Meet. From time to time, I’ll get invited to another, similar platform for online meetings. Each of them offers a mute capability, but each one uses a different control in a different place in its app window.

What I like about Video Conference Mute in PowerToys is that it offers one single set of controls for mike and camera, for all such apps. Here’s the set of keystrokes it uses:

PowerToys v0.49.0 Gets Video Conference Mute.keys

Keys to toggle the mike and video together, or separately. Good stuff! (Source: PowerToys built-in Welcome docs)

For those already using PowerToys, an update is in order. For those not already using the tool, you can simply run the installer and it will set you up. Then, right-click the PowerToys icon in the notification area to open its UI, and go to the VCM pane. There you simply need to move the slider labeled “Enable Video Conference Mute” to on (as shown in the lead-in graphic if you exercise the option to view it on its own web page). It’s just that easy. I already liked PowerToys a lot, but this latest and long-anticipated addition just made me like it a whole bunch more. Check it out.

Facebooklinkedin
Facebooklinkedin

Windows 11 Says Sayonara WMIC

Because it was announced in Windows 10 21H1, it was just a matter of time. The Windows Management Interface Command-Line utility, aka WMIC, is deprecated. No longer simply slated for oblivion, WMIC is missing from the Dev Channel version of Windows 11. The lead-in graphic shows what (doesn’t) come up in cmd.exe for Build 22483 and higher. Hence my title: Windows 11 says Sayonara WMIC. For the record, it’s still in production Windows 11 versions but reads “WMIC is deprecated.” in red.

Windows 11 Says Sayonara WMIC.Win11-prod

Notice the red text at top of help response. It’s MIA In Dev Channel versions now.[Click image for full-sized view.]

Though Windows 11 Says Sayonara WMIC, WMI Remains Around

Microsoft has good advice for would-be WMIC users. They should  use PowerShell replacement cmdlets instead. Turns out that the Windows Management Interface (WMI) remains alive and well. In a story about this change-over, WinAero.com suggests using a specific PowerShell command to learn more:

Get-Command -Noun WMI*

For the record, that string produces the following output that shows this is just the beginning of a sizable set of cmdlet documentation.Windows 11 Says Sayonara WMIC.ps-info

The 5 cmdlet WMI facilities: Get, Invoke, Register, Remove and Set.
[Click image for full-sized view.]

Each of these five facilities has its own muti-level help files. Looks like the switch-over is supported. That said, it requires climbing a new learning curve to bring users under the PowerShell umbrella.
Cheers!

Facebooklinkedin
Facebooklinkedin

Windows 11 ADK Is Now Available

If you know where to look, the Windows Assessment and Deployment Kit (ADK) is now out for Windows 11. Indeed, you can find it in MS Docs at Download and install the Windows ADK. That’s why I assert that the Windows 11 ADK is now available in this item’s title. What does this buy you and your organization? I’ll explain…

If Windows 11 ADK Is Now Available, Then What?

The ADK includes collection of potentially useful and valuable tools designed for at-scale Windows deployments. These include access to:

  • WinPE, the Windows Preinstallation Environment that provides runtime support before an OS has loaded. It’s used to support Windows installation and also provides the foundation for WinRE (Windows Recovery Environment). Basically, it’s a stripped-down and self-supporting portable version of Windows (11 in this case). Note: WinPE is a separate add-on to download and install after installing the ADK.
  • Volume Activation Management Tool (VAMT): works with Windows Office and other Microsoft products for volume and retail activation using Multiple Activation Keys (MAKs) or the Windows Key Management Service (KMS). Works as an MMC snap-in with the Microsoft Management Console (MMC).
  • User State Migration Tool (USMT) delivers a customizable user-profile migration capability that can capture user settings for Microsoft office versions 2003, 2007, 2010, and 2013 (separate tool for 2016 also available). The tool covers a broad range of migration scenarios (described here).
  • App-V (Application Virtualization) is still supported, but MS calls out EOL for April 2026, and now recommends using Azure Virtual Desktop with MSIX app attach instead.

From a different perspective, the ADK includes support to assess, plan for and execute large-scale Windows deployments. Assessment comes from the Windows Assessment and Windows Performance toolkits. Deployment tools include WinPE, Sysprep, and other items that can customize and distribute Windows images.

It’s Early in the Lifecycle…

Organizations are mostly still considering Windows 11 deployments, though some pilots are underway. Grab yourself a copy of the new ADK and you can get to know it, as your organization starts pondering and investigating its Windows 11 options and timetables. Cheers!


Facebooklinkedin
Facebooklinkedin

Clean Install Still Cuts Gordian Knot

The old, old story of the Gordian knot traces back over 2 millennia. It’s meant to illustrate that difficult problems may be overcome by a variety of means. Usually, as with the original story itself, some of them are drastic. When unable to untie the knot, Alexander the Great drew his sword and cut it through instead. He lost the rope, but solved the problem. And so it is with some Windows problems, where a clean install still cuts gordian knot issues that other repairs cannot address.

If Clean Install Still Cuts Gordian Knot, What Made it Necessary This Time?

I’ve been helping a friend over the past two weekends try to solve an iCloud to Outlook synchronization problem. To his credit, he put in two lengthy calls with MS Support, and performed an in-place upgrade repair install. His primary symptoms were:

1. Unable to download iCloud from the MS Store
2. If installed manually, unable to get iCloud and Outlook to synchronize. Interesting but weird error messages about “no default Outlook profile” suggested possible fixes, but none of those worked.

After attempting numerous manual repairs and tricks last weekend without success, I showed up this weekend planning to perform a clean install on his wife’s laptop, a Dell Latitude 7155 (i5, 4th gen Intel CPU). It took me somewhat longer to get the disk cleaned up and a pristine image laid down on her NVMe SSD than I had thought it would.

But once a clean Windows 10 image was installed and updates applied, I was able to download iCloud from the Store. Next, I revisited office.microsoft.com and re-installed Office 365. The acid test followed immediately thereafter: I attempted to synch with iCloud for messages, contacts, and other Outlook items.

To nobody’s particular surprise, it worked. But gosh, it sure took a while to get everything ready (Macrium Reflect came in hand indeed). And it took longer to install and update the OS image than I was expecting. But in the end, the outcome was as desired. So far, we’ve put about 7 hours into this repair effort. Alas, it’s still not quite done just yet.

One More Thing…

I mounted the Macrium backup to make it available for copying older files to the rebuilt desktop. But because of permissions problems I wasn’t able to access some key stuff. So, I’m going back in one more time to fix those and grab the additional stuff my friend needs. Hopefully, that will be as routine as I anticipate. In the meantime, I’m boning up on the ICACLS command so I can reset permissions wholesale, and make everything one might need from the backup available in one go.

At the end of the day, it’s nice to know the tried-and-true methods work like they’re supposed to. I can only guess that some vital plumbing between the Outlook and iCloud APIs got munged in the old runtime environment. By creating a new, pristine one, we have apparently fixed what was broken. Old school still rules. Good-oh!


Facebooklinkedin
Facebooklinkedin

Start11 Gets v0.9 Update

Some running Windows 11 who might want an alternative to the native Start Menu. For those folks, Stardock’s latest Start11 release offers a nice option. Please understand this is NOT free software. Those upgrading a Start10 license must pay US$4 for the bits; first-time buyers must pony up US$5. Either way, it’s a pretty good deal IMO. As a long-time user, when Start 11 gets v0.9 update, I pay attention. Others may not be so inclined.

When  Start 11 gets v0.9 update, What Do You Get?

Start11 gives users a pretty broad range of functions for a small price. It allows them to make the Start Menu look like the ones from Windows 7, 8 or 10 (and of course, 11 as well). Here’s the UI “pick a version/layout” control:

Start11 Gets v0.9 Update.sm-style

You can pick from Windows 7, 8 (Modern style), 10, and 11 styles for the Start Menu layout, look, and feel.

You can pick an icon for the start button, and position the start button at left or center in the taskbar (or even up top). As for the taskbar itself, Start 11 offers a number of controls, including blur, transparency and color; the ability to apply a custom texture; right-click menu controls (which bring back the old Windows 10 style right-click pop up), and a bunch of tweaks for taskbar size and position, plus separate positioning controls for primary and secondary monitors. I like it, myself.

Search can be tweaked in a variety of ways, including disabling built-in search. Search result filtering can use icons, search can peruse file contents and well as names, and more.

Alternate Menus Appeal to Some

I know plenty of purists who want to use only native. built-in Windows controls and utilities. I am not such a person. If you are, Start11 will have no appeal to you. But if you’ve got users who want to be productive right away and already know their way around an earlier Windows version, Start11 can be a real blessing.

Right now, I’m running one machine with native facilities only, another with Start10 on Windows 11 (it works), and this one with Start11 set to run in modern layout mode. I’m watching for issues and gotchas, and will keep readers posted. I’m glad I feel comfortable getting around Windows11 using a variety of menuing tools and techniques. I remember being baffled, bothered and bewildered when Windows 8 first came out. Thank goodness, that’s no longer an issue.

Facebooklinkedin
Facebooklinkedin

Trick Restores Missing Chrome Scrollbar

OK, then. Here’s an oddity for my fellow Tenforums users (and possibly other heavy Chrome users). In navigating the forums there daily, I jump from forum to forum in order of appearance. Within each forum I read over new threads, as well as old threads with new content. Sometimes when I use the “Previous Thread” link at the bottom of each page to get to the next oldest item, that page comes up without a vertical scrollbar at the right-hand edge. Recently, I discovered that a certain trick restores missing Chrome scrollbar. Let me explain…

What Trick Restores Missing Chrome Scrollbar?

For a long while when the scrollbar disappeared I would switch between normal window and maximized window using the control at its upper right corner. When the normal window appeared, it would always have a scrollbar. And when I reverted to the maximized (full-screen) version, it would get its scrollbar back. This was a viable workaround, but a little too distracting to please me.

The trick I discovered last week is to use the down arrow to move the cursor deeper (downward) into the open web page. After the screen has to refresh to accommodate more new content at the bottom, the scrollbar also reappears. This takes little time, and is nowhere near as distracting as the two mouseclicks needed to revert to normal page size, then go back to full-screen mode. If you ever find yourself in this situation, try this approach. As it now works for me, it may do likewise for you.

What’s Causing This Bizarre Behavior?

I’m working on a dual-monitor rig. I run Chrome in the left-hand window with desktop extended across both monitors. My best guess is that sometimes, when I transition from one page to the next, the maximized view somehow “eats” the vertical scrollbar at the far right of the screen. Here’s what my layout looks like in Settings → System → Display.

Trick Restores Missing Chrome Scrollbar.display

With a Chrome windows on display 1 maximized, its right edge might sometimes impinge on display 2 territory.

Such is my theory, anyway. That said, I’m glad to have found a quick and easy workaround that keeps me chugging along without interrupting my concentration or workflow. These are the kinds of adjustments and adaptivity one must practice to do one’s job, and get things done, here in Windows-World.

Facebooklinkedin
Facebooklinkedin

Managing Windows 11 Defaults Gets Tricky

Oho! I just learned something interesting from Martin Brinkmann over at Ghacks.Net. It seems that in Windows 11, MS has re-jiggered the way default application selection works. In Windows 10 one could grab an application and associate it with all typical file or link types in one go. Alas, managing Windows 11 defaults gets tricky, because you must now choose them one at a time.

MS also supplies various defaults by default so to speak, which explains why Microsoft Edge shows up so persistently when opening web-related file types. Thus, for example, I count 22 such entries in Settings → Apps → Default apps → (Browser name here). I chose Google Chrome as my example in the lead-in graphic above. If you really want to make Chrome the overall default, you must jump into each of the 22 associated file or link types and pick Chrome from the pick list for each one.

Why Say: Managing Windows 11 Defaults Gets Tricky?

Maybe I should have said “labor intensive” instead. But “tricky” makes for a more compelling headline, so I’ll admit to taking just a wee bit of artistic license here. Truth is, as long as you know that this is how Windows 11 works, it’s the kind of thing you need to do once for those applications you want to make default when Microsoft supplies something different. This takes time and a little effort, but it’s not the end of the world as we know it by a long shot.

I’m hoping Nir Sofer reads this blog post, though, and whips out a Windows11Default tool to help automate this task. Seems like it should be fairly straightforward for someone with the right understanding of Windows internals to make this happen. I see a fascinating thread on this topic in the Spiceworld Forums that explains that GPOs and an XML file can do the trick. I’ll be noodling around with this for a while and see if I can figure something further out. Hopefully, Windows 11 and 10 work the same way in this regard. Stay tuned, and I’ll find out…

Facebooklinkedin
Facebooklinkedin

Check Windows TPM Status 2 Ways

What with Windows 11 looming ever closer on the horizon, more Windows 10 users will want to check TPM status on their PC. TPM is, of course, the Trusted Platform Module that provides hardware-level credential caching and encryption to protect systems from snooping and takeover. Today, I’ll show you how to check Windows TPM status 2 ways. One way uses a PowerShell cmdlet, the other way runs a Microsoft Management Console snap-in (an .msc file).

How to Check Windows TPM Status 2 Ways

Naturally, both methods require admin privileges. That is, you must run the cmdlet in an Administrative PowerShell session. Alternatively, you must be logged into an administrative-level account to access the proper MMC snap-in.

Way 1: PowerShell

Prosaically enough, the necessary cmdlet is named get-tpm. As its name portends, it provides detailed information about the presence and state of TPM on the target system upon which it is run. Go ahead, take a look:

Check Windows TPM Status 2 Ways.get-tpm

Note all the details about TPM presence and status. Source: my i7-6700 PC, which has no TPM.

Way 2: Run TPM.MSC (MMC Snap-in)

To take this path, simply type tpm.msc into the run command box or the Windows search box. It does not provide as much detail as the PowerShell cmdlet, but it is a little faster and easier to run. That said, here’s what its output looks like:

Check Windows TPM Status 2 Ways.tpm.msc

The TPM plug-in for the MMC just provides basic presence/absence information, though more data appears when a TPM is present (see next screencap below)
[Click image for full-sized view.]

TPM Info from Win11-Ready System

For comparison purposes here’s a side-by-side rendition of the PowerShell cmdlet (left) and MMC snap-in (right) from my 11th generation Lenovo X12 Hybrid Tablet PC. It meets the Windows 11 hardware requirements and tells its story about the TPM capabilities present on that machine. Note: 11th generation Intel CPUs provide TPM 2.0 emulation in firmware, rather than in a separate TPM chip.

Click image for full-sized view.

Facebooklinkedin
Facebooklinkedin