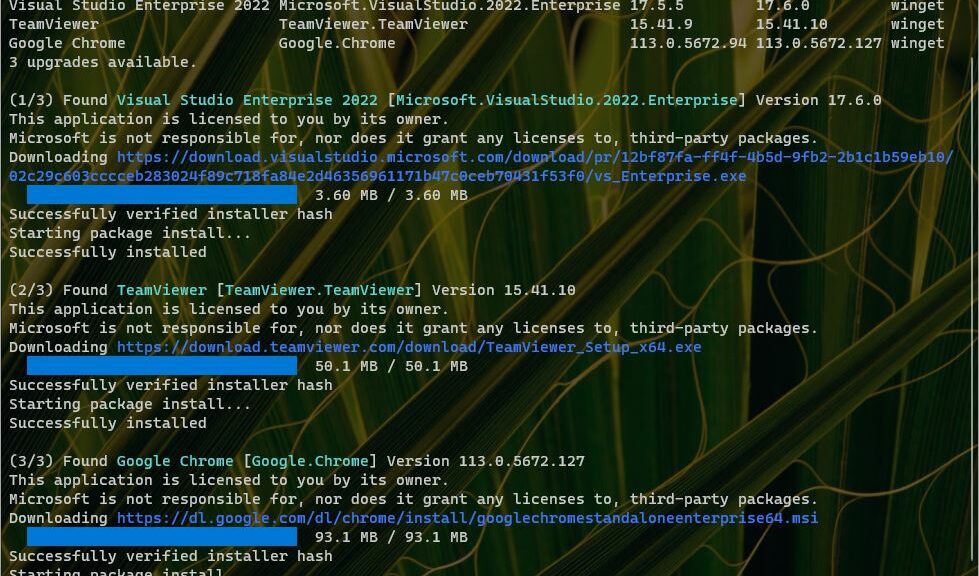
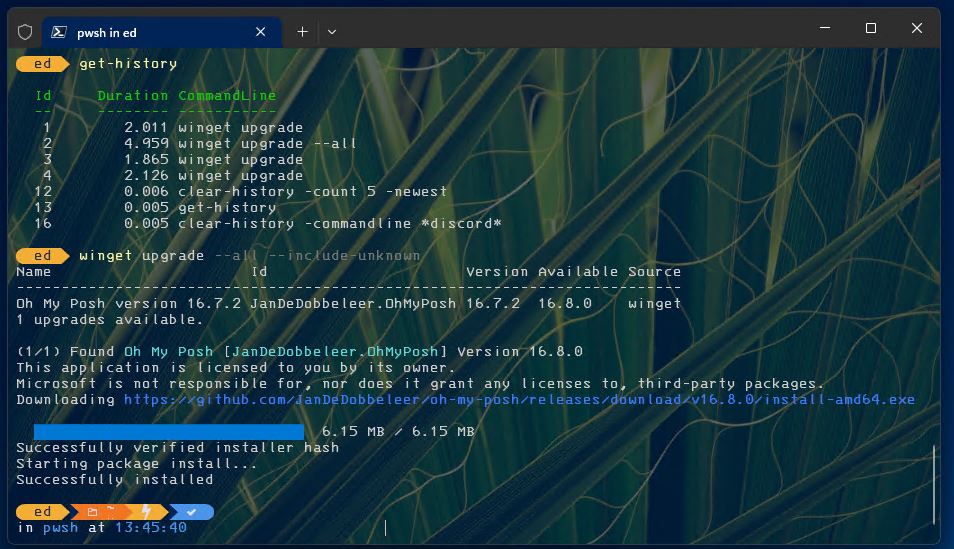
Category Archives: Cool Tools

Thunderbolt Monitor Makes Life Easy

OK, then. Lenovo sent me a terrific Thunderbolt 4 4K ThinkVision P27-u20 monitor. It actually showed up the day before Thanksgiving. It’s been sitting on my office floor since then, waiting patiently for me to get around to it. I’m working with the company to get a better sense of how Thunderbolt 4 works in an office environment. And indeed, now I can say from experience that a Thunderbolt monitor makes life easy for properly-equipped PCs and laptops.

Extremely narrow side and top bezels make for a compelling and nicely stackable monitor. [Click image for full-size view.]

Why Thunderbolt Monitor Makes Life Easy

Simple: plug it it, turn it on, set the device for dual displays and extend the desktop on a laptop. You can see how this looks in the Thunderbolt Control Center on the X12 Hybrid Tablet in the top graphic.

On the P360 Ultra, it fired up on its own when plugged into the front Thunderbolt 4 port. Colors are crisp, and the monitor appears to work as fast using TB4 as it does under either HDMI or DisplayPort. Better yet, the Thunderbolt-accessible ports on the monitor include TB4 in/out, 2xHDMI 2.0, DP 1.2, GbE (RJ-45), an audio mini-jack, and 2xUSB3.1 (1 USB-Type B, and USB-C is TB4 capable). It’s also got integrated speakers (3W each, so not really major, but adequate). It runs a 60Hz refresh rate with a response time of 4 -6 ms so it’s not really a gaming monitor by any stretch. That said, it’s nice for productivity and static creation work.

Resolution is nominal 4K (3840 x 2160), and it supports DCI-PC3 and Adobe RGB. It’s also DisplayHDR 400 certified (that means 10-bit color). See the product page for complete tech specs.

Built-in TB4 Hub Makes For a Killer Price

Yes, that’s right: the monitor includes an entirely capable, built-in Thunderbolt 4 hub as part of its equipage. Very cool, for a device with an MSRP of under US$550. Indeed, even the cheapest TB4 hubs, similarly equipped, cost over US$300 nowadays. It also includes a DP cable, a TB 4 cable, and a USB TypeB2A cable to hook an external USB 3.1 device up to its Type B port. Note: I just happened to hook the monitor up through a Lenovo TB4 Dock because I have one, but it will act as a dock by itself. That’s why two devices (dock and monitor) show up in the Thunderbolt Control Center up top.

To me, this functionality makes the price of the monitor easy to justify given that it comes ready to support Thunderbolt 4 based audio, video, networking and peripherals right out of the box. If you need another monitor and you can also benefit from TB4 connectivity and access, this could be too good to pass up.

Upon first exposure and short-term use, I’m wowed. I’ll follow up with more details after I’ve had a chance to spend some time with this puppy.

Notes Added December 7

A few more noteworthy things have occurred to me as I ponder this new peripheral and its inner workings. The USB C port delivers up to 100 W of power, so it should be able to handle most laptops without a separate AC connection for juice. The on-screen menus do take some fooling with to figure out. It is kind of heavy (28 lbs/12.7 Kg) but easy to assemble, move around and adjust. Here’s an interesting technical review from PC Magazine for your consideration, too.


Facebooklinkedin
Facebooklinkedin

Macrium Announces Reflect Free EOL

Dang! I always hate it when this happens, but I do understand why it does. Macrium, maker of the excellent Reflect backup, restore and imaging software has just announced end-of-life for its free Version 8 of that package. As Macrium announces Reflect Free EOL, I realize I’ll have to start planning a different strategy for my test PCs and VMs going forward.

Details: Macrium Announces Reflect Free EOL

The announcement comes with plenty of warning. The company plans to provide security patches for the Free version until January 1, 2024 (more than a year from today). Users who want to keep using the package after the EOL data may do so, but will go unsupported thereafter. This also means that Windows version 11 22H2 is the most recent version of Windows that Reflect 8 Free will support.

What Else Is There?

Rest assured, I’ll be finding out. I came to Macrium Reflect Free (MRF, for short) thanks to the folks at TenForums.com and ElevenForum.com, my favorite online Windows communities. I’ll be watching to see what those people recommend. I also plan to dig into the elements presented in this recent (updated November 24) TechRadar story: Best free backup software of 2022. I’ll even be returning to MiniTool ShadowMaker and scanning over the MajorGeeks “Back Up” category.

But sigh: I wish this wasn’t necessary. MRF is a great, great tool. I’ll be sorry to see it go.

Facebooklinkedin
Facebooklinkedin

Minimum Battery Charge Required Blocks BIOS Upgrade

I have to laugh. I’m putting my office back together following not just the big holiday yesterday, but windows washed on Tuesday. I’m talking real, physical windows on the house, not the eponymous OS that is the focus of this blog. I had to disconnect the Lenovo Thunderbolt 4 dock, the wired GbE LAN. That meant my X12 was untethered and uncharged for several days. When I tried to log in to that machine today, I learned that the minimum battery charge required blocks BIOS upgrade. Sigh.

WTF: Minimum Battery Charge Required Blocks BIOS Upgrade

The funny thing is, I had some interesting foreshadowing on this topic just last night. I had to upgrade my now-aging iPad Air 2 to the latest iPad OS. At first, the Install button didn’t light up. Apple helpfully provided a error message by way of explanation, saying that a “minimum charge level of 20%” was required for the OS update install to go forward.

Thus, after leaving the X12 untethered for four-plus days, I found myself wondering. “Gee,” I thought to myself “What do you bet that the X12 BIOS update can’t go forward without a minimum charge level, either?” Sure enough: I checked online and indeed, the battery must be at 25% charge or higher, even if the PC is on AC power, for the BIOS upgrade to proceed.

Easily fixed! It only takes time (about 20 minutes in my case) to get past that 25% threshhold. As I write these words, the BIOS flash is underway at the UEFI command line. It’s just over 80% complete, in fact. Good thing the iPad forewarned me about this possible impediment, eh? Otherwise, I might have jumped into major troubleshooting mode, built a bootable BIOS installer, and done a manual BIOS upgrade instead.

If It’s Not One Thing, It’s Another…

It’s rare when I feel like the universe is looking out for me. Most of the time when trouble strikes, I have to roll up my sleeves and fix things the hard way. This time, time — and the related upping of battery charge levels — fixed things more  or less on its own. As you can see in the lead-in graphic, the same Lenovo Vantage utility that told me I needed a BIOS upgrade now shows me installation success for same.

I’m glad that’s over. I learned about Lenovo’s “self-healing BIOS” along the way to this resolution. I’m just glad serious troubleshooting and repair was unneeded in this happy case.

Facebooklinkedin
Facebooklinkedin

No Remote WinSAT No Batteries

In following up on yesterday’s memory training item, I started messing about with WinSAT. For those not already clued in, WinSAT stands for Windows System Assessment Tool. As it turns out, such assessment depends on steady, reliable power and “close to the metal” access to the PC it’s assessing. That’s why, I believe that MS says “You cannot run formal assessments remotely or on a computer that is running on batteries.” (Using WinSAT). Hence the assertion: no remote WinSAT no batteries.

If No Remote WinSAT No Batteries, Then What?

A formal assessment on WinSAT runs a whole battery of checks. You can still do feature-by-feature checks remotely (just not the whole thing). Here are the results of WinSAT mem over a remote connection to one of my 2018 vintage Lenvo X380 Yoga ThinkPads:

No Remote WinSAT No Batteries.rem-mem

A single feature check — mem, or memory — does work remotely.

But if I run the whole suite (WinSAT formal) in the same PowerShell session, I get an error message instead:

No Remote WinSAT No Batteries.rem-formal

Going formal with WinSAT “cannot be run remotely…”. No go!

Such things lead to head-scratching from yours truly. I can kind of get it because it’s undoubtable that the remote connection is going to affect results reported because of the time involved in remote communications. But why allow checks one-at-a-time, but not all-at-once? MS is mum on this subject, so I’m not getting any insight there. It could be that singleton checks add relatively little overhead, but that cumulative effect of an entire suite of same adds noticeable delay. Who knows?

Facebooklinkedin
Facebooklinkedin

VM SSD Speed Falls Off

What did I expect, I wonder? I’ve been digging more deeply into VMs on the amazing Lenovo P16 Mobile Workstation. (It’s got an i9-12950HX, 2TB PCIe x4 SSD, 128GB RAM, Quadro RTX A5500, and Windows 11 22H2.) Most of the time, the VM runs almost indistinguishably from the physical OS. But various IO metrics tell a different story: most tellingly, VM SSD speed falls off measurably. That applies both to the Virtual C: drive inside the VM, and when accessing external USB4 storage devices from the VM.

How Much VM SSD Speed Falls Off

By most metrics, it’s 2X or more. To be more specific, CrystalDisk-Mark results for the C: drive are about half across the board versus the internal Kioxia SSD. For the all-important random read/write 4K single thread, it’s worse than that (2.5X to 3X). Worse still, large file copies to external USB drives fall off a cliff: typical rates of 250-280 MBps fall to 60-70 MBps. This is shown from File Explorer inside the VM in the lead-in graphic above. Here’s a comparison from the physical machine:

VM SSD Speed Falls Off.phys-copy

Notice: USB speed is at least 4X faster on a physical PC vs. a VM.

Let’s Get Physical…

This actually provides an interesting justification for running certain workloads on physical rather than virtual PCs — namely, that IO and completion times can be dramatically affected. But given the convenience, flexibility and open-ended nature of VMs, this is not likely to matter that much except for highly specialized workloads where time is worth more than money.

Fascinating stuff, though — and great fun to play with. Check out the Get a Windows 11 development environment page at MS.

Facebooklinkedin
Facebooklinkedin

Windows 10 Phone Link Eliminated

Dang! After messing about with PowerShell unsuccessfully, I turned to long-time fave 3rd-party tool Revo Uninstaller Free. Seems that Windows 10 doesn’t allow the Phone Link app to be uninstalled anymore. Sadly, the Uninstall option is greyed out in Settings. Likewise, I couldn’t get PowerShell Get-AppxPackage | Remove-AppxPackage to work, either. But if you turn to Revo Uninstaller, it delivers the goods: Windows 10 Phone Link eliminated.

Why I Want Windows 10 Phone Link Eliminated

Two reasons:

1. Phone Link only works with Android phones and I have iOS. Don’t use it, ever.
2. Update failed, then app “stopped working, around recent Store revisions.

If I can’t use an app AND it causes errors, I don’t need it. Thus, I want it gone!

Look at the lead-in graphic. I’ve put a red box around the listing item for the Phone Link app on my Windows 10 production desktop. Right-click on that item, and the first menu option is “Uninstall.” Pick that. Revo asks you to confirm that choice, as follows:

Windows 10 Phone Link Eliminated.confirm

Alas, PS does NOT show the command details it uses to pull this off. Sigh.

Revo Unsintaller works some PowerShell magic around the following text I copied:

Deployment operation progress: Microsoft.YourPhone_1.22092.211.0_x64__8wekyb3d8bbwe

After removing the app, I used the Revo Uninstaller Scan functions to remove all leftovers from the Registry. It no longer shows up on my Windows 10 PCs — all both of them. I will be on the lookout for reappearances after CUs and feature upgrades, based on what I read online about how Phone Link keeps showing back up.

When it comes to “Windows pest removal” sometimes, repeated treatments may be required. LOL!

Facebooklinkedin
Facebooklinkedin

Windows 11 Beta Channel Gets Improved Task Manager

Finally! I’ve been reading about — and seeing — cool changes to the Task Manager in Windows 11 for weeks and weeks. But only with Build 22623.891 for all of its users, Windows 11 Beta Channel gets improved Task Manager. What does this mean? Take a look at the lead-in screencap (and others below) and I’ll tell you more…

Woo-hoo! Windows 11 Beta Channel Gets Improved Task Manager

Let’s start with the lead-in graphic. Among the several improvements Task Manager now makes easily accessible in the 22623 fork of the Beta Channel, I can finally produce the Dark Theme. That’s what you see in that graphic, which makes for a more dramatic (but also visually sensible) set of CPU utilization graphs. Previously, this kind of thing was only accessible through ViveTool tweaks (which I avoid as a matter of practice).

What else is in there? You can search for processes by name in various Task manager panes (processes and details). The next screencap shows the results of a search for the ubiquitous svchost process in the Processes pane (notice it’s smart enough to map part of the .exe name to the related process names: cool!).

Windows 11 Beta Channel Gets Improved Task Manager.search

Notice that “Service Host” appears in nearly all of the elements shown as search results. Very helpful!

According to this story at WinAero from Sergey Tkakchenko, you can search on process name, ID or publisher with good results. That certainly worked for me.

One more thing: turning on “Efficiency mode” in Task Manager is now a right-click option from the Details pane. This lets users lower runtime priority to boost power efficiency, while upping stability risks. My example (e.g. the Chrome web browser) is an example of something you probably would NOT wish to run in this mode. For real.

Efficiency mode is easy to set, but should be approached with some caution.

I’m not sure I truly understand when or why to use Efficiency Mode (presumably on a tablet or laptop on battery power) but I’ll do some investigating and experimenting and see what’s up with that. Stay tuned! Should be fun…

In the meantime, I’m delighted to finally be able to see and exercise these Task Manager facilities for myself. If you have access to a Beta Channel Insider Preview, it’s worth updating to Build 22623.891 to see for yourself.

Facebooklinkedin
Facebooklinkedin

PowerToys File Locksmith Works Well

Starting with version v0.64.0, released on November 2, the PowerToys collection added File Locksmith to its mix.The tool’s own built-in description is sparse. It reads: File Locksmith is “…[a] Windows shell extension to find out which processes are using the selected files and directories.” Doesn’t sound like much but can be handy. Indeed, I learned that PowerToys File Locksmith works well this weekend. Let me explain…

Why Say: PowerToys File Locksmith Works Well?

As I tried to work through an update process for a desktop tool, I got an error message showing three instances of svchost.exe were impeding installation. Remember: File Locksmith is a “shell extension.” In this case, that means you can right click “stuck” files in File Explorer and then choose the “Who’s using this file?” menu option that appears.

This brings File Locksmith into the picture, wherefrom you can choose an “End Task” button for associated files that show up in the listing. Furthermore, you can see detail about each running process, so you can even match up process IDs inside Task Manager to make sure you “end task” only when and where you should, and leave other stuff alone.

PowerToys File Locksmith Works Well.fl-output

The offending items were various DLLs. They run within svchost processes so multiple programs can share access to them.
[Click image for full-sized view.]

This made my job pretty easy. All I had to do was end the offending tasks so the installation could complete. It did so pretty much immeditately after I told it to try again. And it ran to successful conclusion.

Warning: Because ending tasks for shared DLLS can leave certain important facilities inaccessible after such a move, I also restarted Windows after the update was done. You know: just to be on the safe side…

But gosh, File Locksmith made this sometimes vexing and onerous task easy and straightforward. I have to laugh about this too, though. Here’s why: earlier versions of PowerToys itself were prone to experiencing install delays owing to running items. These included dll host processes that required manual closing in Task Manager. Thus, it’s glaringly obvious how the developers figured out such a tool could be helpful — at least, IMHO.

But it’s here, it works, and has already proved useful in helping me update a utility included in my Startup items, and generally running in the Windows background. If it worked for me, it should do likewise for you. Enjoy!

Facebooklinkedin
Facebooklinkedin

Winerror versus Err: Enough, or Too Much?

Here’s an interesting dilemma. In the past, I’ve advocated use of the Windows Error Lookup Tool, currently Err_6.4.5.exe The other day, I had cause to rue my recommendation. I actually found a different, more focused tool named Winerror.exe. It’s part of the Windows Assessment and Deployment Kit, aka Windows ADK. But then, you might also need to grab the older Windows 10 version to get the tool I’m about to discuss. It seems to be missing in the Windows 11 version.

Winerror versus Err: Focused and General

You can see the issue in the lead-in graphic for this article. Notice that winerror provides two different expansions, one of which mentions normalization. Err_6.4.5, OTOH, provides 6. These come from a variety of error code source files: bugcodes.h, netmon.h, winerror.h, and ntstatus.h.

In simpler terms, winerror looks only at winerror.h; err… looks at a bunch of error code source files, including winerror.h. My point is that winerror may be worth consulting when you’re troubleshooting Windows 10 or 11. That goes double when the error reporting tool (err_6.4.5.exe) produces more output than you know how — or really want — to use.

Wm Blake Still Has a Point

The end half of the title for this story comes from William Blake’s Proverbs of Heaven and Hell. It makes the excellent point that you really don’t know you have enough until you have more than you need. That’s why I recommend using the older, but less general, Winerror.exe when you find that the latest error reporting tool (err_6.4.5.exe) has more to say than you really need to know.

‘Nuff said!

Facebooklinkedin
Facebooklinkedin

Using Winget For 4 Ways To Update

I’ve been researching an upcoming ComputerWorld story about the terrific and powerful PowerShell based Windows packager: Winget. It’s a peach! I mostly use it for keeping applications and supporting elements current. Lately,  I’m  using Winget for 4 ways to update my apps. Let me explain…

How-to: Using Winget for 4 Ways to Update

Way 1: Check Pending /Available Upgrades

By itself, the command winget upgrade simply shows what’s ready to upgrade. It doesn’t actually do any upgrades. Thus, it offers a quick easy way to see what upgrades are available. That’s why it appears as the lead-in graphic for this story.

Ways 2 & 3: Perform Blanket Upgrades

In fact, two different command strings provide varying degrees of upgrade capability

  1. winget upgrade –all
  2. winget upgrade –all –include-unknown

By default winget only upgrades to a new version when it recognizes the current version. Then, if the current installed version is lower-numbered than the pending one, the upgrade goes ahead. Some-times, for whatever reason, winget can’t find the current running version into. In such cases, the upgrade –all variant skips them. Thankfully, adding –include-unknown to the string tells winget to upgrade those anyway. Consequently, I use that more inclusive variant because there’s less follow-up needed.

To illustrate, the next screencap shows winget upgrade –all –include-unknown output on the PC that produced the lead-in snap. Notice please: 5 items found, 5 items upgraded. Good-oh!

The –all –include-unknown variant of winget upgrade covers the most possibilities. On this PC, all 5 candidates upgrade.
[Click image for full-sized view.]

Way 4: Targeted Winget Upgrades

Examined closely, both preceding screencaps shows an ID column. Indeed, that information provides a “package name” for its associated application. Thus, you can always upgrade a single package at time using this syntax:

winget upgrade <package-name>

For example, names shown in the screencaps include Mozilla.Firefox, TeamViewer.Teamviewer, AntibodySoftware.Wiztree, Google.Chrome and Microsoft.WindowsSDK. That follows a mostly predictable structure: builder-name.package-name. For speed, I like to use it when winget presents only a single option, or when a winget blanket command fails.  I’m learning that happens sometimes, for various odd reasons.

There are many ways to work with winget I haven’t yet mentioned. These could appear in future posts here. Certainly, they’ll definitely be covered in my upcoming ComputerWorld piece. Right now, that’s scheduled to appear online before month’s end. Hopefully, you’ll get a chance to catch that during the busy holiday season.


Facebooklinkedin
Facebooklinkedin