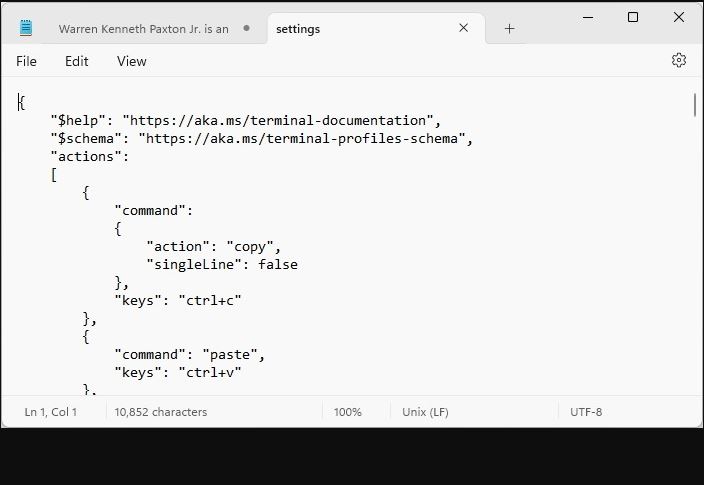
When I saw @JenMsft’s Tweet yesterday, I knew I had to have it. A new Notepad version now includes character counts in the (bottom-line) status bar. If you squint, and look bottom right, you can see it in the lead-in graphic: 10,852 characters. Thus, when I declaim that the new Canary Notepad builds character, I’m not talking about personality traits like gumption and perseverance. I’m talkin’ numbers, baby!
Exactly How New Canary Notepad Builds Character
Over time, MS has been revamping and improving the Notepad app. Indeed, it now comes from the MS Store and lives in the Program Files\WindowsApp file hierarchy (version 11.2311.29.0 has these particular goods). Indeed, I’ve seen some discussion that it might even gain more code editing and formatting smarts, a la Notepad++.
But this current version far exceeds the capability of its predecessor (e.g. the version still running in Windows 10). That older iteration lacks the bottom status bar completely. It’s got no settings controls, either: you must do all that stuff using menu bar entries.
A Different Update Drill…
Optimistically, I went looking for the newest Notepad version on one of my Canary test PCs when the news about the character counts came out. I should’ve known better. I had to open the Store, click the Library entry, then Update all. After that, as you can see in the closing screencap below, I obtained “new Notepad satisfaction.”
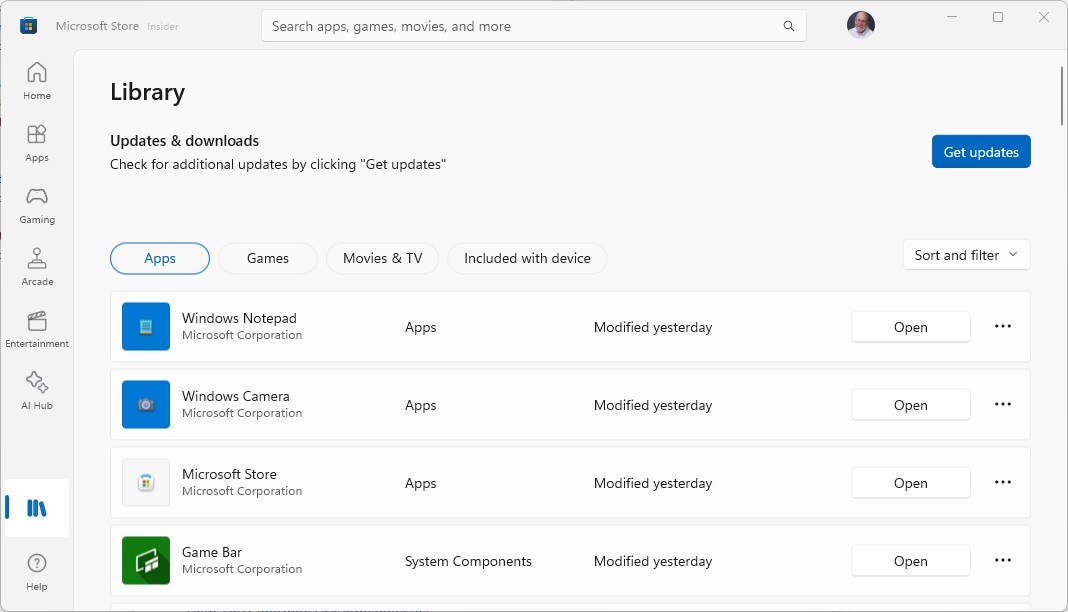
Once I visited the Store, I was able to update Notepad to see its new character count ability.