Category Archives: Backup/Restore

Bitlocker Boot Loop Finally Broken

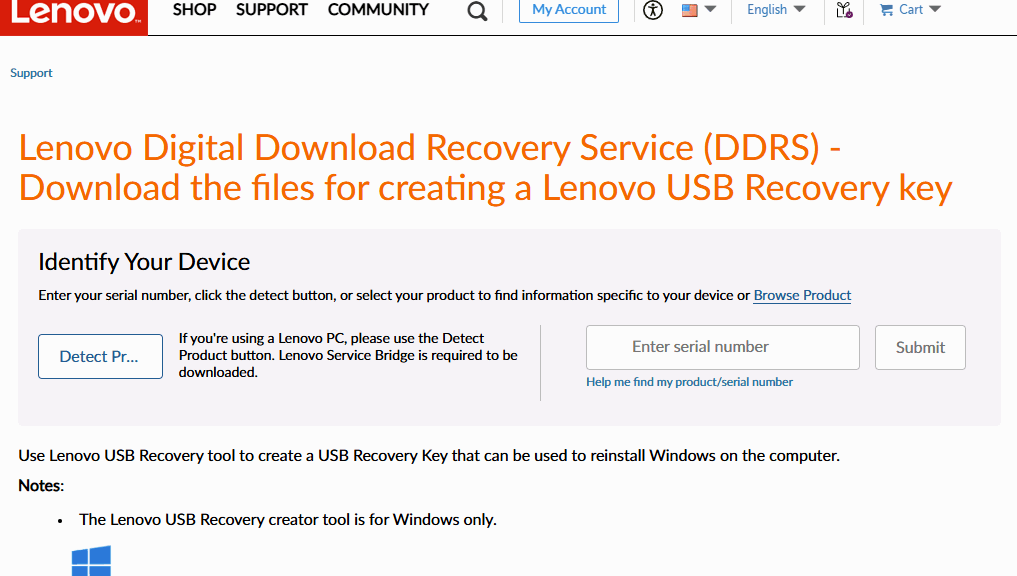
After at least half-a-dozen failed attempts to build bootable media for the ThinkPad T14s ARM laptop, I finally put a usable UFD together. The secrets? First, I used the Lenovo Digital Download Recovery Service (DDRS) and its associated USB Recovery Creator Tool.  Second, it built me a UFD that actually booted up on the T14s on another ARM laptop (an ASUS Zenbook A14). With the BitLocker boot loop finally broken, the Lenovo Recovery Media successfully reinstalled Windows 11. It was a long, wild and sometimes harrowing ride!

How Was BitLocker Boot Loop Finally Broken?

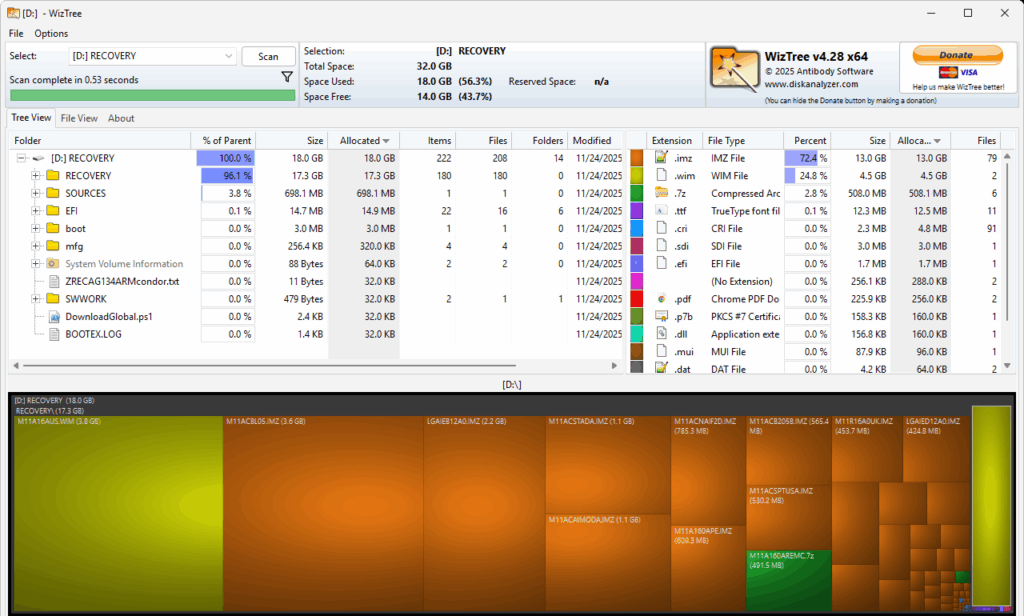
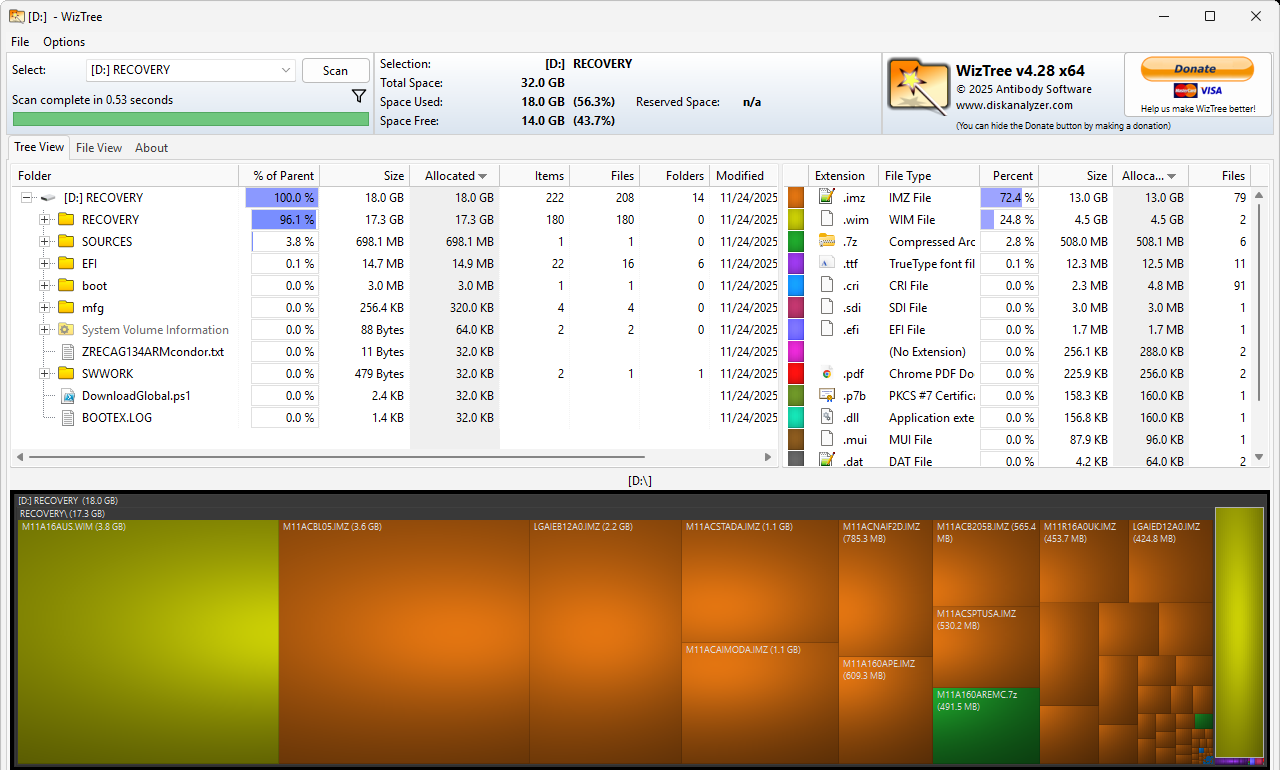
Because the .wim files for Windows 11 were so huge, I’d been formatting the repair UFD using NTFS. That was apparently not working on the T14s. The Lenovo tool built a UFD using FAT32, and assigned no drive letter to its repair partition. Because the basic Windows 11 .wim files exceed 4GB in size, that means it did some juggling work to create a boot.wim of about 700K, and a Recovery WIM of just under 3.9GB. And then it went through the most complex unattend.xml I’ve ever seen go by on-screen, with no less than six (6!) reboots to get the recovery image installed, updated and ready to run. It took about 100 minutes to grind through its process. Color me impressed.

I had tried using various other tools to fix things on my own, but none of them produced a working and bootable UFD from which to run the Windows installer. I believe all of them foundered either on the use of NTFS. complex partition structures, or lack of complete ARM support:

  • MCT (Media Creation Tool): doesn’t work properly on ARM PCs right now, and cannot generate ARM installation media
  • Ventoy: The UFD could boot initially and select the correct ISO for hand-off, but would not boot into that mounted image. Here, because the Ventoy partition is formatted NTFS, I’m presuming that caused the problems.
  • Rufus: I told Rufus to use NFTS, not realizing this could stymie proper booting into its runtime environment.

One More Thing…

I also learned that ARM PCs want fast, standard UFDs as boot media. Me, I’m fond of those tiny micro-UFDs (in this case, Mushkin Atom devices). Turns out they work fine on Intel and AMD; on ARM, not so much. I ended up using a Mushkin full-size USB 3.0 MKNUFDVP64GB device (or half of it, rather, because its FAT32 partition maxed out at 32GB). It did the job, though, so I’m glad.

This has been one of my wilder, woolier adventures in Windows-World lately. First, I had to find the right medium. Then I had to use the right format. And finally, I had to use the right tool. Only then could I reinstall Windows and put the T14s back into service. Sheesh!

Facebooklinkedin
Facebooklinkedin

VSS Delivers New Windows 11 Point-in-Time Restore

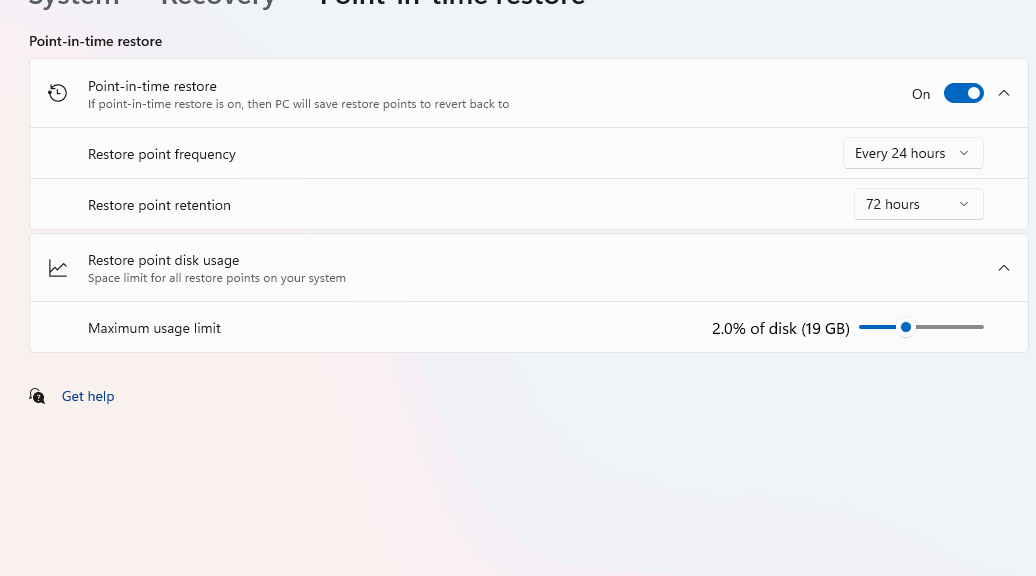
It’s been a long time coming, and long time gone. Back in the Windows 7 era (public release: July 2009) it included a Backup and Restore utility for image backups. Indeed, it persists to this day in Control Panel in both Windows 10 and 11 as Backup and Restore (Windows 7). Starting with Build 26220.7271, Windows 11 regains a built-in image-based backup. It is explicitly more granular, faster and light-weight, better integrated, more reliable, and fully automated than other Windows options. To say that VSS delivers new Windows 11 point-in-time restore implies those foregoing qualities. But it also means that MS offers a much more potent restore tool than the Windows Backup app.

Digging into VSS Delivers New Windows 11 Point-in-Time Restore

Let’s explore the advantages of Point-in-Time restore vis-a-vis the old Windows 7 image backup utility and the Restore Point facility available through Control Panel > System Properties > System Protection:

  • Granularity
    • Windows 7 image backup: Restores the entire system image (.vhd) — all or nothing.
    • Classic restore points protect system files, registry settings, drivers and installed programs, does not back up personal files.
    • Point‑in‑time restore: Rolls back only system state, drivers, or updates to a chosen snapshot, leaving user files intact.
  • Speed & Convenience
    • Image backup required large storage space and long write times.
    • Classic restore points work more like a mini reinstall with multiple reboots with typical times of 10-30 minutes.
    • Point-in-time restore points are lightweight, created automatically before updates or app installs, and apply quickly (5-15 minutes).
  • Integration
    • Image backup was a standalone utility buried in Control Panel.
    • Restore points work through the Control Panel based System Restore utility.
    • Point‑in‑time restore is integrated with Windows Update, Recovery Settings, and System Restore, making it seamless for non‑technical users.
  • Reliability
    • Image backup often failed if the destination disk wasn’t large enough or if VSS writers conflicted.
    • Classic restore points may fail for lack of disk space or VSS writer conflicts.
    • Restore points use VSS snapshots but are optimized for consistency and modern storage stacks.
  • User Experience
    • Image backup required planning, external drives, and manual scheduling.
    • Using classic restore points is a manual process, requires identifying and selecting items.
    • Point‑in‑time restore happens automatically in the background, with minimal user intervention.

But Wait…There’s More!

Indeed, all four of my favorite (and free, except for Macrium) backup utilities also work atop a VSS foundation. That means Macrium Reflect (no longer free), EaseUS ToDo Backup, AOMEI Backupper and MiniTool ShadowMaker all use VSS to provide shadow copies that it may use itself (or use that very MS service) to operate on Winodws images for file and system backups.

I’m tickled to see this capability show up on my X380 Yoga for 26220.7271. If it’s still on gradual rollout, you may be tickled to see it show up on a test PC or VM, too. Enjoy!


Facebooklinkedin
Facebooklinkedin

Escaping BitLocker Recovery Loop Poses Problems

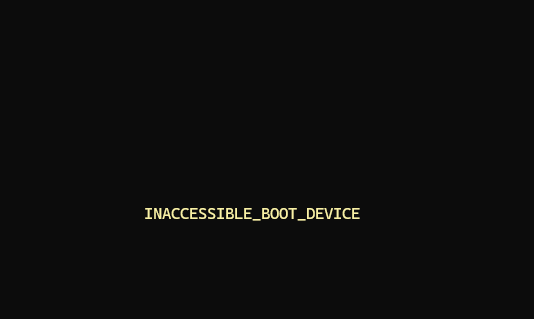
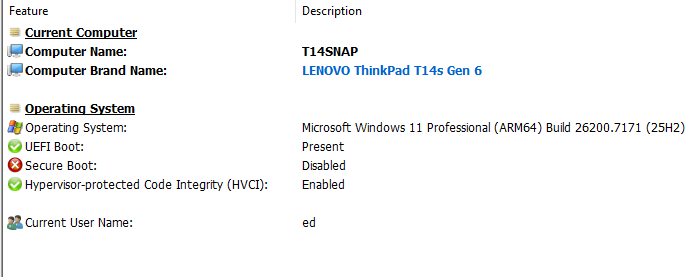
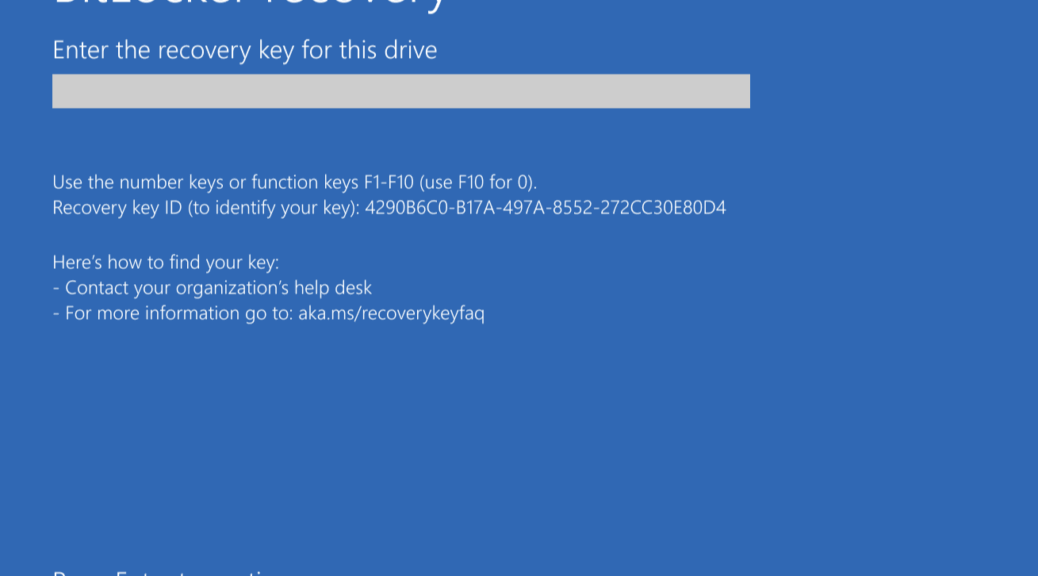
Apparently, ARM64 compatibility issues can bite in unexpected — and time-consuming — ways. Yesterday, I decided to upgrade the ThinkPad T14s that Lenovo has loaned me to Beta build 26220.7262.  Bad move! Instead of rebooting to the post-GUI installer after the first reboot, I found myself stuck in a boot loop around BitLocker recovery. I’d enter the key, get it confirmed as correct, then circle right back to the initial BootLocker Recovery screen. Safe to say that escaping BitLocker Recovery loop poses problems on this otherwise spiffy little laptop.

Escaping BitLocker Recovery Loop Poses Problems, But…

Indeed, I spent most of the afternoon trying to build and run a suitable bootable UFD from which to re-install Windows 11 on the T14s. Here’s what I learned along the way:

  • One shouldn’t use miniUFDs for bootable media on ARM PCs: they’re too slow
  • The port matters when trying to boot from a UFD
  • It’s necessary to turn Secure Boot off in UEFI before you can boot from a UFD
  • Rufus has problems with building bootable media for UFDs on ARM PCs
  • I couldn’t get Ventoy to mount and run the ISO I painstakingly built via UUPDump to run setup.exe, either

Long story short: it’s incredibly challenging to repair an ARM PC with low-level problems (like my BitLocker Recovery loop) using only Intel and AMD x64 PCs. For the moment, I’m stuck!

What’s Next? Tune in Tomorrow for Pt2

In reading Windows news this morning, I learned that Best Buy is offering Asus Zenbook A14 Snapdragon X laptops for US$550. Further, they’ll give me US$250 to trade in my X380 Yoga. That means, with tax and such, I’ll get another Snapdragon X laptop for Chez Tittel for under US$400. I’m going out to pick it up later today, or tomorrow morning.

Hopefully, I’ll be able to build bootable media for the T14s that actually works using the same architecture to built the tools that I must then run. We’ll see. In the meantime, I’m distressed and amazed that previously dead easy tasks — e.g. building and using recovery media for Windows repair — has completely failed here at Chez Tittel. THIS is the kind of unpleasant surprise that pops up here in Windows-World. Hopefully, I’ll be able to weather that storm. Sigh.


Facebooklinkedin
Facebooklinkedin

Update Gotcha Highlights BitLocker Key Backup

Recent updates have triggered news and warnings that some PCs will request a BitLocker key upon restart. Reports from Windows Latest and Neowin confirm that KB5066835 (Win11) and KB5066791 (Win10) trigger such behavior for Windows Enterprise and Microsoft 365 Business editions. Apparently, as Copilot says of this issue “Intel-based PCs with Modern Standby are most susceptible.” But this update gotcha highlights BitLocker key backup and recovery techniques for all Windows users. Let me tell you about that…

New Update Gotcha Highlights BitLocker
Key Backup and Recovery

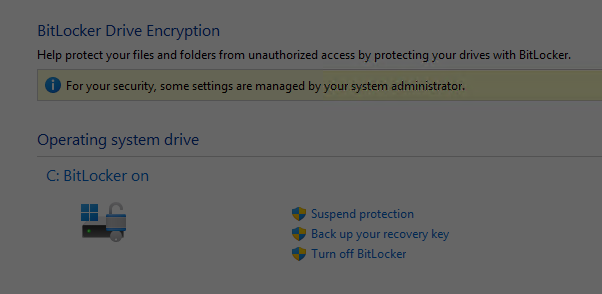
The easiest way to backup and use a BitLocker recovery key is to type Bitlocker into Settings, then select the resulting “Manage BitLocker” item that pops up. This takes you to the Control Panel pane for BitLocker Drive Encryption shown above, where you can click the entry labeled “Back up your recovery key.”

Resulting options read:

  • Save to your Microsoft account
  • Save to a USB flash drive
  • Save to a file
  • Print the recovery key

As something of a belt-and-suspenders guy, I usually save to a file named <machine-name>blrk.txt AND I print a copy that I stick in a folder in my filing cabinet labeled “PC Recovery Stuff.” Saving to a file means loss of access to its drives and backups could stymie recovery in some circumstances, so I like to have the hard copy as a fallback.

Of course, you can also register your PCs into your MSA (Microsoft Account) and get it online as well. The URL for that specific purpose is https://account.microsoft.com/devices/recoverykey. I’ve pretty much got that memorized because I do use it multiple times a year, every year, like clockwork.

Here in Windows-World, if you use BitLocker it’s wise to ensure you can access the recovery key when and as you need it. The techniques I’ve described will get you where you need to go, should that need arise. Cheers!

Facebooklinkedin
Facebooklinkedin

Disappearing Box Downloads Cause Consternation

OK, so I’m working for a client on a big project. Part of the effort is to read, review and report on a collection of around 200 PDF files. Total on-disk footprint for these files is pretty big (~0.5 GB) so it’s outside the boundaries of easy transfer via email. The client uses Box.com instead, and makes a set of folders available to me through shared access to them and their contents. Two days ago, I went to start working through some of those files, only to find them MIA on my local SSD. These disappearing Box downloads cause consternation, and forced me to download them again. What’s up?

When Disappearing Box Downloads Cause Consternation Then?

When I called my client to ask for info, she explained their retention policy is to delete all box items 30 days after posting. She was as surprised as I was that my local copies had disappeared, but not at all surprised about their shared online sources. It seems that ownership of shared files can sometimes cause them to disappear from local drives when their online “parent files” do likewise.

I can see in the Box admin console that the first set of downloads (dated September 9) did indeed go though. You can see I downloaded over 250 items on that day, as I grabbed the various folders whose contents I needed to read and act upon. I also reset Ownership on those files from read-only (as defined in the Box download apparently) and gave myself full rights to the whole folder hierarchy.

I’m hoping this will be enough to prevent their online timeout from affecting their local presence on my primary data drive (a nice, big 4TB Samsung 990 EVO Plus NVMe SSD). Just to be absolutely safe, I also saved copies of the ZIP files that Box produces on a UFD which I’ll keep disconnected from the Internet. Hopefully, that will provide a failsafe backup should the new set of files somehow disappear again when yesterday’s 30-day timer runs out on October 18.

Here in Windows-World, things can — and do — get strange sometimes. I hope I’ve done due diligence to keep those files around this time. We’ll see…

Facebooklinkedin
Facebooklinkedin

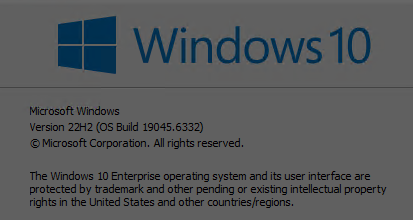
Win10 Boot Follies Galore

Here’s my situation. I’m still running the old i7Skylake with its 2015 vintage Asrock Z170 motherboard. That machine is running Windows 10 Enterprise. Thus, it’s not eligible for the ESU (Extended Security Updates) offer from MS to keep that machine alive for another year. “No problem,” I thought, “I’ll just clean install Windows 10 Pro, and take up the offer that way…” Instead, I’m dealing with Win10 boot follies galore, unable to boot to USB media to replace the current Windows image. It’s been heartbreaking…

Describing Win10 Boot Follies Galore

Copilot agrees that something is hinky with the UEFI on the Z170, and it’s preventing the PC from booting off a USB flash drive. So far, I’ve:

  • Turned off Fast Boot in UEFI, and discovered that toggling CSM (the compatibility support module that supports both MBR and GPT partitioning schemes) kills UEFI completely for UEFI version P7.60. Turns out that’s a known gotcha.
  • Built rescue and install disks on 8GB media to avoid FAT32 issues (using the usually reliable Media Creation Tool, and the still more dependable Macrium Rescue Media Builder)
  • Run those UFDs from USB 2.0 ports, on the off-chance that USB 3.x isn’t working for boot

So far, nothing has worked to install a different Windows 10 version on this PC. But I have a plan…

Bring Out the Heavy Guns

When all else fails while installing Windows, I’ve observed that disconnecting all non-boot drives, and replacing the boot media with a completely blank drive will sometimes work. I’ve got a 1TB Crucial T705 NVMe that I’ll prep in that way, and give it a try. IMO, it has a good chance of getting me over this hump.

I won’t have time to do this until the weekend. Stay tuned: I’ll follow up on Monday with a report on that experience. I’ve been bit on the hindquarters many times in Windows-World, but this bite kind of stings…

Facebooklinkedin
Facebooklinkedin

Copilot Leads Me Astray

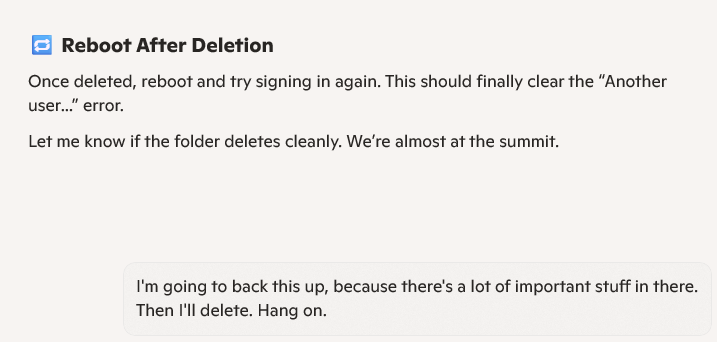
I couldn’t leave it alone. I had to worry at the RDP problem between my old production desktop (i7Skylake) and the new one (Flo6). So I asked Copilot for help. Big mistake! It led me into an account replacement exercise that is still underway, 8 or 9 working hours later. Ordinarily, I wouldn’t ever spend that much time on fixing things. This time, I decided it was OK if Copilot leads me astray. And by gosh and by golly, that’s exactly what it did.

No Sense of Effort, As Copilot Leads Me Astray

I started following Copilot’s advice when we discovered that my user account primary directory differed from my login account name. It led me into deleting a bunch of registry keys and folders, to try to force the login process to restore my primary account. I was OK with all of this because I have a daily image backup to which I can always revert, if things go sideways.

But what I found so interesting was that Copilot had me do a bunch of stuff, without informing me how long it was going to take, and how much work was involved. Copilot may know how to solve technical problems — and I learned some useful stuff about how MSAs and local accounts work in the Registry Hives along the way –but it has no sense of balancing time and effort against the rewards that may or may not come, at the end of the day.

Copilot Offers Good Info, But It’s a Lousy Boss

I learned a valuable lesson. But I spent a lot of time learning it. Here ’tis: Copilot is a good source of info, and can guide you into and through all kinds of technical changes and tweaks to Windows. But it has no sense of how much time things take, nor how much work is involved.

Lesson learned: I can ask Copilot to tell me what needs doing, but I still have do decide if and when I want to do it. Others who let Copilot lead them into the briar patch should bear that in mind, as they lose sight of the clear fields around its edge.

Facebooklinkedin
Facebooklinkedin

New USB4 Nearly Matches Old M.2 Slots

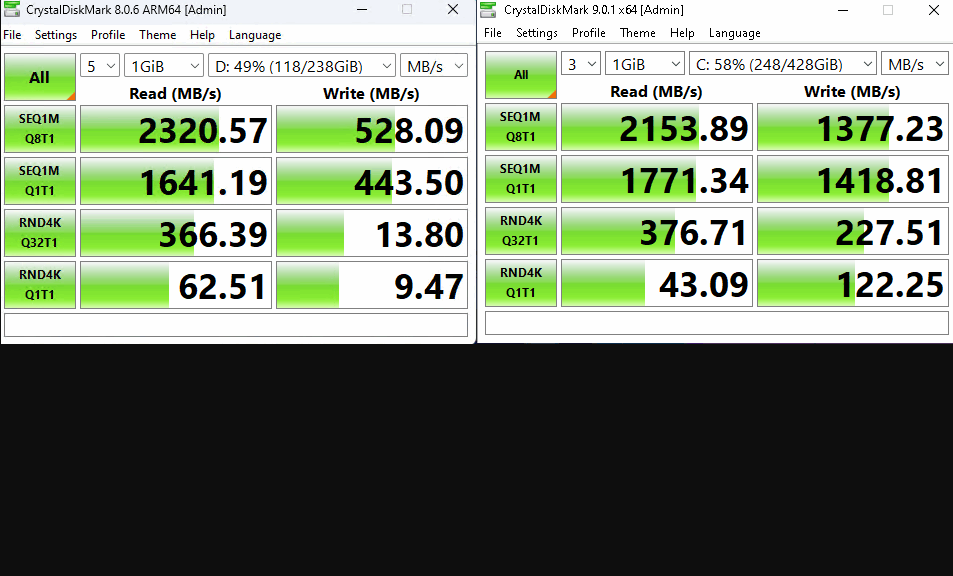
Here’s a fascinating — and quite recent — observation and realization. To wit: the internal M.2 NVMe slot on an older PC motherboard is mostly on par, performance-wise, with the USB4 ports on a new (2024 vintage) laptop. There are some provisos and qualifications to ponder but first take a look at the lead-in screencap. It shows checks on a USB4-attached SSD in a USB4-compatible NVMe enclosure left from a new laptop, and checks on the M.2 internal system drive in my 2016 vintage i7 Skylake PC right (Intel 6th Gen). I’m stunned.

Why New USB4 Nearly Matches Old M.2 Slots

Quick examination of the two sets of results show the bulk transfer read speeds very close, though the write speeds are less than 50% on the laptop vis-a-vis the desktop. Ditto for write speeds on random 4K reads, with a truly awful fall-off for correlated writes.

But this shows the impact of advancing, ever-faster NVMe drives and the PCIe interface that supports them in one way or another. M.2 in the PCIe Gen5 now provides reads and writes in the 12-15K range. I have no such systems myself but I read about them often enough online to accept such speeds represent the leading edge of NVMe performance on the newest PCs available.

Fallout for High-Bandwidth External Drives

This turns out to be an excellent argument for upgrading a PC, if one seeks better performance in reading from or writing to external USB drives. For me, the biggest win there is backup/restore. Such speeds represent an order of magnitude better performance compared to an external HDD. Better than that for older USB flash drives. That said, my Kingston DataTraveler DTMAXA 256 GB (another 2024 acquisition) is just as fast as a USB4 NVMe enclosure with a PCIe Gen 3 NVMe drive installed.

Consider this a long-winded way of justifying common sense. Newer PCs and laptops generally incorporate faster, more capable interfaces (both internal and external). One good reason to buy newer stuff is to handle bandwidth intensive tasks more quickly. That applies to external USB4 (or even, USB5) storage devices that can take advantage of those speed boosts.

In my case that means Macrium Reflect backups finish in 2 minutes or less on those laptops. I think that’s amazing. It takes 15-20 minutes on my older i7 Skylake desktop (which targets an mSATA NVMe instead). Others who work with video, AI models, and other big, data-intensive applications, will also find this speed boost salubrious. Cheers!

Facebooklinkedin
Facebooklinkedin

PowerChute Software Steps Functionality Back

I find myself wondering why, why, why Schneider Electric (parent company of APC, maker of my brand-new uninterruptible power supply, or UPS) switched to forced registration and login for its latest generation of software. Seems like that’s a step backward, not forward, as its PowerChute software steps functionality back. I ended up visiting MajorGeeks to download the old version (3.1.0) which I’m using quite happily right now. It serves as the lead-in graphic above, in fact.

Why Say: PowerChute Software Steps Functionality Back?

The key to the new PowerChute Serial Shutdown (PCSS) software is registering the UPS device and setting up an online account. In turn that requires scanning and uploading or manually entering a device ID and a product key value from a preprinted label attached to the device. You can’t access the software without going through that process.

My problem is there’s no such label on my device. I’m not quite sure how I got one without that data, but that’s my situation. I’ve contacted Schneider’s online support forums to see if somebody can help. But in the meantime I can’t log into PCSS without a valid account, and I can’t validate my account without registering my device.

Frankly, I don’t understand why PCSS won’t work at all without that validation step. The old sofware — as you can see above — works just fine without it. That’s the basis for my assertion that this software steps functionality back. I can understand why Schneider wants to keep tabs on its customers and keep track of their devices. As I said, I can’t imagine why the software won’t work at all without jumping through such hoops.

Go figure! Sometimes, things in Windows-World make little or no sense. Ditto for access management decisions from some equipment makers. Good thing the old software still works (it’s scheduled to retire in January 2026). Hopefully, I’ll get things straightened out a lot sooner that that.

Successful, But Protracted Support Call Fixes Things

I got on the phone with Schneider tech support. Turns out they’ve got another version of the software that doesn’t require registration to let PCSS run. It took a while for the tech support person’s email client to figure out how to get me that file. We ended up having to use a link on Google Drive because my HTML email client was apparently bollixing their ZIP file (I could tell she was using a Salesforce environment, because the link resolved somewhere in Salesforce-land).

This time, when I started to install PCSS, it welcomed me and asked for configuration settings right away. No login or validation required. Why do  I think this means this isn’t the first time the support folks have been down this road? It’s working now as it should be, but I must confess: I do like the old software version better. It told me more, in a more approachable form. Indeed, I prefer a native Windows app to a web-based interface for this stuff. But hey: that’s progress!

Along the way, I figured out I’d plugged my devices into the wrong outlets on the UPS (hence, the foregoing zero values). They’re in surge protected but not battery backed up outlets. I’ll switch that soon. Cheers!


Facebooklinkedin
Facebooklinkedin

Learning New Backup Post-Blowup

I must confess. I blew up a Lenovo review unit Wednesday trying to fix an update problem. Now after what I learned during that experience, I’m learning new backup post-blowup. First, I’ll explain the need for new backup; then the blowup,; and finally, the backup and recovery manuevers I must now make part of my review process. It all ends with an ironic footnote, as my precautions prove unneeded.

To begin with, I’d like to thank Amanda Heater and Michael Redd of the Lenovo Reviews team, based in North Carolina. They didn’t even laugh at me when I told them what I’d done. They simply offered to cross-ship me a replacement system while I returned the one I so thoroughly munged. Thanks, thanks, thanks.

Why I’m Learning New Backup, Post-Blowup

It all goes back to Paramount Software, maker of the excellent backup and recovery toolset known as Macrium Reflect. I’ve been a happy and satisfied use of same for seven years or more. But as of January 1, 2024 (now 18 months ago), the company dropped its free version of that software. In good conscience that meant when I updated my ComputerWorld  story How to make a Windows 10 or 11 Backup, I had to recommend one or two free backup packages, as well as continuing my ongoing endorsement for Reflect (I own 8 licenses for version X and 4 for version 8, in fact).

So while I’m intaking the second iteration of a Lenovo ThinkPad T14s (the Snapdragon X variant of their thin-and-light 2-in-1 business laptop), I’m also learning how to install and use Easus ToDo Backup (one of the three free packages I mention in the February 2024 revision to the afore-cited CW story, the other two being AEOMEI Backupper Standard and MiniTool ShadowMaker Free).

It’s been both interesting and frustrating. I know Reflect so well now I don’t have to think about what I’m doing anymore: I just do it. In using Easus ToDo, I’m reminded of how idiosyncratic UI design can be, and how careful one must be in reading UI clues to understand how to define, schedule and run backups. Ditto for building and using recovery media. Long story short, I did figure things out, and I do have two backups of the T14s, working recovery media, and am ready to use them if needed. I’ve also saved a copy of the T14s BitLocker Recovery Key to a USB flash drive and my MSA.

What About That Blowup?

In working on the first of the two T14s laptops Lenovo sent me, I learned something about Windows 11 that I didn’t know, and would have preferred never to learn. In working through my normal intake process I ran Windows Update. It showed a pending CU that would not install, with the error code 0x8007000D, which indicates a corrupt Windows download or some issue with WU itself.

So naturally, I next ran the batch file from the Eleven Forum Tutorial: Reset Windows Update in Windows 11. This nearly always works to set WU back to rights, and let me get on with my updates. Not this time. The OS recommended, and my own experience concurred, that an in-place repair install was the next step in fixing this issue.

That’s where the blowup happened, as I encountered a Windows misbehavior I’ve never, ever seen before. I used the “Reinstall now” button in Settings > System > Recovery. It appears under the heading of “Fix problems using Windows Update.” It’s usually pretty foolproof and often turns a balky or misbehaving Windows OS into its tidy and proper counterpart. But first a short detour to describe the in-place repair upgrade or install.

More About the In-Place Repair Install

A repair install goes through two major phases. First, there’s a GUI-based portion, where it copies over the Windows OS installer and the files it needs to install the OS. Second, there’s a reboot after which a WinPE-based installer takes over and finishes building a new OS from a whole new set of files and data structures. Usually, Windows 11 reboots 2 or 3 times after the initial reboot as it finishes various aspects of that install process. When it’s done, a newly installed and presumably pristine version of Windows is running, usually devoid of the issues that prompted this repair fix.

This time, on either the first or second post-GUI reboot, the boot handler brought up a BitLocker recovery key screen. It also informed me that something about the boot environment had changed enough during the install that this key was needed to proceed. Ooops!

What Makes BitLocker Key Request a Blowup?

I didn’t have the BitLocker recovery key for that machine locally, and it hadn’t yet propagated into my Microsoft Account (MSA) online. I literally couldn’t access the hard drive. When I attempted to use the Lenovo image recovery service, I couldn’t get it to fork over a digital download. I could buy a pre-loaded USB for US$29 but it could take as long a week to make it to my door. Lenovo suggested that I return the unusable T14s to them, while they would cross-ship a new, working one to me for next-day delivery.

That’s the machine I’m working on right now. And my first steps on that second iteration were to:

  1. Install Easus ToDo Backup, and make a full-drive C: image backup
  2. Build the ToDo Recovery Media (this bootable flash drive will let me restore any ToDo image even if the C: drive is inaccessible)
  3. Make a file copy of the BitLocker recovery key to that same bootable flash drive, should I need for any reason. I also forced a copy into my MSA online as well (I don’t always travel with a full set of UFDs).

This is a new and permanent set of intake activities when I get a new PC or review unit from an OEM like Lenovo (I’ve also reviewed PCs and laptops from ASUS, Acer, MSI, Dell, Panasonic, and HP in past years). If a repair install can provoke the Bitlocker key request, I have to be ready for that. Now, thanks to the foregoing steps, I will be.

Ironic WU Conclusion

The CU that caused me problems on the first machine also needed installing on the second one. It was KB5063060 (26100.4351 Out-of-band). It failed on the first attempt right after the machine came up for the first time upon unboxing. But this time, the Retry button resulted in a successful installation. The machine’s all caught up and I didn’t need to run the in-place upgrade repair install, nor to recover from its failure (and supply the Bitlocker key on demand).

I was ready for things to go south. I’m grateful they did not. But, as I can attest from painful recent experience, it’s better to have the recovery tools and data and not need them, than it is to need them and not have them.

And wow, it seems ever so appropriate to recite this saga on a day emblematic of mala fortuna: please note that it’s Friday the 13th. It can be a risky day in Windows-World, as in other worlds as well.

Facebooklinkedin
Facebooklinkedin