As somebody who’s been in the Insider Program for Windows 10 since October, 2014, I’ve been through hundreds of Insider Preview installations and upgrades. That means I have a pretty well-defined drill through which I take my test PCs once an upgrade is in place. In today’s item, I’ll take you through my Post Dev Channel Upgrade drill as an illustration. That’s because I just finished upgrading to Build 21318.1000, released Friday February 19.
High-level View: Post Dev Channel Upgrade Drill
Viewed at a high level, those post Dev Channel upgrade steps might be described as follows:
-
- Check the environment, restore tweaks, make repairs
- Clean up post-upgrade leftovers, esp. Windows.old
- Perform other routine cleanups
- Check for and install software updates (non-Windows)
- Use Macrium Reflect to make a pristine image backup
In general, the idea is to make sure things are working, clean up anything left behind, catch apps and applications up with Windows, and make a snapshot to restore as this release baseline, if needed.
Step 1: Check & Restore or Repair Anything Out of Whack
YMMV tremendously during this activity. After many upgrades, I’ve jumped into File Explorer Options (Control Panel) to make file extensions visible again, show hidden files, and so forth. MS is doing a better job with this lately, and I don’t usually have to do this with Insider Preview upgrades (though it does still happen for standard feature upgrades).
For a long, long time I had to go into Advanced File Sharing to loosen “Guest or Public” and “All Network” network profiles on the Lenovo X220 Tablet to get RDP to work. Because I use RDP from my production desktop to access and work on my arsenal of test PCs, this is pretty important — to me, anyway. The last few Dev Channel releases have NOT had this problem, I’m happy to say.
I run Helmut Buhler’s excellent 8 Gadget Pack on my Windows 10 PCs. That’s because its CPU Usage and Network Meter gadgets provide helpful dashboards. The former is good for CPU and memory usage and system temps; the latter is great at showing network activity and base addressing info. Very handy. But each time an upgrade is installed, Windows 10 boots it off the desktop. Buhler has written a handy “Repair” utility that I run after each upgrade to put everything back the way it was.
Step 2: Clean up post-upgrade leftovers
You can use the built-in Disk Cleanup utility, run as admin, to take care of most of this. I personally prefer Albacore/TheBookIsClosed’s Managed Disk Cleanup (available free from GitHub). Why? Because he tweaked the UI so you can see all active controls in a single display window, and select all the stuff you want gone in a single pass. Here’s what that looks like to make it visually obvious why I prefer this tool:
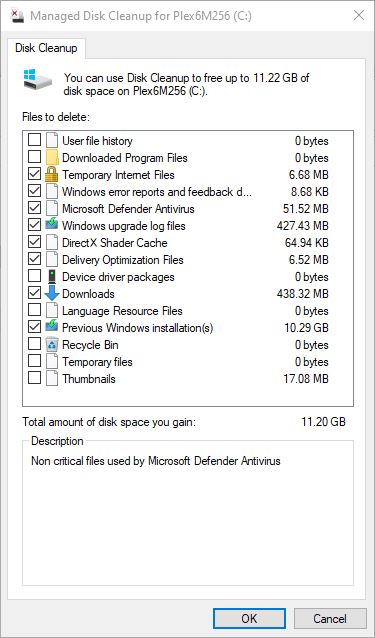
Notice you can see ALL options eligible for selective clean-up in a single display area in Managed Disk Cleanup. I like it!
Step 3: Perform other routine cleanups
I still use Josh Cell’s Uncleaner utility to clean up temp files and other leftovers after an upgrade. If I’m feeling ambitious I’ll run the DriverStore Explorer (RAPR.exe) to identify and remove duplicate device drivers, too. Once upon a time I would run Piriform’s CCleaner as well, but I’m less than happy with that software now that the maker has started including bundleware in the installer. I haven’t found another tool I like as much as the old version.
Step 4: Update Third-Party Software
You can use a tool like KC Softwares SuMO or Patch My PC Updater to suss out most of the items in need of update on Windows PCs. SuMO is a little better at its job but costs about US$35 for the PRO version (does automatic updates for most programs, but sometimes vexing to use). PMP Updater is free, fast, and entirely automatic but doesn’t update everything. Sigh. I use PMP Update on my test machines, and SuMO PRO on my production PC myself. I’m doing this on the theory that it’s best to have everything updated before making a pristine image backup, as I do in the next step.
Step 5: Make a Pristine Backup
With everything upgraded and updated, and all the dross cleaned up, it’s the perfect time to make a fresh image backup. I like Macrium Reflect, mostly because it’s faster and more reliable than the built-in Windows 7 Backup and Restore utility (which MS itself has recommended against since 2016). And indeed, it’s faster at backing up and restoring than most other utilities I’ve used, and also includes a bootable rescue flash drive utility you can use for bare metal and “dead boot/system” drive repair/restore scenarios.
Please note: Macrium Reflect is MUCH faster than using the rollback utility to return to a lower-level OS image from a higher-level one. That’s why I feel safe getting rid of the Windows.old folder as part of my cleanup efforts. I know I’m not going to use those files anyway…
OK then, that’s my drill. I’m sticking to it. Hopefully, you’ll find something in there to like for yourself. Cheers!