Category Archives: Win7View

Notes on Windows 7, Win7 compatible software and hardware, reviews, tips and more.

Swapping X1 Nano NVMe Drives

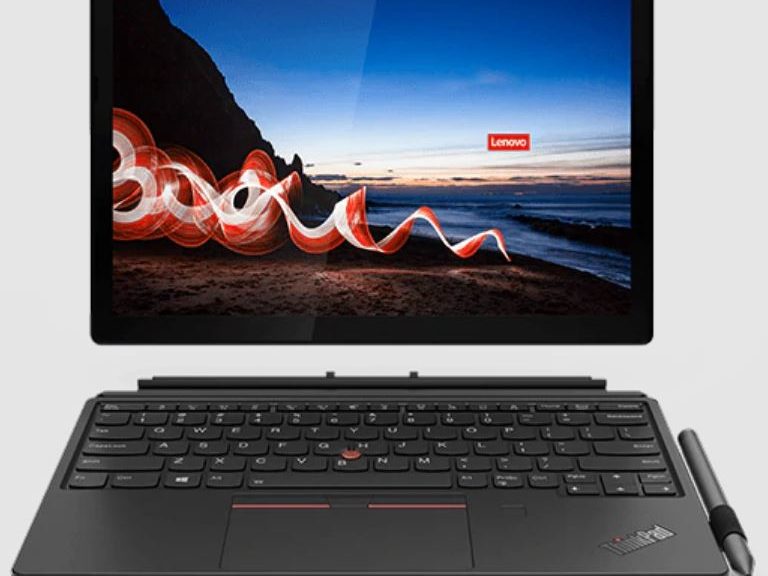
OK, then. I went and sprung US$150 for a Sabrent 1TB M.2 2242 NVMe drive at Amazon. It is depicted in the lead-in graphic above. The high-level sequence of events is as follows. Ordered on Wednesday, received and experimented on Thursday, reported on Friday (today). Alas, I seem to have hosed the drive and have started RMA negotiations with Sabrent. Along the way, I learned most of what’s involved in swapping X1 Nano NVMe drives.

Be Careful When Swapping X1 Nano NVMe Drives

As is almost always the case, there’s a YouTube video for that. It showed me everything I needed to do. Disassembly/reassembly were easy and straightforward. I had no mechanical difficulties. But once again, my US$7 investment in a laptop screws collection saved my butt. I mislaid one of the two NVMe holder screws (found it later during  cleanup). I lost one of the 6 battery restraint screws (fell on the floor into neutral brown carpet). Both were easily replaced from the collection.

Cloning Works, But Proves Mistaken

For whatever odd reason, the Sabrent drive shows up pre-formatted. The disk layout is MBR and the primary partition is ExFAT. Both of those got in my way as I cloned the original drive to the replacement. First, I had to clean the drive, convert to GPT, then format it as a single NTFS volume. Then, I used Macrium Reflect to clone the contents of the Samsung OEM drive to the Sabrent. Along the way Reflect told me it had turned off BitLocker and that I would need to re-enable it after boot.

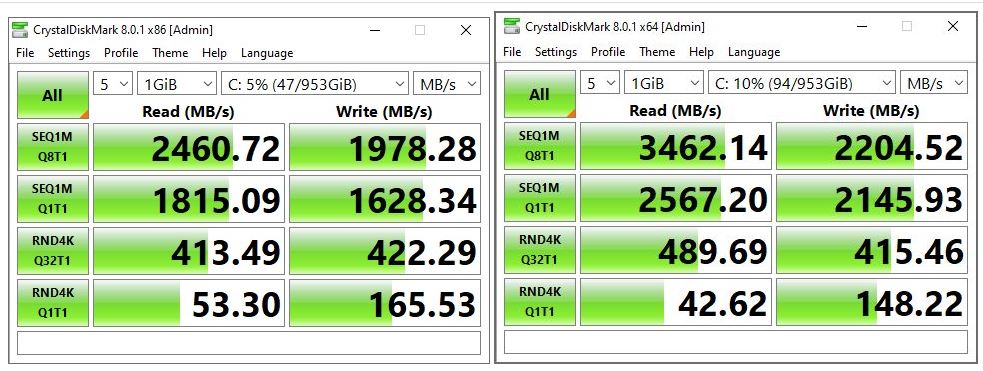
Replacing the Samsung with the Sabrent, I went into BIOS and turned secure boot off instead. This let the X1 Nano boot from the cloned drive just fine. I was able to run CrystalDiskMark to compare their performance. Here’s what that looks like:

Swapping X1 Nano NVMe Drives.side-by-side

Samsung OEM results left; Sabrent results right. Best improvement where it counts most!
[Click image for full-sized view.]

What do these results show? Indeed, the Sabrent is faster on all measurements, and more so on the most important random 4K reads and writes (lower two rows). It’s not a night-and-day difference, but IMO the added capacity and increased speed justify the expense involved. It’s a good upgrade for the X1 Nano at a far lower price than Lenovo charges. Also, performance is somewhat better than what their OEM stock delivers.

Here’s a summary of performance row-by-row (count 1-4 from top to bottom):
1. Read speeds increase by <1%; write speeds by >28%
2. Read speeds increase by >7%; write speeds by >36%
3. Read speeds increase by  >52%; write speeds by >21%
4. Read speeds increase by >14%; write speeds by >51%

Where Did I Go Wrong?

Cloning was a mistake. I saw it in the disk layout, which showed over 400 GB of unallocated space. Better to have done a bare-metal backup using Reflect with their Rescue Media. Next time I’m in this situation, that’s what I’ll do.

Something untoward also happened when uninstalling the Sabrent drive. When I stuck it back in my M.2 Sabrent caddy (which fortunately handles 2242 as well as other common M.2 form factors), it came up with a fatal hardware error. None of my tools, including diskpart, diskmgmt.msc, MiniTool Partition Wizard, or the Sabrent utilities could restore it to working order. I suspect that removing the battery, even though the power was off on the laptop, spiked the drive with a power surge. It’s currently non-functional, so I hope my warranty covers this and I’ll get a replacement. If not, it will prove a more expensive lesson than I’d planned, but still a valuable one.

Facebooklinkedin
Facebooklinkedin

Pondering Lenovo ThinkPad X1 Nano

It’s not often I get to step back from day-to-day work items and pause to think about something. I’ve had a Lenovo X1 ThinkPad Nano since Tuesday, February 23 (I wrote a First Look piece the next day). Since then, I’ve worked with that machine daily. I’ve even used it in place of my iPad Air for evening reading in bed. All this has me pondering Lenovo ThinkPad X1 Nano further. I want to position and present it properly to readers so they can decide if what it offers is what they want.  .  . and if they want to pay for it, too.

When Pondering Lenovo ThinkPad X1 Nano, Use Cases Rule

To justify the cost, one really needs strong use cases for a thin-and-light laptop. It weighs 381g more than my iPad (906 vs 525g). But it’s still comfortable on my lap. As a pretty serious touch typist, I actually prefer constant access to a keyboard. I do now wish, though, that Lenovo offered a touchscreen option for the X1 Nano for simple tablet-friendly activities like web surfing and reading e-books.

Over time, I’ve grown even more impressed with the X1 Nano’s performance and capability. It really does run on par with my older (2016) desktop PC. That’s true despite 32GB RAM and an i7-6700 on that PC vs. 16GB RAM and an i5-1130G7 on the X1 Nano. To me, it’s a telling illustration of how fast technology marches ahead. I didn’t expect an i5 to be able to go head-to-head with an i7 (even a 5-year-old model).

Blast from the Past…

The lead-in graphic for this story comes from Sergey Tkachenko’s WEI clone. He calls it the Winaero WEI Tool. For those who don’t remember — or who never knew — WEI stands for Windows Experience Index. It’s been around Windows since Vista came out in 2007. You can still run the equivalent functionality in Windows 10, in fact, with this command winsat formal. I like the Winaero tool because it presents the same look’n’feel as in Vista and 7.

What you see in that graphic is a rough-and-ready assessment of hardware components on the PC it’s run on. Those numbers show values from 8.9 (CPU, RAM) to  9.2 for the SSD and 9.9 for 3D business and gaming graphics. The only outlier is the desktop graphics — Iris Xe in this case — which come in at a relatively low 8.0 value (the primary reported value as well, because WEI uses the lowest number to desigate overall capability).

FWIW, the only area in which my older desktop beats the X1 Nano is on the desktop graphics category (it’s got an NVIDIA GTX 1070 card). All the other metrics are within 0.1 of one another, so neither machine obviously beats the other by any kind of margin.

Desktop graphics performance notwithstanding, I’ve come to appreciate the X1 Nano quite a bit in the 10 days I’ve had it in hand. It runs acceptably when surfing the Web, using Outlook or Word (my two most frequently used and important desktop apps). To be honest, I am seriously considering buying one of these with my own money. I can’t give a laptop a better endorsement than that.

What’s the Ideal Package?

If you, like me, decide to buy the ThinkPad X1 Nano, I recommend buying the i7 model with the 16 GB RAM configuration. Because the SSD is the only user serviceable part (RAM is soldered), get the 256 GB SSD, which you’ll want to replace when something like the Sabrent 1TB Rocket 4 becomes available in a 2242 form factor.

If you absolutely have to buy something now, the Sabrent 1 TB Rocket is available in a 2242 package. While it’s a bit slower than the Rocket 4, it’s faster than the Samsung OEM parts Lenovo uses in the Nano. You’ll also want to buy a Thunderbolt/USB-C dock, because the Nano is pretty short on ports (2xThunderbolt + 1xheadphone is all you get). As a backup fiend, I’ve already got a 5TB 2.5″ drive enclosure hooked up for extra storage and Macrium Reflect’s use.

Facebooklinkedin
Facebooklinkedin

Fixing Non-responsive Taskbar Icons

Last December, I wrote an article here that described an easy fix for an unresponsive Start Menu. The trick on my affected PCs was to go into Task Manager, right-click Windows Explorer, and select “Restart.” Over the past week the same thing is affecting Task Bar icons for open and pinned applications. It came in the wake of the occasionally wonky preview version of the upcoming March CU. That is, I’m inclined to name KB4601382 as an “update of interest” in this case. Fortunately, the same fix works.

Fixing Non-responsive Taskbar Icons

How can you tell when this problem manifests? Easy! You click on an icon in the taskbar and nothing happens. I show a portion of my taskbar icons in the lead-in graphic, by way of illustration.

I actually show the taskbar at the foot of both of my monitors. Sometimes, when one quits working, the other keeps going. Then I click that one instead. If neither works, the fix goes in. I’ve never had it fail.

As with my earlier report of Start Menu issues, I’m inclined to see some interaction between Stardock Software’s Start10 and the Explorer-based start menu and associated UI elements. Those include the taskbar icons and the notification area as well. Something wonky is happening, but is also easily fixed. I’ve reported this to Stardock and MS and am hopeful that, as before, a fix trickles into one or the other of those environments.

Seems Like a Limited Issue

I don’t see other reports of this phenomenon in the Start10 forums at Stardock. There’s plenty of discussion on the general phenomenon (Google search: “taskbar icons nonresponsive”). But all are unanimous in what to do: Restart Windows Explorer. Not much other cussin’ and discussin’ involved. Nice to know I’ve got the right fix, even if I don’t know the cause unequivocally and unambiguously. Sigh.

Facebooklinkedin
Facebooklinkedin

Mild Microsoft Update Health Tools Mystery

An interesting item is bubbling up in user forums  lately. Lots of Windows 10 PCs — including some of mine — have seen a new-ish, intriguingly named application show up. This story’s lead-in graphic shows it in second place. In fact, I’d say we’re facing a mild Microsoft Update Health Tools mystery. Typical questions include “What is it for?” and “When is it used?”

Cracking a Mild Microsoft Update Health Tools Mystery

A Microsoft Docs “Questions” item links the utility with update KB4023057 .  A corresponding support page mentions all Windows 10 versions, including 20H2. (It’s dated October 2020.) I’ve seen posts at answers.microsoft.com as far back as August 2020. It, too, references that same KB article.

That article says the update delivers “reliability improvements to Windows Update Service components.” It also says it:

includes files and resources that address issues that affect update processes in Windows 10 that may prevent important Windows updates from being installed. These improvements help make sure that updates are installed seamlessly on your device, and they help improve the reliability and security of devices that are running Windows 10.

Some Interesting Notes about KB4023057

There are 5 bulleted items (and a sub-note) the Support Note. All make fascinating reading. I reproduce them verbatim. (For brevity, I prune “This update may” or “This update will” ):

  • …  request your device to stay awake longer to enable installation of updates.

    Note The installation will respect any user-configured sleep configurations and also your “active hours” when you use your device the most.

  • … try to reset network settings if problems are detected, and it will clean up registry keys that may be preventing updates from being installed successfully.
  • … repair disabled or corrupted Windows operating system components that determine the applicability of updates to your version of Windows 10.
  • … compress files in your user profile directory to help free up enough disk space to install important updates.
  • … reset the Windows Update database to repair the problems that could prevent updates from installing successfully. Therefore, you may see that your Windows Update history was cleared.

Invitation to Conspiracy Thinking?

Go back, and read the forum traffic. Or, search Google for “Microsoft Update Health Utility.” Sadly, it reveals suspicion among community members. Indeed, some fear it helps MS forcibly update older Windows installs. In fact, MS does this already. Others don’t trust MS update orchestration. They’d rather control updates themselves. Still others worry about unwanted side effects or unusable PCs after forced updates.

Gosh! While these things are possible, I see nothing untoward at work here . Instead, I see MS staging repair tools in advance for update issues on Windows 10 PCs should they manifest. Aside from lacking user controls, I see them no differently than built-in update troubleshooters. In fact, I’m a devoted user of Shawn Brink’s Reset Windows Update tutorial and its accompanying batch file. It’s gotten me past 95% of all WU problems I’ve seen. That’s why I’ll gladly keep using it.

No Cause for Alarm

As far as I can tell, there’s not much to see here. Admittedly, Update Health Tools is a small surprise. But its Support Note offers good explanations. Thus, I’m OK with this tool. Nor should you worry, either. Rather, it looks like good software engineering.

Better yet, the Update Health Tools can handle update issues on their own, sans user input or guidance. That sounds like a blessing, even if in disguise. And FWIW, it’s missing  from Insider Preview releases. That tells me it aims squarely at production PCs outside IT umbrellas. That means mostly home and small business users. Thus, it should benefit those who need it most.

I’m coming out in favor of the Update Health Tools. I hope we’ll learn more about them from Microsoft soon. In the meantime, if you don’t like the tool, you can choose to uninstall it. I’m leaving it alone myself. If I’m right about it, it may come in handy someday.

Facebooklinkedin
Facebooklinkedin

X1 Nano First Look

Sometimes, you just get lucky. This Monday, I saw Rich Woods’ review of the Lenovo X1 Nano laptop at NeoWin.net. Immediately thereafter, I emailed my contact at Lenovo to ask for a review unit. Yesterday (one day later) I had that unit in my hands. That’s lucky! This mini-review is my X1 Nano first look report. Also, I’ll be writing about this light, compact, and powerful unit one or two more times in the next couple of weeks. Then, alas, I must return it.

Impressions from X1 Nano First Look

I’m a fan of the more compact X series ThinkPad laptops. I currently own an X220 Tablet (2012 vintage), 2 X380 Yogas (2018) and an X390 Yoga (2019). I like the portability of the 13″ form factor. I like the ease with which I can throw a unit (or two) into a carrying sleeve, a briefcase, or a backpack. On family trips especially, I’m used to taking two small laptops along. Thus, I can still keep up with email and post blogs while on the road. And my wife and son can use the other laptop when their smartphones aren’t enough.

I came into this review thinking the Nano would be a great candidate for family laptop on the road. I came out of it thinking that it would make an excellent (if lighter duty) candidate for work laptop on the road. I’ll need more time with the unit to suss this out further.

X1 Nano First Look.speccy

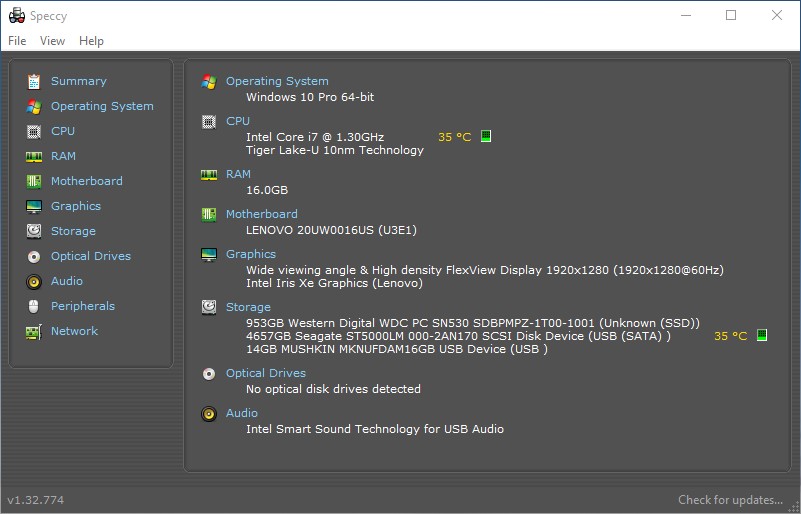
PiriForm’s free Speccy tool shows the basic components in this review unit.

X1 Nano Review Unit Speeds & Feeds

OK then, it’s got a Tiger Lake (11th generation) i5-1130G7 CPU, which runs at 1.10GHz on four cores and eight threads. Burst mode goes to 1.80 GHz for single-threaded tasks. It also comes with 16 GB of surprisingly fast LPDDR4-4266 RAM. It’s the first laptop I’ve used with Intel Iris Xe graphics. (Once again: these are surprisingly fast and also capable.)

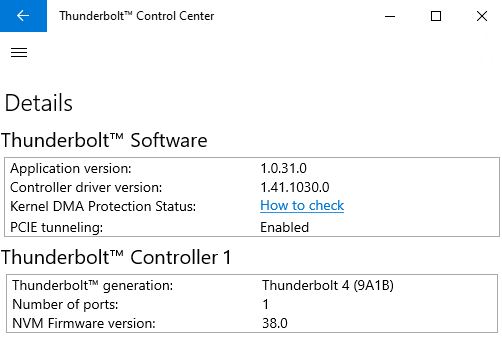
There’s a Samsung OEM 512 GB SSD (NVMe PCIe 3.0 x4) that’s reasonably fast (NotebookCheck calls it “entry-level to mid-tier by H1 2020;” one year on, it’s pretty much straight-out entry level). It’s got a non-touch, 2560×1440 (2K), 450 nits, 16:10, sRGB display that’s crisp and readable at default resolution. The only ports on the device are two Thunderbolt 4 USB-C connections: one labeled for power-only, the other labeled for power and data.

It also sports a speedy Intel AX201 Wi-Fi chipset that meshed quite nicely with my Asus 802.11AX router. (Access speeds of 400 Mbps and better, in a busy, signal-rich office environment.) Oh, and it has a fingerprint reader and a 720p Windows Hello capable integrated Webcam, too.

What’s missing on this unit for those who don’t have a Thunderbolt dock handy? (I have several.) At least one USB 3.0 Type A port, and  a micro SD port for added, onboard flash storage. With even high-capacity uSDXC cards now pretty affordable, I do indeed wish Lenovo had found a way to squeeze one in somewhere.

What Makes the X1 Nano a Standout?

It weighs only 906 grams (1.99 lbs). It’s got a carbon fiber top deck and a  (nicely coated) magnesium bottom deck.  The keyboard is about 10% smaller than the one on my other X model ThinkPads. Even so, it feels (and works) so much like those others that I can’t tell any difference. And for somebody like me who makes his living by typing on a keyboard, that’s a big thing.

The display is also pleasingly bright and clear, and the Iris Xe graphics are fast, crisp and powerful. I’m no gamer, but I couldn’t make the display choke up even by throwing graphics pop-ups at it. Working with my usual mix of multiple Chrome, Firefox and Edge windows, plus MS Word for writing, I was impressed. It works and feels just like my now-aging but still capable i7-6700 Z170 desktop (32 GB RAM, Samsung 950 Pro SSD, GTX 1070) on my typical in-office workloads. Even comparing CrystalDiskMark 8.0.1 results for the two primary drives, they’re almost identical.

More to Come in Days Ahead

Right now, my response to this PC is an enthusiastic “So far, so good.” As equipped, this unit’s MSRP on its Lenovo product page is US$1727.40. That makes it about $100 less than a 10th generation,   i7-equipped, non Iris XE (Intel 620 UHD) touchscreen ThinkPad X1 Yoga Gen 5.

Were I myself to buy one of these, I would spring the extra $120 for an i7 CPU. It uses an M.2 2242 NVMe drive, of which 1 TB units are not yet readily available on the aftermarket. Thus, I would probably buy the 256 or 512 GB SSD and then do a swap myself, when higher-capacity, higher-performance options go up for sale.

Other than that, it’s a delightful little laptop. I recommend it highly, subject only to my reservations. Those are: few ports, no SDXC slot, and a mildly painful ouch factor on price. But that’s how it is for “thin-and-light” laptops, isn’t it?


Facebooklinkedin
Facebooklinkedin

Post Dev Channel Upgrade Drill

As somebody who’s been in the Insider Program for Windows 10 since October, 2014, I’ve been through hundreds of Insider Preview installations and upgrades. That means I have a pretty well-defined drill through which I take my test PCs once an upgrade is in place. In today’s item, I’ll take you through my Post Dev Channel Upgrade drill as an illustration. That’s because I just finished upgrading to Build 21318.1000, released Friday February 19.

High-level View: Post Dev Channel Upgrade Drill

Viewed at a high level, those post Dev Channel upgrade steps might be described as follows:

    1. Check the environment, restore tweaks, make repairs
    2. Clean up post-upgrade leftovers, esp. Windows.old
    3. Perform other routine cleanups
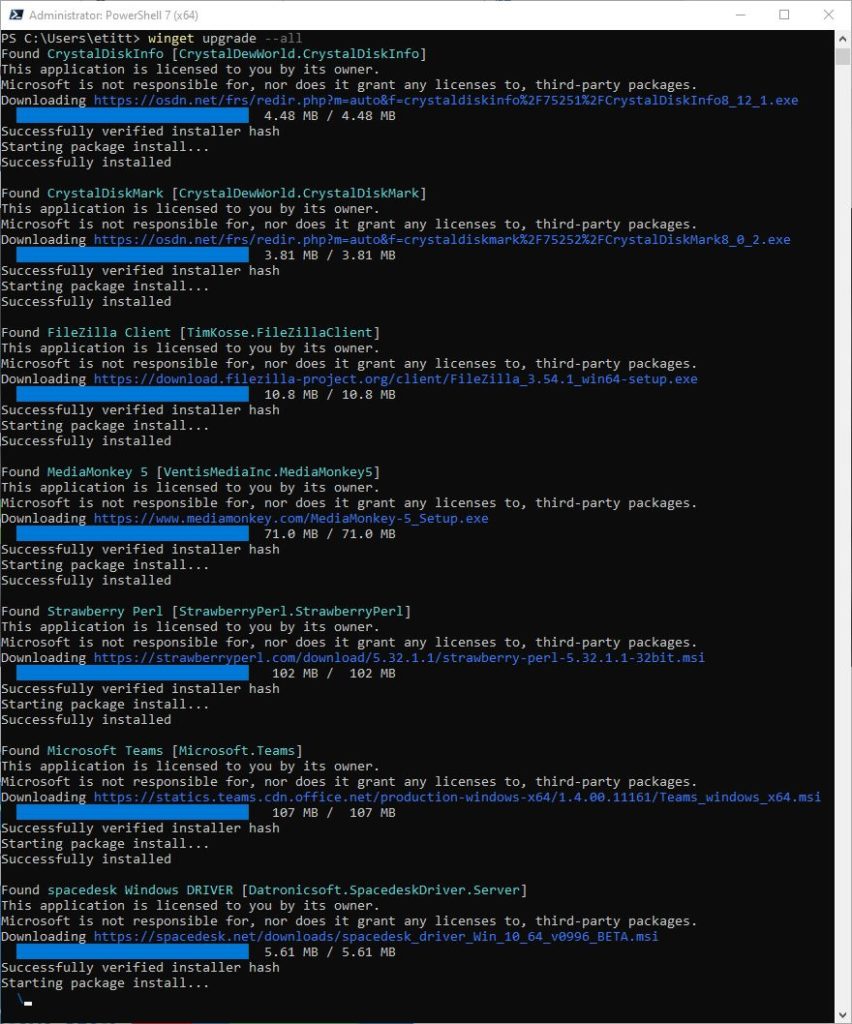
    4. Check for and install software updates (non-Windows)
    5. Use Macrium Reflect to make a pristine image backup

In general, the idea is to make sure things are working, clean up anything left behind, catch apps and applications up with Windows, and make a snapshot to restore as this release baseline, if needed.

Step 1: Check & Restore or Repair Anything Out of Whack

YMMV tremendously during this activity. After many upgrades, I’ve jumped into File Explorer Options (Control Panel) to make file extensions visible again, show hidden files, and so forth. MS is doing a better job with this lately, and I don’t usually have to do this with Insider Preview upgrades (though it does still happen for standard feature upgrades).

For a long, long time I had to go into Advanced File Sharing to loosen “Guest or Public” and “All Network” network profiles on the Lenovo X220 Tablet to get RDP to work. Because I use RDP from my production desktop to access and work on my arsenal of test PCs, this is pretty important — to me, anyway. The last few Dev Channel releases have NOT had this problem, I’m happy to say.

I run Helmut Buhler’s excellent 8 Gadget Pack on my Windows 10 PCs. That’s because its CPU Usage and Network Meter gadgets provide helpful dashboards. The former is good for CPU and memory usage and system temps; the latter is great at showing network activity and base addressing info. Very handy. But each time an upgrade is installed, Windows 10 boots it off the desktop. Buhler has written a handy “Repair” utility that I run after each upgrade to put everything back the way it was.

Step 2: Clean up post-upgrade leftovers

You can use the built-in Disk Cleanup utility, run as admin, to take care of most of this. I personally prefer Albacore/TheBookIsClosed’s Managed Disk Cleanup (available free from GitHub). Why? Because he tweaked the UI so you can see all active controls in a single display window, and select all the stuff you want gone in a single pass. Here’s what that looks like to make it visually obvious why I prefer this tool:

Post Dev Channel Upgrade Drill.mdiskclean.exe

Notice you can see ALL options eligible for selective clean-up in a single display area in Managed Disk Cleanup. I like it!

Step 3: Perform other routine cleanups

I still use Josh Cell’s Uncleaner utility to clean up temp files and other leftovers after an upgrade. If I’m feeling ambitious I’ll run the DriverStore Explorer (RAPR.exe) to identify and remove duplicate device drivers, too. Once upon a time I would run Piriform’s CCleaner as well, but I’m less than happy with that software now that the maker has started including bundleware in the installer. I haven’t found another tool I like as much as the old version.

Step 4: Update Third-Party Software

You can use a tool like KC Softwares SuMO or Patch My PC Updater to suss out most of the items in need of update on Windows PCs. SuMO is a little better at its job but costs about US$35 for the PRO version (does automatic updates for most programs, but sometimes vexing to use). PMP Updater is free, fast, and entirely automatic but doesn’t update everything. Sigh. I use PMP Update on my test machines, and SuMO PRO on my production PC myself. I’m doing this on the theory that it’s best to have everything updated before making a pristine image backup, as I do in the next step.

Step 5: Make a Pristine Backup

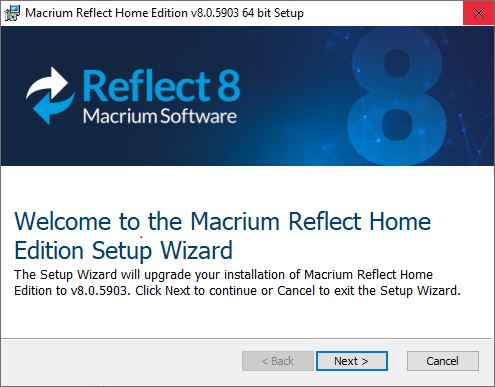
With everything upgraded and updated, and all the dross cleaned up, it’s the perfect time to make a fresh image backup. I like Macrium Reflect, mostly because it’s faster and more reliable than the built-in Windows 7 Backup and Restore utility (which MS itself has recommended against since 2016). And indeed, it’s faster at backing up and restoring than most other utilities I’ve used, and also includes a bootable rescue flash drive utility you can use for bare metal and “dead boot/system” drive repair/restore scenarios.

Please note: Macrium Reflect is MUCH faster than using the rollback utility to return to a lower-level OS image from a higher-level one. That’s why I feel safe getting rid of the Windows.old folder as part of my cleanup efforts. I know I’m not going to use those files anyway…

OK then, that’s my drill. I’m sticking to it. Hopefully, you’ll find something in there to like for yourself. Cheers!

Facebooklinkedin
Facebooklinkedin

DISM Trumps SFC To Fix Hung Execution

Here’s an interesting observation straight from TenForums. Occasionally, the System File Checker (SFC) will hang when run. That is, it will grind forward to some percentage of completion, and then sit there indefinitely, making no further progress. If that happens to you on a Windows 10 PC, it’s OK to terminate the process (enter Ctrl-C at the command line or in PowerShell). In such cases, DISM trumps SFC to fix hung execution. Let me explain…

How DISM Trumps SFC to Fix Hung Execution

To unpack my assertion, please understand that when SFC finds an error it cannot fix, it more or less stops where it is. The Deployment Image Servicing and Management tool, aka DISM, can replace the files in Winodws 10’s cross-linked code repository WinSxS. By doing so, it will often fix the errors that SFC cannot surmount successfully.

The syntax for the specific DISM incantation is most often:

DISM /online /cleanup-image /restorehealth

Other variations for offline images, or that use something other than local files already known to Windows 10 are documented at MS Docs. There you’ll find a helpful article entitled “Repair a Windows Image” that take you through various elaborations that may sometimes prove necessary. Using the Source: attribute can get particularly interesting, especially if you’re working from a WIM or ESD file that is home to two or more Windows images.

If SFC Hangs, DISM /RestoreHealth Often Sets Things Right

As it did for the person who posted about SFC difficulties at TenForums, this approach will often (but not always) make things right. You can’t know until you try. But the thing to remember is that if SFC hangs or fails, your next step should be to try this specific DISM command.

In my personal experience, this has fixed half or more of such issues when they’ve come up. If the odds come up as they should, this approach will also work for you. Try it, and see!

[Note Added Feb 16 afternoon]:
Go Ahead: Skip SFC, Run DISM First

Members of the Insider Team responding to this post informed me that “On Win10 it’s recommended to run DISM first.” This is explained in an MS Support Note entitled “Use the System File Checker tool to repair missing or corrupted system files.” And sure enough, in reading over that article it informs readers “If you are running Windows 10 … first run the inbox Deployment Image Servicing and Management (DISM) tool prior to running the System File Checker.” I’m not sure what “inbox” means in this context, but the order is clear and unmistakable: DISM first, SFC second.

I’ve been following typical advice from TenForums and conventional wisdom for so long, I neglected to read up on SFC in putting this story together. Live and learn: now I know to reverse the order and run DISM first. Hope this helps others, too!

Facebooklinkedin
Facebooklinkedin

Voidtools Everything Finds Files Fast

I know plenty of purists who won’t use third-party Windows tools if a Microsoft-supplied tool or facility will do the job. I am not such a person, and I’m happy to use third-party tools that either do things that Microsoft doesn’t do, or do as well as they do. Because Voidtools Everything finds files fast, it’s part of my standard Windows 10 desktop runtime. Oh, and it’s free, imposes little overhead, and — in my experience — runs faster and works better than Microsoft search. I usually get what I’m after before I’ve finished typing my input string.

Because Voidtools Everything Finds Files Fast, Use It!

The Everything FAQ provides a peachy overview of the tool, and explains its speed, behavior and workings. That said, Everything is primarily a name search tool for files and folders. It provides only limited visibility into file contents (that’s a search tool of a different stripe). The developers say that Everything takes about 1 second to index a fresh Windows install (about 120K files) and a minute to index 1M files. It really is fast, based on personal experience. It can also access files on FAT volumes, network storage, and flash devices (but minor configuration wiggles in Tools → Options → Folders are required, shown below).

FAT-derived volumes (like those on SD cards and UFDs) don’t show up by default in Everything. But they are easy to add.
[Click image for full-sized view.]

Working Search for Everything It’s Worth

OK, bad pun, I know. But you can use boolean operators and wildcards in Everything much like you do at the Windows command line. Everything also supports advanced search for more complex search strings that also include the program’s content search functions (warning: these are slow because Everything does not index content in advance). For me the Advanced Search window provides the complex functions I need. Check it out:

Advanced search offers a variety of pattern definition and matching functions. Works like a champ, too!

If, like me, you have lots of storage and millions of files at your fingertips (right now, Everything says it’s indexed 1.4+M objects for me), Everything is handy and useful. If you try it out, you’ll probably end up keeping it around and using it regularly. I use it dozens of times a day, every day myself.

Facebooklinkedin
Facebooklinkedin

X380 Yoga 21301 Installation Issues

I’ve been struggling since last Thursday to get the latest Fast Ring version — namely, 21301.1000 — installed.  That’s right, I’ve got “interesting” X380 Yoga 21301 installation issues running hot and cold right now. So far I’ve seen at least 4 different error codes, all of which hit at about the 48% mark after the first reboot. I call this the “post-GUI” phase of Windows 10 installation, because it occurs after the WinPE environment takes over the install process following that first reboot.

Diagnosing X380 Yoga 21301 Installation Issues

I’ve just confirmed that these issues persist in the latest CU 21301.1010,  as well as in 21301.1000. I’ve been using the MS tool setupdiag.exe to get to the bottom of things. But because it finds the NT driver as the culprit for the IRQL_NOT_LESS_OR_
EQUAL and the bugcheck 0X0A error, that puts the onus on MS to fix something beyond my control. You can see this in the setupdiag output in the lead-in graphic for this story.

I can tackle and fix lots of Windows 10 drivers. But as I understand it when the NT driver (shows up as lowercase nt in the screencap) is mentioned, it’s general indicator. According to dbgtech.net, “the error might be caused by a device driver, a system service, a virus scanner, or a backup tool that is incompatible with the new version.”

Coming Up Dry Is No Fun at All

I’m running Defender on this PC so I’m pretty sure it’s not involved. I’ve stripped my services down to the bare minimum. Macrium Reflect is my backup too (and still working on the X220 Tablet that has managed both of these recent updates/upgrades). The same device drivers work on 19042.746 on my other nearly-identical X380 Yoga PC (only difference: Toshiba SSD vs. Samsung).

I’m still looking for enlightenment, but not finding any. Last time something like this happened, I just had to wait for a new Fast Ring/Dev Channel release, and it installed just fine. Here’s hoping!

[Note Added Feb 12] 21313 Brings Success!

I’d been contacted by a member of the Windows Insiders team as a result of sharing a link to this post on the Windows Insider MVP Yammer community. I was informed that a future Dev Channel release would fix my problem. As I learned earlier this afternoon, 21313 installed without difficulties. Seems that this PC got bit by a known bugcheck error.  It’s the first item on the Fixes list in the 21313 release notes. This has been a known issue for some time, and is apparently now fixed. Woo hoo!

Facebooklinkedin
Facebooklinkedin

UFD Failure Presents Strange Symptoms

I had one of my 16 GB Mushkin Atom USB Flash Drives (UFDs) fail on me this weekend. Alas, it happened in the middle of a boot-into-restore operation on my Lenovo X220 Tablet.  Because I didn’t think I’d built Rescue Media, I stuck the UFD into the machine while that process was underway. After the restore ended,  because that very same UFD failure presents strange symptoms I blamed Reflect. Wrong!

When UFD Failure Presents Strange Symptoms, Then What?

As is my usual practice when a device presents odd behaviors or symptoms, I go into diagnostics mode. When I dug into the drive using MiniTool Partition Magic (MTPW), I could see 5 NTFS partitions on that device. Each was a miniscule 3.8 MB in size. But no set of contortions would return that device to operation. Diskpart didn’t do it at the command line, nor was MTPW able to return it to working order. When I inserted it into Disk Management, I got the ultimate judgement on its condition shown in this story’s lead-in graphic: “Bad Disk.” That seemed to sum things up pretty nicely.

This is the second UFD I’ve had fail on me in the past 5 years or so. I just counted 28 of them here in my office, in sizes ranging from 8 GB to 128 GB. I use them all the time. The smaller ones are usually bootable with OS images, rescue media, or repair tools. The larger ones act primarily as portable storage for project work when I go on the road. And apparently, they do fail from time to time.

Macrium Reflect Forum Sets Things Straight

I hope I can be forgiven for initially wanting to blame Reflect for trashing the UFD. It did go south on me in the middle of a Macrium operation, after all. Then, I learned more about how Rescue Media works, courtesy of MR forum regulars “Froggie” and “jphughan.” Now, I am inclined to agree with their analysis that the UFD’s failure was coincidental.

Let me explain: it seems that when invoked using the “boot to restore” operation, jphughan told me “the WIM file inside the Rescue Media cached build folder — but that is a folder on (by default) your C partition.”  Given that member jphughan has 8.5K posts on the forums and has reached “Macrium Evangelist” level, I’m inclined to believe he knows what he’s talking about.

And in fact, I saw my system go into Recovery from the usual boot drive (a Plextor SSD) on that PC. Turns out that there’s a sub-older inside C:\Boot that’s named Macrium. It in turn has folders for the drivers it needs, various Windows 10 Assessment and Deployment Kit elements (aka WA10Files) folder, where the all-important boot.wim file for the WinRE version that Macrium uses to boot its Rescue Media resides.

Given that the UFD doesn’t function properly, but the system not only booted and ran its restore, this is the only way to explain how that process occurred. Thus, I concur with my informants from the Macrium Forums that (a) restore ran from the C: drive and (b) the UFD was either dead or died somewhere during the reboot process that proceeded just fine without its help or involvement.

Just goes to show that coincidence is a powerful force, but one that can be reasoned past when needs must.

Facebooklinkedin
Facebooklinkedin