Category Archives: Insider stuff

Lenovo Yoga Pro 9 Intake

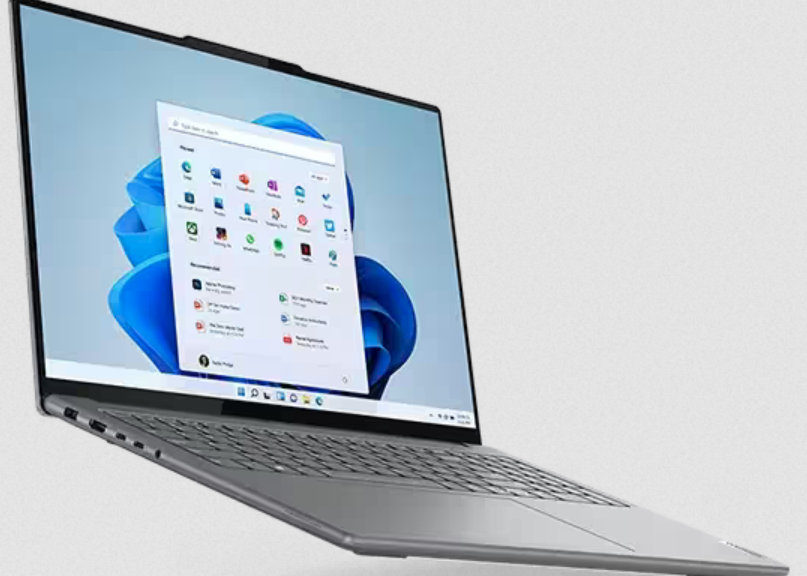
When I got home from a visit to a dental lab around lunchtime on Friday, the Boss asked “Were you expecting a package?” I’d asked Lenovo to send me a Yoga Pro 9 earlier that week, so my answer was a tentative “Maybe…” And sure enough, that’s what it was. Over the weekend, I had time to get through all steps in the Lenovo Yoga Pro 9 intake process. It proved more interesting — and educational — than I expected…

What I Got for Lenovo Yoga Pro 9 Intake

There were some interesting surprises in what showed up. Basics of the unit’s configuration include:

  • Intel Core Ultra 9 185H (Meteor Lake/13th Gen+)
  • 32 GB LPDDR5x-7467 (soldered)
  • Hynix 1TiB NVMe SSD PCIe x4
  • 16″ Lenovo LEN8BAI Monitor 3200×2000 resolution monitor
  • Intel Wi-Fi 6E AX211 network adapter
  • Intel AI Boost NPU & Copilot key

There’s more, but I’ll get to some of that in the next section. The main reason I requested a short loan of this formidable PC was for access to a machine with NPU and Copilot key to take them for a spin. Looks like this unit retails for around US$2,100 at the Lenovo Store.

What I  Learned During the Intake Process

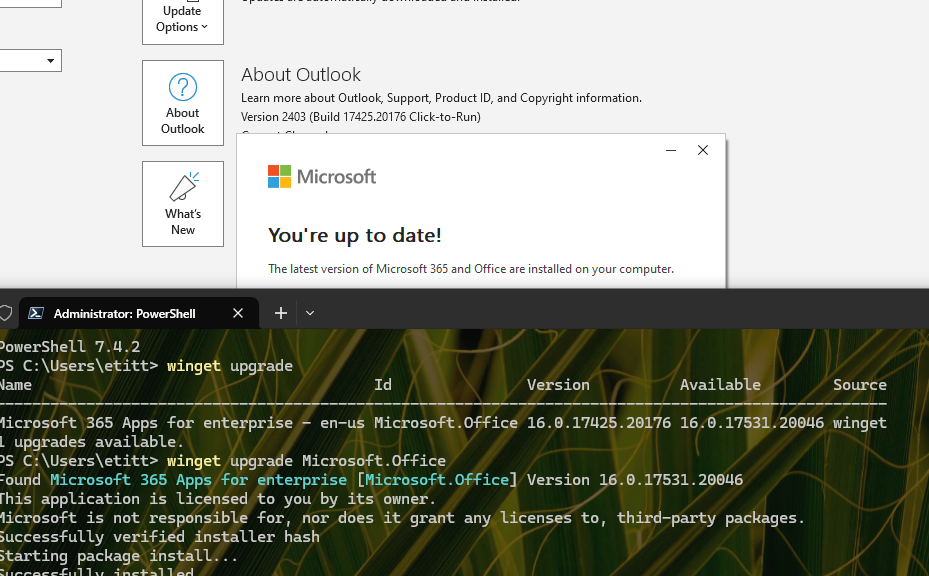
TLDR answer: LOTS of things. I’ll elaborate by noting first that the unit came with Windows 11 Home installed (immediately upgraded to Build 22631.3527 Enterprise). Because I usually interact with most PCs — personal, production and test/loaner units — via RDP, sticking with Home was not an option for me. It’s OK: because I’m an MVP I get a MAK key for Enterprise as part of my Visual Studio subscription. Lenovo will destroy my image upon its return anyway. But if you decide to purchase one, you can indeed configure it with Pro for a mere US$2 extra. That’s what I’d do, for sure…

I found myself a little mystified by the new Meteor Lake Intel Core Ultra 9 185HCore Ultra 9 185H CPU. Intel refers to this CPU as “formerly Meteor Lake” but doesn’t really assign a “Generation” number. Its Intel home page studiously avoids mentioning such info. My unit was built in early February 2024 according to its outside sticker. Its Intel Ark page describes it as Intel Core Ultra processors (Series 1) so it looks like NPU endowed chips are starting a new numbering scheme instead. This should be interested to see play out, expecially with Snapdragon X systems on their way into this same niche.

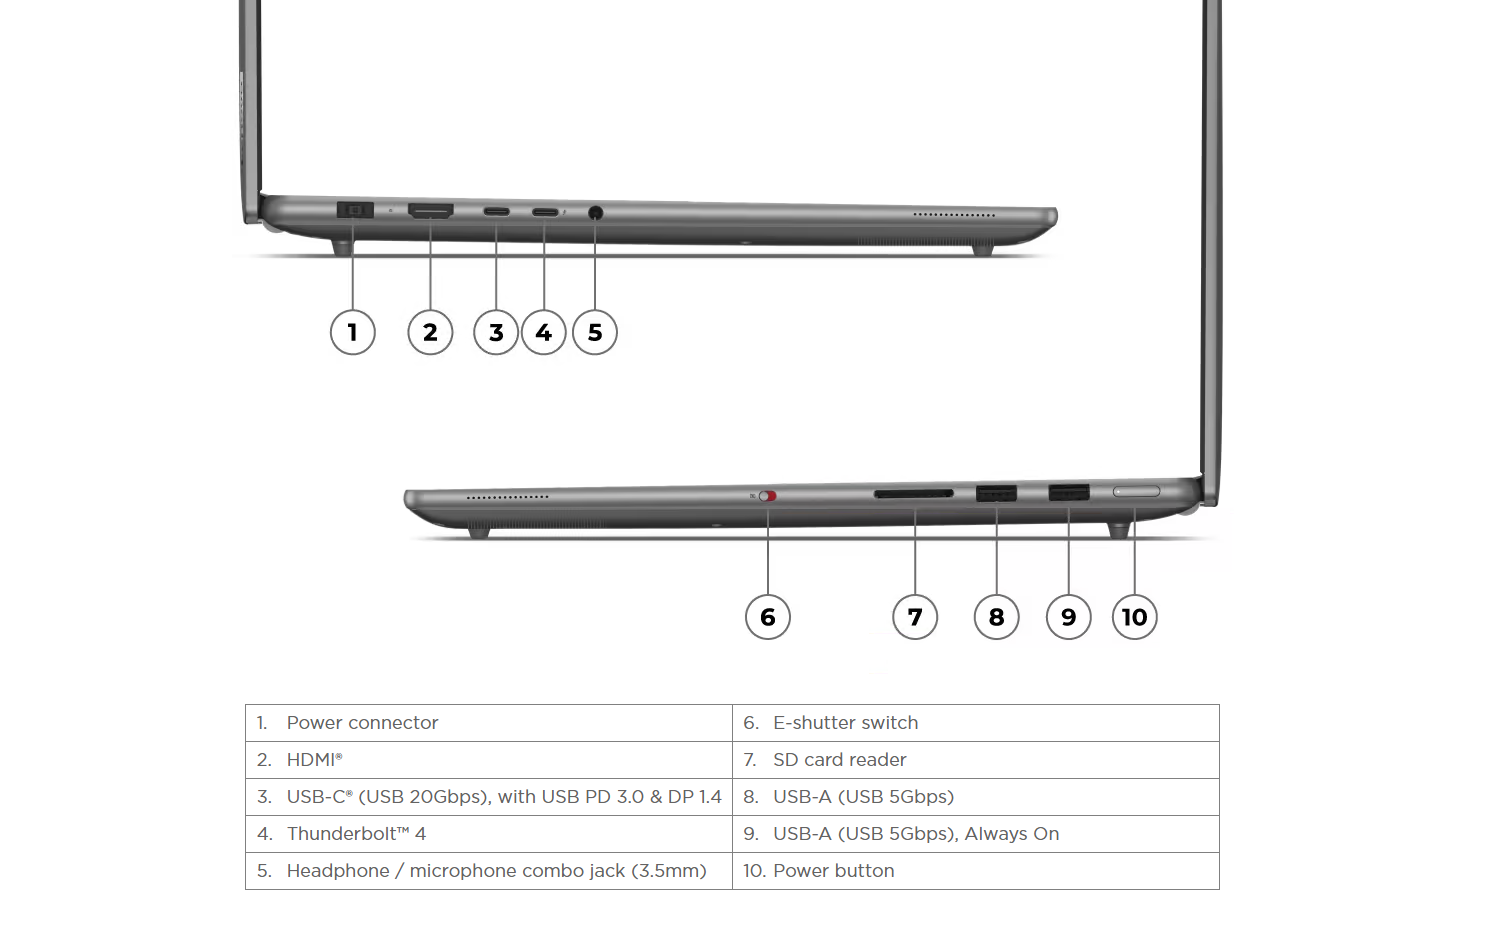
I also observed that read/write speeds vary significantly by USB-C port type. As you can see in the next graphic, port3 is USB -C 20Gbps, and 4 is Thunderbolt 4. These produce “interesting” benchmark results where one is noticeably faster than the other for some values. Indeed, TB4 is faster for 1M read and 4K random writes, while USB 4 is faster for 1M write and 4K random reads. Others are more or less a wash. I’m going to have to try faster SSDs to see if that makes a difference (I suspect it will).

Lenovo Yoga Pro 9 ports (left & right sides)
Lenovo Yoga Pro 9 ports (left & right sides) [Double-click image for full-size view]

What About AI Stuff?

I can tell that Copilot runs faster on this laptop than on other, older models (even a ThinkPad P16 Mobile workstation with a 12th-Gen i9-12950HX CPU but no NPU). But other than that I haven’t really messed around enough with Copilot and other AI functions to get a sense of the differences. Stay tuned! I only get to keep this unit for a month, so I’ll be writing about it regularly over the next few weeks.

Other Observations

Here are some bullet points that reflect other stuff I noticed while unpacking, setting up and using the new Lenovo Yoga 9 Pro:

  • The shipping materials proudly proclaim “plastic-free packaging” in several places on the boxes. Two egg-crate holders supported the laptop, with one small internal cardboard box for the brick and power cord. There was some soft material labeled 22/PAP between the upper and lower decks of the clamshell. Ditto for the label on the black bag inside which the laptop itself was sitting. The material uses a plastic-recycling symbol (three arrows forming a triangle) but lookup tells me … yep, it’s paper! Even the twist-tie that held the power cord together was covered in brown paper. Good job, Lenovo.
  • For some unholy reason, Lenovo included McAfee AV on the Yoga 9 Pro. I uninstalled it right after I performed the OS updates on that PC. Defender is fine with me: I no longer use much, if any, third party security software.
  • Have to laugh: the Copilot key is a big deal on these new Windows AI-Ready PCs. But the onscreen keyboard (Ctrl+Winkey+O) does not include such a key. I bet MS will fix this before these AI-Ready PCs get into wider circulation.
  • The Open Source Snappy Driver installer (SDIO version) gives the drives already installed on this laptop its blessing. It’s not an absolute guarantee that everything’s up to date, but it’s pretty darn close. Good-oh!
Facebooklinkedin
Facebooklinkedin

Dev Home Now Creates VMs

A new release of the Dev Home (Preview) toolbox hit the streets on Tuesday, April 23 (v0.13). I updated but didn’t really pay much attention. Then, this morning I learned something noteworthy from WindowsLatest — namely, that you can now use Dev Home (DH) to set up and manage Windows VMs including Hyper-V instances. Because I’m working on a “How-to” story right now on such VMs, this definitely caught my eye. And indeed, on a test PC, I see strong evidence that Dev Home now creates VMs. Not too much effort involved, either…

If Dev Home Now Creates VMs, Then What?

It took me a while to get where I needed to go with setting the right environment toggles. Eventually, I settled on the first three (Environments Creation, Environments Management, and Environments Configuration) and turned all three on. Then, I had to close and re-open Dev Home to gain the ability to actually use the “Create environment” button.  It’s hiding in the upper right corner of the lead-in image; you can see it up there if you check.

At that point you can give your environment a name (I called it DHWin11 to indicate I was using Dev Home to build a new test Windows 11 VM in Hyper-V). Then you pick the reference image from which it gets built. I chose the Windows 11 Development Environment option that Dev Home supplied. I’m sure I could have navigated to another ISO of my choosing.

Take a While, But Gets Things Right…

It took over 15 minutes for the setup, download, and install processes to get far enough along to do something. But gosh, I was able to get into the Hyper-V window to fire things off, then get to the desktop with no hiccups or gotchas along the way inside RDP. Things don’t work that well using Hyper-V Manager.

I found myself running a 22H2 Windows 11 instance labeled “Windows 11 Enterprise Evaluation” for Build 22621.3447. I know from prior experience this is a 30-day eval or thereabouts. Indeed, Copilot tells me it expires on June 19, 2024. But gosh, this makes standing up and using a plain-vanilla Hyper-V VM as easy as it’s ever been in my personal experience.

Now, I need to do it again, and use an image of my own choosing. That should be interesting! Stay tuned, I’ll write about this soon. Meanwhile, you can see that VM running on my P16 test PC as shown in an RDP window for the whole shebang.

Wow! That was almost TOO EASY. I must say, I’m impressed. Need more time and exploration to really formulate a more useful opinion, though. First look is a doozy, though.

Facebooklinkedin
Facebooklinkedin

Hope MS Makes Good on Classic Teams Uninstall

I’ve got to admit: I’ve lost count. I’ve seen oodles of updates and versions of Teams come and go on my various Windows 10 and 11 PCs lately. Take a look at Monday’s MS Teams article “End of availability for classic Teams client.”  Among much other stuff it says “This rollout involves installing the new Teams client for users who still have the classic Teams client, with Microsoft attempting to uninstall the classic Teams client 14 days after the installation of new Teams.” Gosh, I hope MS makes good on Classic Teams uninstall promises.

Why I Hope MS Makes Good on Classic Teams Uninstall

I’ve tried uninstalling Classic Teams on Windows 10 PCs and VMs. (Note: I do NOT have this issue on Windows 11 PCs of any build or version, stable or Insider Preview channels.) But it often returns to those Windows desktops on its own, through means mysterious and marvelous. In short: it’s attaining zombie-like status except it doesn’t relentlessly chant “Brains! Brains! Brains!”

Better (or worse) still, when I try to use Teams on Windows 10 (it’s still my production work environment), Classic tends to come up by default. I know why — it’s because I use MSAs that aren’t part of an AD/Entra domain — but it’s still irksome.

Gosh! I’ll be glad when July 1 comes and goes and I get to see if the zombie that is Classic Teams will finally get exorcized — err, uninstalled — from my Windows 10 PCs and VMs. Stay tuned! I’ll keep you posted. Fingers crossed, in the meantime. . .

Results from Remove/Replace Operation

Just for grins, I used Revo Uninstaller to get rid of all Teams traces on my production PC. Then I went to the MS Store to download and install its latest version. When I launched for the first time, it asked me if I wanted Teams (New) or Teams (Classic). I chose (New) and now it comes up in the Start menu with no Classic companion. I’ll keep an eye out and let you know if Classic lurches back to life!

Facebooklinkedin
Facebooklinkedin

IPRI Hits Production Windows 11

I’m not sure exactly how long this has been true but Copilot agrees with me that it first appeared in 23H2 Build 22631.3447. Release date for that build: April 9, 2024. It had been available in Insider Previews since earlier this year, but this is when in-place repair install (IPRI) first showed in a production release. Now that IPRI hits production Windows 11, it’s ever so much easier to let WU provide the files to make that happen. Good stuff.

What IPRI Hits Production Windows 11 Means

Before this facility appeared in various Windows 11 versions, the only way to conduct such a repair was to use UUPdump.net to build an ISO that matched the current installed Windows version, then mount same, and run setup.exe from its root-level folder (see red-boxed item in the screencap following):

IPRI Hits Production Windows 11.setup.exe

The old-school IPRI method requires an ISO for the same version.build that’s running, then launching setup.exe from its root-level folder.

Now, with this change you need only navigate to Settings > System > Recovery, then click the “Reinstall now” button as shown in the lead-in graphic. Windows Update does the rest. It does take a while (50-60 minutes in recent test runs for a ComputerWorld story) but that’s because it has to download all the component files, then build and update an ISO. Adding install time to the time UUPDump.net takes to create the ISO, it’s pretty much a wash.

And again: it’s ever so much more convenient and automated. Big win for Windows users everywhere. Thanks, MS!

Facebooklinkedin
Facebooklinkedin

Varying Office Visions for Up-to-date

Here’s an odd one: I find myself trying to reconcile varying office visions for up-to-date. I’ve got a Microsoft 365 Subscription on the one hand, and the Microsoft 365 Apps for enterprise – en-us on the other. Both currently stand at version 16.0.17425.20176. The update checker in the application version (top of lead-in graphic) says it’s up to date. WinGet, however, wants to update the apps version to 16.0.17531.20046, says it’s succeeding, but not getting anywhere. What to do: yikes!

Reconciling Varying Office Visions for Up-to-date

I blogged about a similar gotcha last month (Office Update Hiccup Is Easily Fixed: March 11). Alas, this time the same fix (Repair the office install, then try again) does NOT appear to resolve the issue. Indeed, even though I tell it to fix the apps version, the repair tool works on the subscription version anyway.

Despite some interesting discussion and suggestions at Microsoft.Answers, I can’t get any of their proposed “other fixes” to work, either. Sometimes, when updates get wonky, you just have to wait for MS to get the picture and provide fixes from their side. Methinks this could be one of those times. Indeed, I’ve spent enough time trying to handle this myself, so I’ve decided to wait for a next update and see if that fixes things.

Ain’t that just the way things go from time to time, here in Windows-World? Rhetorical question, I know, but my answer is “Yes!”

Facebooklinkedin
Facebooklinkedin

Bring Up Start Menu Inside Start11v2

Here’s something I hadn’t noticed, nor yet learned how to fix. Seems that there’s no entry in the UI for Start11v2 in “Windows Pro style” for the built-in Windows 11 Start menu. But there’s a trick to bring up Start menu inside Start11v2. That method lurks behind the lead-in graphic which shows all of the available styles and the one I currently have selected — namely “Windows Pro style.”

The Trick to Bring Up Start Menu Inside Start11v2

This trick depends on features available in the Windows 7 style that are missing from Windows Pro (and other more modern styles):

1. Switch to Windows 7 style view
2. Open the Start menu
3. Find the entry that reads “Windows Menu”
4. Right-click that item and select “Pin to start”
5. Inside Start11v2 UI, switch back to Windows Pro style

Now, you can see the “Windows Menu” entry at the lower left of the default app icon grid inside Start11v2.  If you hold down the CTRL key, you can drag that item and put it wherever you like.

Bring Up Start Menu Inside Start11v2.Windows Menu

I used that technique to move it to the upper-left corner position where I can see it more quickly and easily.

Bring Up Start Menu Inside Start11v2.oldmenuulWhy Use the Built-in Start Menu, Anyway?

Some things in Windows 11 don’t work unless you can access the built-in Start menu rather than a third-party version (e.g. Stardock’s various versions, StartAllBack, Open Shell Menu, and so forth).

In this case I wanted to see if a new feature providing access to MS account info directly from the start menu in Beta Build 22635.3500 was present or absent. It’s apparently on a gradual rollout. And, in keeping with my unbroken track record so far, that feature is not yet available on this PC. Go figure!

Facebooklinkedin
Facebooklinkedin

Busy Week Brings 9 WinGet Updates

It’s been a busy week, so I’ve been doing stuff more, and playing less with Windows. How do I know? I just ran WinGet on my production desktop and it tossed up a new personal high. That’s right: my busy week brings 9 WinGet updates to my Windows Terminal PowerShell session. You can see the intro part in the lead-in graphic. Wow!

When Busy Week Brings 9 WinGet Updates, Install Them

So that’s what I’m doing right now, as I write this blog post. The whole 9 items took about 2 minutes to complete. It brought 8 successes and one failure. Because I have numerous M365 components open right now, the M365 Apps for Enterprise install failed. That’s probably because I’m using a different subscription version tied to a different MSA. The one I’m using cheerfully reports itself all caught up.

It’s the one I’m NOT using that reports itself out-of-date (which is perfectly OK, because I’m not using it. Maybe I should remove it?) Isn’t it funny how using multiple MSAs in a Windows PC can occasionally make life interesting when you login with one such account, and use assets tied to another such account?

It’s All Part of Windows’ Inestimable Charms…

Learning where the eccentricities reside or potholes lie, and steering around them, gives me countless opportunities for learning and enjoyment when it comes to working with Windows. But less so than usual this week: I’m busy. In fact, I need to go do some paying work as soon as I’m done here. Cheers!

Facebooklinkedin
Facebooklinkedin

PowerShell Install Goes Cancelled to Abandoned

Here’s a good one. Take a look near the bottom of the lead-in graphic. It shows what happens at the end of a WinGet upgrade sequence with the PowerShell installer. But whereas that installer used to say “Installation cancelled” it now says “Installation abandoned.” Hence my assertion: PowerShell Install Goes Cancelled to Abandoned. In truth, this simply means the Windows Terminal window must be closed and re-opened for a new PowerShell version to take effect.

What PowerShell Install Goes Cancelled to Abandoned Means

Things get interesting when a program that’s currently running gets updated. Generally, for the code to take over from the old, the old must first stop. Then, the new must start up and run, so it can use all of its newly-minted capabilities and capacities. The “cancelled” and “abandoned” stuff is text for an error message that indicates the installer itself had to terminate in some kind of unexpected, unusual, or surprising way.

Look at what comes up when I close Windows Terminal, and then re-open it. Just for grins, I add WinGet list microsoft.PowerShell and another WinGet upgrade … check. The former shows the new version 7.4.2.0 is present (as does the lead-in prompt above it). The latter shows that a new WinGet check no longer reports that PowerShell needs an upgrade. Case closed!

PowerShell Install Goes Cancelled to Abandoned.follow-up

The new PowerShell version is running so it no longer generates an update notification. [Click image full full-size view.]

Facebooklinkedin
Facebooklinkedin

Reboot After NVIDIA 552.22 . . . Or Else!

I updated my production desktop with its RTX 3070 Ti GPU yesterday. When that process completed, the installer asked me if I wanted to restart now or wait until later. Because I was busy working, I elected later. Then in the usual crush of a frenetic afternoon, I completely forgot that reminder. It came back crashing down upon me this morning when I noticed that graphics performance was discernibly laggy. “Aha!” I thought to myself: “The reminder should have said ‘Reboot after NVIDIA 552.22 . . . or else suffer the consequences.”

Why Reboot After NVIDIA 552.22 Update?

That was the question I asked yesterday when the installer gave its reminder. I got my answer this morning when I noticed that graphics performance was visibly slower than usual. Turns out that while the 552.22 release notes don’t explicitly say “You must reboot upon installing,” it’s considered a best practice to do so when updating a big, complex driver like the one that drives a relatively modern GPU.

That’s probably why the installer asked me to reboot when it finished. I got my demonstration this morning, after forcing my system to sleep at 4-something AM this morning when I saw the monitor was on after wandering around on a predictable nocturnal mission.

Next Time, I’ll Do It When I Quit for the Day

Upon reflection, I now realize something obvious. When I got up from my PC in the evening, with no intent to return until the next morning, that would’ve been the ideal time to reboot. As it is, I had to wait around 90 seconds, all told, for the machine to shut down, restart and reboot to the desktop. Tolerable, but not the smartest way to take the NVIDIA installer’s apt advice.

Facebooklinkedin
Facebooklinkedin

Beta Channel Rollback Follies

Found myself in an interesting pickle after running an in-place repair install on the 2018 vintage X380 Yoga for Build 22635.3495. Before the repair, DISM . . .  /AnalyzeComponentStore was showing me bogus reclaimable packages (see lead-in graphic). After the repair install, those bogus packages were gone — but alas, so were my start menu and task bar icons. Thus, I found myself engaged in Beta Channel rollback follies as I returned to the earlier status quo.

Before Beta Channel Rollback Follies, Some Flailing Around

Before I went to System > Recovery > Go Back to return to the previous status quo, I tried a bunch of repairs on the affected PC. None of the traditional usual suspects gave up the goods:

  1. Turned off Start 11v2 and went back to default Start menu
  2. Tried jacking around with Start11v2 settings galore
  3. Ran explorer.exe from Run box/Task Manager run

Whatever I tried, I was stuck with an invisible Start menu and no visible Taskbar icons. In the end it proved to be more trouble to run Windows without easy menu access than to put up with those bogus reclaimable packages.

Follies, Enumerated and Excoriated

Along the way back to where I started, I had a few bumps in the road. Because I typically run my test PCs through an RDP window on my main desktop, I had to remember “Oh yeah, you have to run Recovery options from the physical desktop.” I also stumbled around numerous Start11 menu settings that didn’t work as they’re supposed to — simply because the underlying Start menu was itself out of order.

Once I realized local repairs weren’t getting me anywhere, I knew enough to say, “Time to roll back.” I’ll stand pat on my current situation until MS comes out with a new Beta update (it usually happens once every week or two). Then, I’ll try again. Hopefully the next one will work properly and not show a bunch of spurious reclaimable packages, either. We’ll see…

A Terrible Trade-Off

Normally, running an in-place repair install results in a Windows image that’s pristine and works well. This is the first time I can ever recall that such a repair took a mildly bollixed image and left it unable to work properly after it was applied. As I’ve been thinking about what this might mean, I’m pondering a clean install on this test PC as an alternative to waiting for the next Beta Channel release. It will probably depend on how much free time I have this week. Stay tuned! I’ll keep reporting on this one…

Facebooklinkedin
Facebooklinkedin