A couple of weeks ago, the nice folks at Lenovo Reviews contacted me by email. “How would you like to try out the newest ThinkStation P3?” they asked. I already had the first generation model in house, so I boxed it up and sent it back. A few days later the new model arrived, and I got going on ThinkStation P3 Ultra SFF G2 intake. Here’s what I’ve learned so far…
Working Thru ThinkStation P3 Ultra SFF G2 Intake
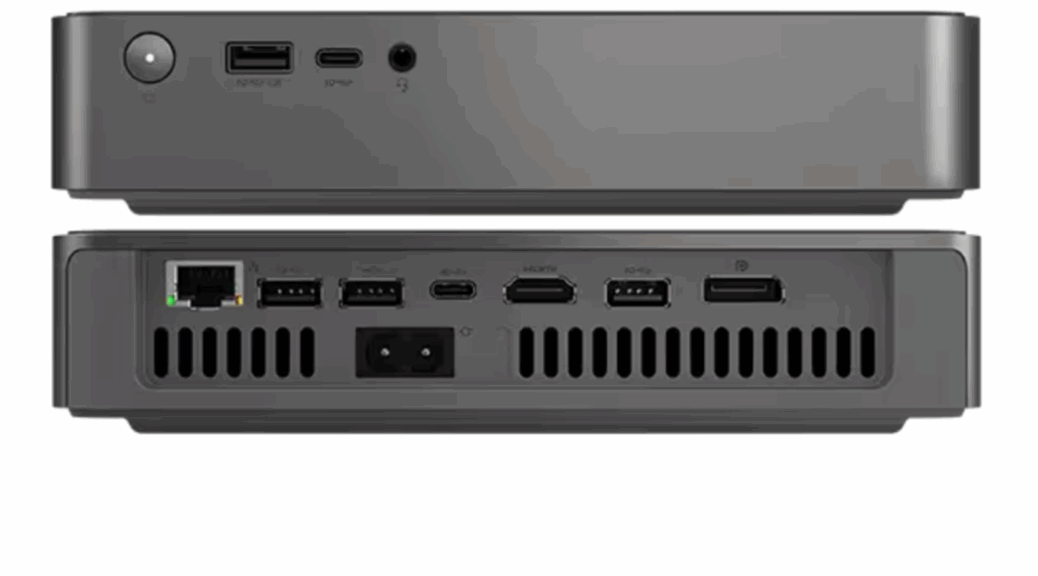
At first glance, there’s no obvious difference between the Gen1 and Gen 2 models in this series. But I show the back of the unit because it’s immediately obvious that Lenovo made some substantial changes there. Let me list them out:
- Went from side-by-side 2.5 GbE & 1 GbE RJ-45 ports to a single 1 GbE port
- Switched from 8 mini-DP ports for video to 3 full-size + 4 mini DP ports
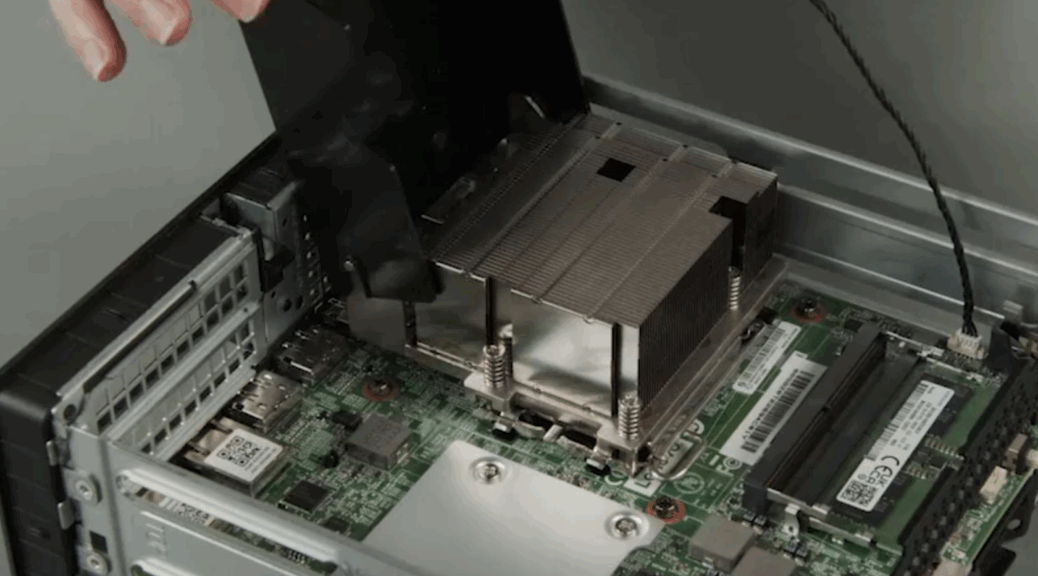
- Changed the interior layout so it’s even simpler to switch out SSDs and RAM modules without using (too many, or any) tools
Of course, as you’d expect the innards got a bit of a facelift in climbing the generational ladder. That said, this compact workstation, while powerful, is NOT a Copilot+ PC. Here’s a list of key components:
- Intel Core Ultra 9 285 (Arrow Lake, 8 P & 16 E cores: 24 total)
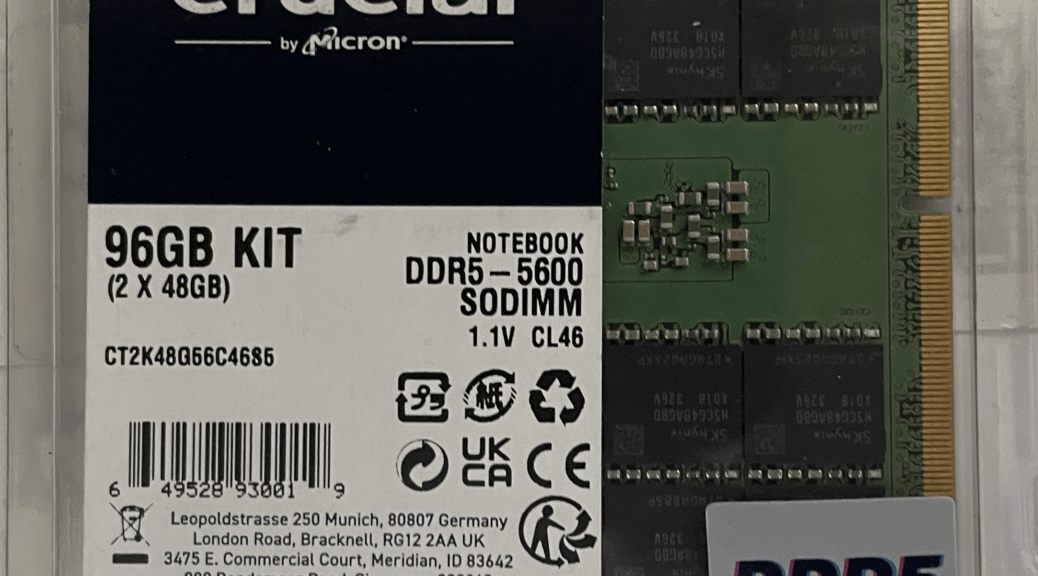
- 64 GB (2×32) DDR5-5600 RAM
- Graphics: Intel Arc Xe-LPG & RTX 4000 SFF Ada Generation NVIDIA GPU (20 GB RAM)
- Single 1 TB Samsung OEM SSD, to which I added a Samsung 950 EVO 4TB SSD (Higher speed options, including 10 GbE, available)
- Wi-Fi: Intel Wi-Fi 7 BE200 2×2 BE vPro & Bluetooth 5.4
- Ports: 2x USB-C/USB4/TB4 (front), 1x rear (top left, next to Wi-Fi antenna port), 2x USB 2 Type-A (mouse & keyboard), 2x USB 3.2 Gen 2 (10 Gbps) Type-A
- Power goes to a 300W external brick (far right, top row)
As configured, the unit comes with an MSRP of $3,915. As per typical ongoing Lenovo discounts, it will cost you $3,054 at the Lenovo store. The unit is new enough that third-party resellers — and different prices — are not yet widely available.
Doing the Intake Thing
It was absurdly easy to remove the 2nd SSD from the old Gen 1 instance and install it into the Gen2. Took less than 2 minutes all told. I’ve not yet tried my 96 GB memory kit on the machine, though (Gen 2, like Gen 1, maxes out at 128 GB RAM). Getting the machine up to snuff has been a pleasure: it’s every bit as fast and powerful as its predecessor. So far, I’m loving working this beast, just as I enjoyed the older model.
Make no mistake: even though this PC is not Copilot+ capable, it’s still a powerful albeit compact (SFF means “small form factor” after all) PC. It can drive lots of monitors, handle lots of intense demanding work, and do those jobs with ease and panache. A worthy successor to the Gen 1, the Gen 2 is a kick-butt little workstation.