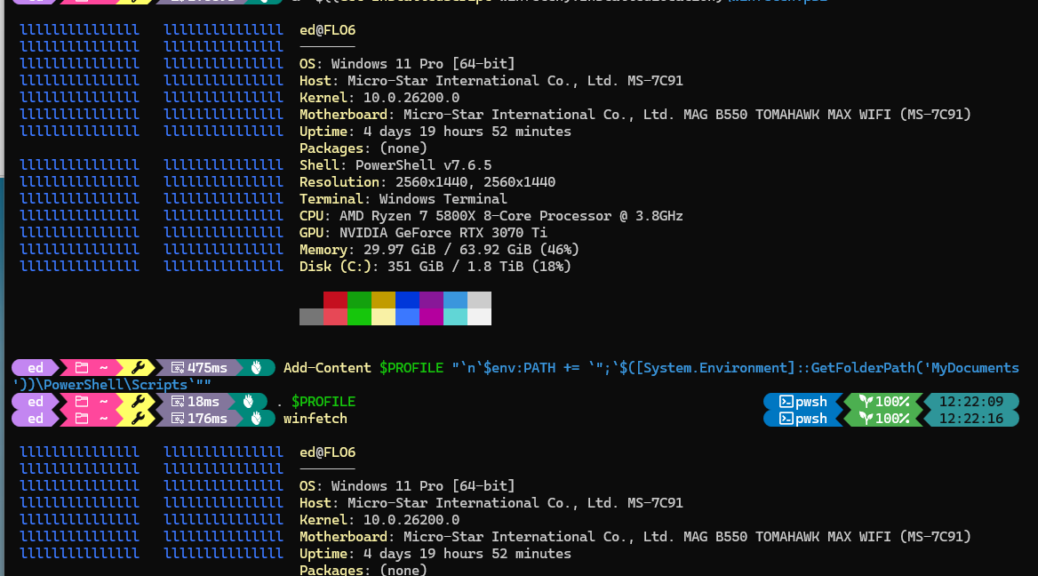
If you’re ever seen Neofetch, you’re likely to want something like it for Windows. It’s a command-line tool that displays a quick system snapshot. It shows OS version, CPU, GPU, RAM, uptime, shell, storage and more, alongside a rendering of the OS logo as “ASCII art.” But Neofetch is mostly a Linux/Unix thing that requires a Bash shell to run. It was also archived in April 24. It still works, but there are better choices for Windows. For those seeking Windows Neofetch alternatives, the best options are fastfetch and winfetch.
Windows Neofetch Alternatives Are Helpful, or Necessary
Again: Neofetch is a Bash script. That explains most of the friction inherent in running Neofetch on Windows. That is, it requires Git Bash or WSL — neither of which is a native Windows tool. The script itself froze at v7.1.0 when the repository was archived. Worse, going forward Neofetch is dead in the water: no updates, no bug fixes, no future-forward functionality.
Think about what Neofetch actually does: it reads your OS version, CPU, RAM, and a handful of other system facts, then prints them alongside an ASCII logo. Running an outdated Bash script through a compatibility layer to accomplish that feels like overkill. Native tools handle this job more cleanly, more quickly, and without the extra dependencies.
2 Strong Alternatives: Fastfetch and Winfetch
Both of these facilities are actively maintained, and update regularly. Either one can take over for Neofetch without skipping a beat.
Fastfetch
Fastfetch is written in C and installs as a native binary. Speed is its calling card — it fetches and renders system info noticeably faster than Neofetch ever did. Cross-platform support (Windows, Linux, macOS) makes it useful across mixed environments. Install it with any of the major Windows package managers:
winget install fastfetch
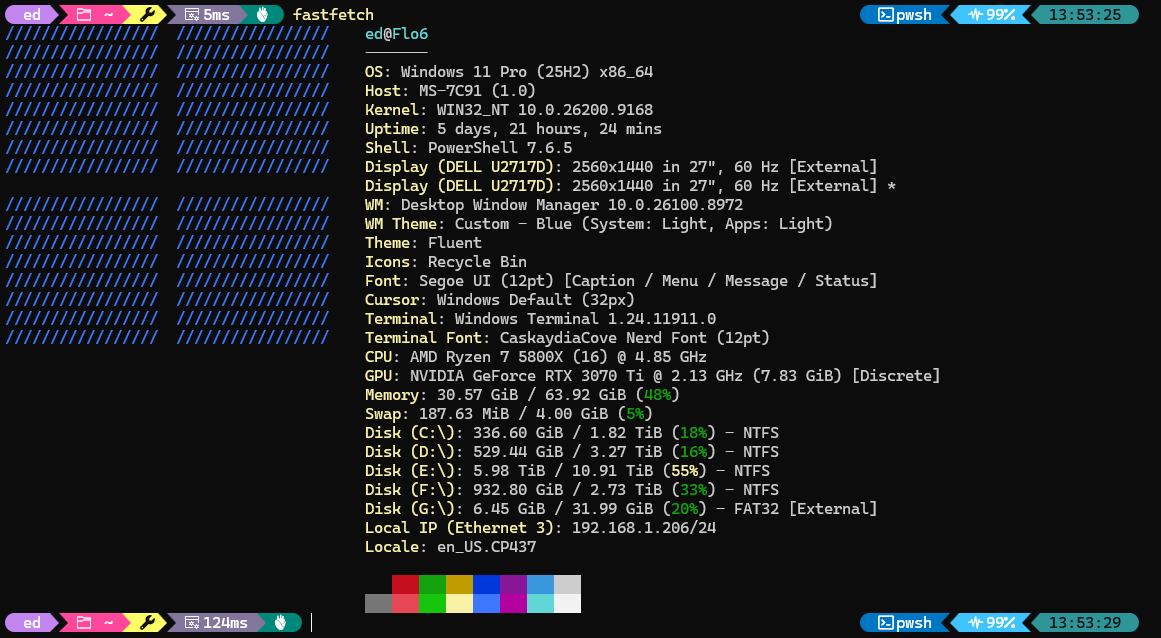
Once installed, launch it by typing fastfetch at any prompt. Configuration lives in a JSONC file, so customization is straightforward and version-control friendly. Here’s what it looks like on my AMD-based Flo6 desktop (click image to enlarge):
Winfetch
Winfetch is a pure PowerShell script — Windows-only, and deliberately so. It installs directly from the PowerShell Gallery:
Install-Script winfetch -Scope CurrentUser
For anyone already running Windows Terminal with an Oh My Posh prompt and Nerd Fonts, winfetch slots right in. The output renders cleanly alongside a styled prompt, and the whole setup feels native rather than bolted on. You can see it in the lead-in screencap.
The Winfetch Path Gotcha
What the lead-in graphic shows is me getting past the requirement that the winfetch script must be somewhere in $PATH to work. In fact, after I installed it, I got this error when I tried to run it:
| Error
winfetch : The term ‘winfetch’ is not recognized as the name of a cmdlet, function, script file, or operable program. |
This happens because the installer drops the script into a specific, pre-assigned folder:
C:\Users\Documents\Powershell\Scripts\
Powershell does not, however, automatically add that folder to the $PATH environment variable. So even though the script is installed, it doesn’t run from the command line. Easily fixed, however, as also shown in the lead-in graphic, through a series of simple steps.
Fixing Winfetch, Step-by-Step
Step 1: Confirm the install location
Run this to verify exactly where the script landed:
Get-InstalledScript winfetch | Select-Object Name, InstalledLocation
Step 2: Run it directly as a workaround
Before touching PATH, you can invoke winfetch immediately using its full location:
& "$((Get-InstalledScript winfetch).InstalledLocation)\winfetch.ps1"
That works, but typing it every time is obviously impractical. The permanent fix takes about ten seconds.
Step 3: Add the Scripts folder to PATH permanently
Open PowerShell and run the following command to append the Scripts folder to your PATH inside your profile:
Add-Content $PROFILE "`n`$env:PATH += `";`$([System.Environment]::GetFolderPath('MyDocuments'))\PowerShell\Scripts`""
Then reload your profile in the current session:
. $PROFILE
After that, typing winfetch works cleanly from any new PowerShell session. No more “not recognized” errors, no manual path juggling.
| Tip: Execution Policy
If PowerShell refuses to run the script at all, check your execution policy first: Get-ExecutionPolicy. A setting of Restricted blocks all scripts. Set it to RemoteSigned with: Set-ExecutionPolicy RemoteSigned -Scope CurrentUser |
Which to Use: Winfetch or Fastfetch?
The choice comes down to how you work, not which tool is objectively better.
| Tool | Best For | Install Method | Config Format |
| Fastfetch | Speed, cross-platform use, binary simplicity | winget install fastfetch | JSONC file |
| Winfetch | PowerShell-native feel, Windows Terminal + Oh My Posh setups | Install-Script winfetch -Scope CurrentUser | PowerShell config script |
Reach for fastfetch when you want something fast, dependency-free, and portable across platforms. Winfetch makes more sense if you live inside PowerShell and want the output to feel like it belongs there — especially alongside Windows Terminal and a styled prompt. Both tools beat neofetch on Windows in 2026. Pick one and move on. Either way, you get a clean, colorful system info display — and you leave a frozen Bash script behind where it belongs. That’s about as good as tradeoffs get here in Windows-World. Cheers!

