Here’s a scenario that trips up even seasoned Windows power users. You yank a perfectly healthy NVMe drive from your desktop or laptop, slide it into a USB or Thunderbolt enclosure, and Windows either refuses to unlock it or asks for a BitLocker recovery key that doesn’t unlock anything. A BitLocker NVMe enclosure combination produces what looks like data loss — but isn’t. Not yet, anyway. Understanding why this happens requires a quick tour of how BitLocker actually seals your data to your hardware. The point, however, is worth noting: using Bitlocker makes transplanted NVMe inaccessible. You can’t read it unless you put it back whence it came.
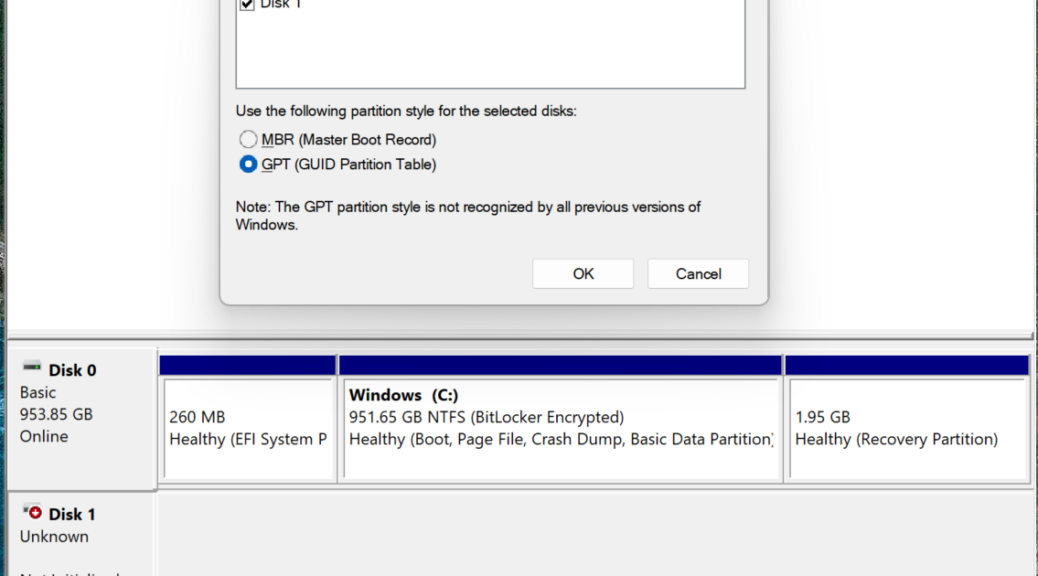
After an initial warning asking for a Bitlocker key that WILL be rejected, the affected drive shows up as “Unknown” in Disk Management. That’s what you see as the lead-in graphic for this blog post.
Why Bitlocker Makes Transplanted NVMe Inaccessible
BitLocker doesn’t just encrypt your drive and hand you a recover key. By default, it uses the TPM (Trusted Platform Module) — the dedicated security chip on your motherboard — to seal the VMK (Volume Master Key) against a specific hardware fingerprint. That fingerprint is a set of PCR (Platform Configuration Register) measurements recorded at the moment BitLocker was first enabled. Think of it like a wax seal on an envelope: the seal was made using your exact hardware setup, and it can only be broken by that same setup.
The most important register in modern configurations is PCR7. It tracks the Secure Boot policy state — specifically, the UEFI firmware’s Secure Boot signature databases (db and dbx), the boot manager, and the OS loader’s cryptographic signatures. When your PC boots normally, the TPM recalculates PCR7 from scratch. If that fresh measurement matches what was recorded at sealing time, the TPM automatically releases the VMK, BitLocker decrypts the drive in the background, and you never see a prompt. The entire process is silent and seamless. That’s the design goal.
When the PCR7 measurement doesn’t match — because something in the Secure Boot chain has changed — the TPM refuses to release the VMK. BitLocker then falls back to prompting for a recovery key. That’s expected behavior. A drive enclosure, however, is a different problem entirely.
Why the Enclosure Breaks Everything
When you move the NVMe to an external enclosure, the TPM doesn’t come along for the ride. It’s soldered to your original motherboard. The enclosure presents the drive to a completely different environment — or no TPM at all, if you’re plugging into a machine without one, or directly into another system as a USB mass storage device. There is no trust anchor. No Secure Boot validation chain. No PCR match is even possible.
To appreciate the full picture, it helps to know the other key registers. PCR0 captures the UEFI firmware code itself. PCR2 captures option ROM measurements — the firmware on expansion cards and storage controllers. PCR4 records the boot manager. PCR11 is BitLocker-specific, covering its own policy settings. Normally, all of these must match the original sealed profile for the TPM to cooperate. In an enclosure, none of them can be reproduced. This is not a bug. It is precisely the theft-prevention feature Microsoft designed BitLocker to deliver.
The VMD/RST Complication
There is a subtler wrinkle that catches power users off guard: VMD (Intel Volume Management Device) and RST (Rapid Storage Technology). Many modern Intel-platform systems configure their NVMe storage through the VMD controller, which routes NVMe drives through Intel’s RST driver stack during the boot process. That RST driver participates in the boot chain and alters the PCR measurements — particularly PCR2 and PCR0, which capture option ROM and firmware behavior.
When you pull that NVMe and attach it to a plain USB or Thunderbolt enclosure, the RST and VMD stack is completely absent. Even if you moved the drive to another Intel machine with a TPM, the PCR profile would not match because the storage controller mode is different. The sealed measurements were taken with VMD/RST in the picture; your new environment has neither. Many users never realize their BIOS storage controller mode is part of the BitLocker trust equation. Now you know.
Why The Recovery Key Doesn’t Work
Here’s the misconception that causes the most panic. Your recovery key isn’t being rejected because it’s the wrong key. The deeper problem is that BitLocker in TPM-only mode never even reaches the stage where it checks the recovery key in a normal boot flow. The TPM unsealing fails first — and in an external enclosure, there’s no TPM at all. BitLocker can fall back to recovery-key mode, but only if the drive’s key protectors actually include a recovery password protector. If BitLocker was configured in TPM-only mode with no recovery password added, you are looking at an encrypted brick. The data is mathematically inaccessible.
This is why Microsoft’s guidance is emphatic: always back up your recovery key. Store it in your Microsoft Account, print it, or escrow it to Active Directory or Azure AD. Every one of those options beats learning this lesson the hard way at 2 a.m.
Pro Tip
Before pulling an NVMe from an encrypted system, run manage-bde -protectors -get D: to review the drive’s protector configuration and PCR profile. Confirm a recovery password protector exists. Then decrypt fully with manage-bde -off D: before removal. Re-encrypt after reinstallation in the new system. That sequence keeps your data safe and accessible every time.
BitLocker’s hardware binding is a feature, not a flaw — and a pretty powerful one. A TPM-sealed VMK means a stolen drive is worthless without the original motherboard’s trust environment. But that same strength makes casual NVMe swaps treacherous if you aren’t prepared. Decrypt before you disconnect. Check your protectors before you assume. And for everything else, learn more about BitLocker recovery options directly from MS before you need ’em.

