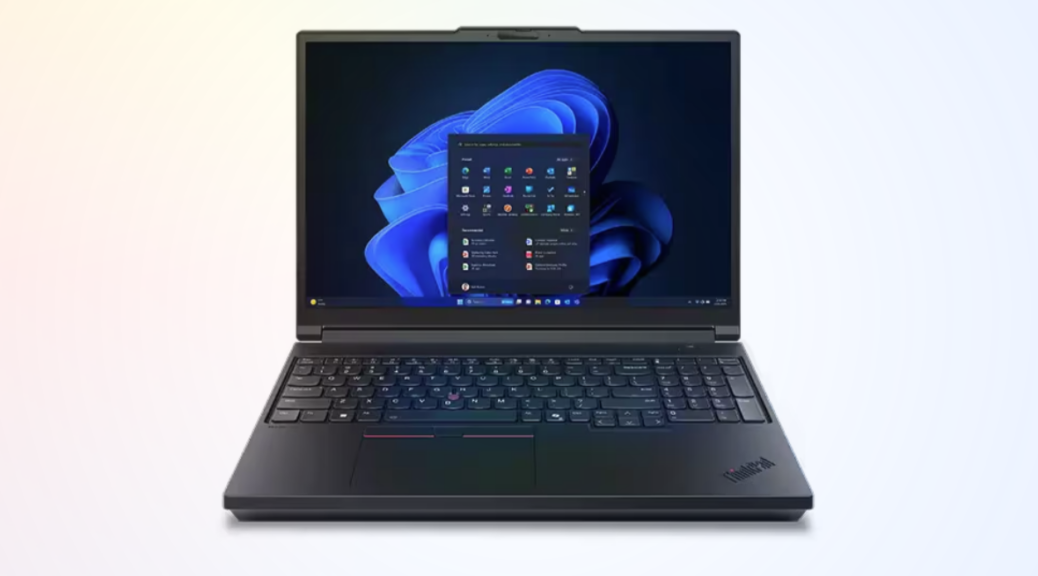
Imagine my excitement when I got a brand-new Lenovo ThinkPad P16 Gen 3 Mobile Workstation delivered to the door yesterday. It’s an absolute beast of a machine (more on that below), huge and powerful. As part of my usual intake routine, I apply all pending updates. Alas, one of them — the P16 Gen3 firmware update — hangs during its install. I have to take drastic measures to finish things up. Let me explain…
If P16 Gen3 Firmware Update Hangs, Then?
The system wouldn’t reboot after the UEFI itself got updated. It was stuck, unable to go forward or go back. So I exercised the nuclear option when it comes to laptops lost in limbo. I unplugged the battery and waited for it to drain completely, as evidenced by the power button and ESC key lights that stayed on late into the night last night.
The update completed successfully after that: I’m now running N4FET47W (1.28) dated 1/23/2025. But it took some doing to get there. Lenovo Vantage downloaded the update but was unable to install it. I also tried Lenovo System Update, which is usually better at handling firmware stuff, but no dice there, either. Finally, I visited the Lenovo Support pages, plugged in the serial number, and got a standalone flash installer named n4fuj05w.exe.
Starting UEFI Update Is Good, Finishing Is Better
The installer does its initial thing inside Windows getting the UEFI, Intel Management Engine (ME), and other update elements unpacked and ready before it reboots the machine. Then the flash installer takes over. That’s what hung on me.
Initially, Copilot advised me to remove the back deck of the unit and unplug the battery to force a cold reboot quickly. But this laptop costs over US$9K and the back deck didn’t want to come off. I had to use more force than I was comfortable exercising just to get the back edge to lift a little. Copilot yammered on I should keep trying and that the unit is notorious for tight clips and challenging extraction.
Nope! I also knew that draining the power over time would achieve the same end, with no danger of scratching the finish. So I waited overnight instead.
Getting Going On Intake
Now that the updates are all in place, WU is happy, winget’s been satisfied, and the Store is caught up, I can pay attention to the machine itself. I’ve got all my apps and tools installed, and am ready to report on what I see about this monster of a laptop.
Here’s a quick summary of key components:
• It’s NOT a Copilot+ PC
• Intel Core Ultra9 275HX (8P-Cores, 16 E-Cores, 24 threads)
• 128 GB DDR5 UDIMM RAM
• Intel integrated graphics Arc Xe‑LPG Graphics (64 exe units)
• NVIDIA RTX Pro 5000 Blackwell Generation (ADA arch, 7,424 CUDA cores, 16GB GDDR6, 58 3G RT cores, 232 4G Tensor cores)
• 4TB SAMSUNG MZVLC4T0HBL1-00BLL (SSD)
Pretty serious complement of components, eh?`
Here are the ports provided on the unit, listed by side as left, back and right:
LEFT (from front, items listed back to front)
• 1xSD slot (full-sized)
• 1xThunderbolt 4 (USB-C) up to 40 Gbps, DP1.4, USB4 compatible
• 1xUSB-A 3.2 Gen 1 (5 Gbps)
REAR (left to right, looking at rear)
• RJ-45 2.5GbE
• HDMI 2.1
• 2xThunderbolt 5 (USB-C) up to 80 Gbps, DP2.1, USB4 compatible
RIGHT
• Kensington lock slot
• 1xUSB-A 3.2 Gen 1 (5 Gbps)
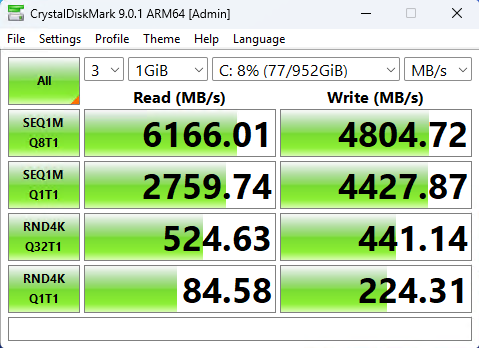
Most notably, this P16’s got Thunderbolt 5 and USB5 (aka 4.2) support! Now I’ll finally be able to test TB5/USB5 stuff. The internal SSD — a PCIe x5 Samsung model — reports speeds over 11,000 for 1GB block transfers in CrystalDiskMark. A USB4 drive attached to the high-speed USB-C port clocks in over 6,000. It’s the fastest USB I/O I’ve ever seen. Cool!
From the Belly of this Beast
Weighing in right at 6.5 lbs (2.95 kg) this is a massive monster of a laptop. But if you need lots of horsepower, capability and connectivity this could be your mobile workstation, too. Lenovo tells me its MSRP is ~US$9,200. You’ll need some serious financial backing to make this baby yours, too. So far, I like it a lot!!!