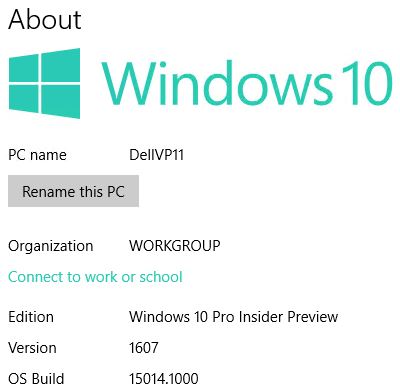
Category Archives: Tips, Tricks and Tweaks

Want to know how to make the most out of your Windows 7 system?
Here we share the things we have learned for what to do (and what not to do) to make Windows 7 perform at its best.

Impatience Imperils Progress on 15014 Upgrade

As I was finishing up my day in the office yesterday I made a last pass through TenForums.com. I noticed there that Insider Preview Build 15014 was out. But, alas, I failed to read the covering blog post. Had I done so, I could’ve saved myself some wasted time and effort. Turn out that the progress bar for downloading the latest Upgrade is broken. So when I started updating and didn’t see any progress on my desktop test machine, I immediately presumed “Another issue with WU.” This led to evasive action that ultimately forced me to restore a backup and then reapply the upgrade (successfully) later on. And that’s how I found myself able to observe that impatience imperils progress on 15014 upgrade maneuvers, as noted in this blog post’s title.

You could understand this self-inflicted problem as an “RTFM error,” if you like. But it actually helped me in a couple of interesting and unexpected ways. For one thing, I found myself dealing with the dreaded “black screen of death” on Windows 10. It’s something I’ve read about a lot, but haven’t troubleshot too often. First, I tried to see if the OS was available enough in the background without a working display to launch Task Manager. That meant entering Ctrl-Alt-Esc at the keyboard, then striking Alt-F to open the File Menu. An “R” launches the Run box, which one can use for a variety of tasks. I tried re-launching Windows Explorer, then a shutdown command. Nothing doing. My machine was pretty hosed, it seemed.

Impatience Imperils Progress on 15014 Upgrade

Eventually I did reach my ultimate goal: getting 15014 installed.

Getting Past the Won’t Boot Hurdle

Next, I turned to my old reliable backup program, Macrium Reflect Free. It thoughtfully installs its console as a boot option on the Windows OS boot screen, so I happily fired it off. Inside the Macrium-based Recovery Environment it provides, I found my way to an image of the wonky disk I’d made on January 13. It took just a few mouse clicks to get the restore operation going, and about 10 minutes to complete the job. After that, the machine booted immediately so I could start all over again.

This time, armed with the right information, I let Windows Update chug away to do its thing. This process took around 25 minutes to complete, but the upgrade was entirely successful. Here’s what I learned from this experience:

  • Reading the release notes for a new Insider Build is highly advisable if not downright mandatory
  • Once you’ve started an upgrade, give it plenty of time to run to completion
  • Always keep a current backup available when performing major system changes (like an OS upgrade)
  • If an upgrade fails, be ready to restore that backup and start over, or try again

I did fine on the second two items in the list (I’d learned them the hard way a long time ago). But I’ll have to do better on the first two going forward so I don’t get caught unaware. That’s modern life in Insider Preview land! I don’t want to have to rewrite “Impatience Imperils Progress on 15014 Upgrade” for some other build number, too.


Facebooklinkedin
Facebooklinkedin

A Wrinkle Upon Office 365 Subscription

Just before the big holiday season got going, I took the boy — son, Gregory — to one of his favorite haunts: the Microsoft Store at the Domain in Austin. While we were there I picked up a year’s renewal for his Xbox Gold subscription, and at the same time bought myself a one-year extension to my Office 365 Home subscription. This morning, I finally got round to entering the subscription key for another year of use. I was in for a surprise: no sooner did I enter said key, than did the renewal process inform me it couldn’t find the key in its database. WTF?

office-key

A life size scan of the credit card sized plastic key card prompts the thought: why can’t they put a scan code on this sucker?

Of course, my first thought was I’d mis-typed one or more of the five 5-character groups that composes such a key. But a careful comparison of what I’d typed to what was printed there quickly disabused me of that notion. So I opened Google and searched on “Chat with Microsoft Support” and in under a minute I was chatting online with Pravin, my designated MS Support representative.

As he asked me how I’d attempted to renew my subscription, it suddenly dawned on me that I’d tried it in Chrome (my browser of choice these days, for good or for ill). I thereupon asked him if I should try my renewal in IE or Edge instead. Sure enough, that was it: entered the same web page, the same renewal screen, the same key in IE and it all worked like a charm. It just goes to show you that for some tasks, Microsoft still expects you to use their tools and not somebody else’s. Whoda thunk it? Now that you can access the Microsoft Update Catalog and MSDN using Chrome, why should subscription sign-ups or renewals be any different? I have no idea why it’s so, but there it is. If you find yourself renewing an MS subscription in the near future, remember to use IE or Edge and you’ll be more likely to zip through the process faster that I did on my initial attempt with Chrome.

And so it goes in Windows-land!

Facebooklinkedin
Facebooklinkedin

Dodged a Bullet on Norton Upgrade

As I was surfing the Web earlier this week, researching a story on a typical network/system administrators anti-malware toolkit, I happened to notice that Norton Internet Security is no more. It has been replaced with Norton Security of which the 2017 version represents its latest and greatest offering. Upon trying to update my software (for which I have 5 PC seats and 1 iPhone seat) I quickly realized this wasn’t something I could do for myself. So I jumped online to Norton Support chat and in short order the following things were done:

  1. My existing Norton Internet Security subscriptions (of which there were 3) were cancelled. Immediately, I got a notification from my production desktop that the license had been revoked.
  2. I was issued new licenses and keys for my available seats, and instructed to use the “Norton Removal Tool” first to remove all traces of NIS before installing Norton Security 2017.
  3. I ran the tool, rebooted my system, and installed the new software. Everything went smoothly and flawlessly.
Norton Identify Safe
Norton Identity Safe is a handy, simple password manager.

Norton Identity Safe is quick, compact, and easy to use.

Then I realized: “Holy crap! Did my Norton Identity Safe get cancelled and cleaned out along with the other old Norton stuff?” In case you don’t already know, Norton Identity safe is one of any number of password management programs out there, and it comes as part of the overall Norton environment. I use it to store account and password information for over 1,000 different accounts. This number comes from to the tool itself, though it counts multiple logins to the same site as separate accounts (for example, I have multiple Twitter logins for different personae, plus guest and admin accounts for many of the websites that I write for, own, or help to operate).

One more salient bit of information: I’ve also been using the Norton Password Generator lately, because it generates strong passwords automatically. They can be of arbitrary length, but the default is a nice, tough 12-character string. I don’t even bother to try to remember passwords any more. Because I can always get to the Norton Identity Safe on the Web from any of my PCs or mobile devices, I can always zip into that tool, search by URL, and cut’n’paste my password string (and account, if needed) into my login of choice. Extremely convenient, but an utter disaster if Identify Safe — or the data it contains — goes MIA.

Trembling with trepidation, I tried opening Identify Safe after setting up my new Norton software. Luckily enough, changing the anti-malware solution didn’t have any discernable impact on my honking huge collection of URLs, accounts, and passwords. Ideally, this is the kind of thing one should think about and prepare for ahead of time. The Identity Safe even offers an export function, so you can save its contents in the form of a CSV file, and import it back into a new safe (or use it as a backup for your existing safe). I’ve got one of those now, too, sitting on an encrypted flash drive here at the house. Having already dodged one bullet, I feel like I should get ready for more to come!

Facebooklinkedin
Facebooklinkedin

Unraveling a USB Mystery

About two months ago, I finally got a break in my schedule and used part of that time to replace the motherboard in my ailing production PC with a newer, more capable one. The “new” mobo is actually about two-three years old in technology, if still brand-new for the unit I rebuilt my system upon. It’s a Gigabyte Z77X-UD3H and it features more USB 3 ports than its predecessor, and support for an mSATA slot that now houses a dandy Samsung EVO 512 GB SSD. I was all ready to go off to the races, and my initial impression of the system was overall pretty positive.

z77x-ud3h

The specs looked good and I saw uniformly positive reviews, so I bought it.

About 5-6 days after the rebuild, right when I started moving my 1 TB of music files from older smaller drives to the newer bigger ones, I started losing USB 3 devices: first a couple of big drives (2 TB and 3 TB) connected to an Eagle dual-drive caddy, various plug-in ports on the case (from interior on-board USB3 header), and once my keyboard went away and didn’t come back. This motherboard features 4 Intel USB 3 ports, and an equal number of VIA USB 3 ports. Somewhere in those ports (and it looks like the Intel chipset is the culprit) one of those ports seems to jump in and out of failure mode. The big drives in my caddy seem particularly likely to go off-line, the more so when I’m doing huge file transfers over an extended period of time, which makes me suspect something heat related might be involved, or perhaps some of the circuitry that supplies those ports with power is flaking out under higher loads.

It took me quite a while to get to the bottom of this problem, not because the problem was especially difficult: the symptoms were obvious and the devices involved rather more consistently failing than mysteriously flaking out only every now and then. I just haven’t had a lot of time for troubleshooting research lately, and it took me a long time to find the right search string to get confirmation that this is a known problem (I ended up using the mobo designator and “USB port fail” and finally found reports from others of the same problem I’ve been having).

At long last, I finally stumbled upon some forum posts up on Toms Hardware where other buyers reported similar USB 3 problems and seemed to indicate that this is a known defect of this particular motherboard. I don’t want to replace it once again, so it looks like I will install one or two (I have a LOT of USB 3 devices on this machine, mostly for external storage) 4 port USB 3 cards that connect via PCI-Express x4 lanes and feature a separate controller chip for each connection so as to support max bandwidth for each one. The make and model is HighPoint RocketU 1144C 4-port USB 3 Controller card (here’s a Newegg link for this somewhat pricey item, that gets good reviews, on the site and at AnandTech). At $108 and change, I’m going to try one first and see how it goes. If I like the results, I’ll consider buying another one.

Something about the potential for less-than-optimal results, in the wake of this modest but nevertheless frustrating motherboard flake-out has me feeling more wary and chary of new technology purchases than usual right now. Wish me luck!

Facebooklinkedin
Facebooklinkedin

Machine Crash Prompts Lots of Learning, Especially for Intel Rapid Start

OK, so I’m on the phone last Friday, and I’ve just installed Service Pack 1 for MS Office 2013. After the obligatory post-install reboot, I discover the system won’t boot because it can’t find a boot drive. A long bout of troubleshooting ensues, after which I reluctantly conclude my motherboard’s gone south. My immediate efforts concentrate on moving over to my back-up desktop system, and I put an order into Newegg for a new Z87 motherboard, with a i7 4770K processor.

By the time I got my standby system promoted to production status, and prepared my T520 notebook for backup status (which means it’s got all the apps I use installed, and is ready to play host to my Outlook PSTs and all my usual data files and stuff), the parts arrived from Newegg. Wednesday, I started putting pieces together, and managed to get all the way through the build process for my first shot at a new backup system. But that’s where my first lesson of this adventure came into play: I struggled mightily to get the Corsair CWCH cooler to mate properly with the MSI Z87-G45 mobo I’d selected (good price, with mSATA drive slot), but ended up having to switch for the stock Intel cooler because I had to keep fiddling with the CPU to get it to work.

Turns out my #10 Torx screwdriver came in really handy, because torqueing down the front screw to clamp down more tightly onto the processor was the only way to get things working. This necessitated three tries before I was able to boot into the BIOS. Getting the Corsair cooler in place ONCE was more than enough for me, so I’m using the stock cooler now, watching temps, and plan to drop in a Zalman CNPS95 (had good luck with these before in various earlier builds) if the stock cooler doesn’t cut it. At present, CPU temps mostly fall in the range from 40-50 degrees Celsius (about 10 degrees hotter than on the i7 930 CPU I just replaced, but I think that’s normal when scaling down from 45 to 22 nm technology). The Antec 902 case in which the build is housed is well ventilated, with four 120 mm fans, plus a 200mm venting warm air out the top.

My next big challenge came from a Windows licensing snafu. MS didn’t inform me until one day after the initial install that my key was a duplicate (why couldn’t they check that at initial validation, I wonder?). I wasn’t able to get tech support to issue me a new key (even though I’ve got an MSDN subscription and two unused Windows 8.1 keys, the activation utility would accept neither one of them). After trying every trick I know of, I elected to re-install, as much because I wanted to switch to RAID drivers and try out the Intel Rapid Start Technology, as because I got tired of trying to fix the licensing snafu I’d caught myself in.

rapstar

The GUI doesn’t show much, but it takes several contortions to get it working.

That’s where my next big learning adventure began. I quickly learned that I needed an SSD “hibernation partition” in which to shadow memory contents to make Rapid Start work, and I chewed through several sets of instructions before I figured out how to make it work on my MSI-based system:

0. I number this step zero because it occurs when Windows isn’t running (yet): you must get into your system BIOS to enable Intel Rapid Start Technology (and set the hibernation value to “Immediate” if present) before you can get the Rapid Start installer to work properly. You’ll have to catch and set this at an opportune reboot before attempting to install the software.

1. I set up the Intel mSATA 80GB SSD (nominal size; 76.29 GB actual) with a 42 GB partition, to leave 34 GB for the hibernation partition that Rapid Start uses to snapshot or copy memory contents. I used Disk Manager to set up a 42 GB GPT partition, leaving 34 GB unformatted for the series of diskpart commands I figured out I would need. Any SSD will do for the snapshot, and you should leave slightly more space in the hibernation partition than you have memory installed on your PC (mine has 32 GB; hence, a 34 GB partition). Interestingly, while the hibernation partition is visible in Disk Management, it is invisible to Windows Explorer (aka “File Explorer” or explorer.exe in Windows 8.*).

2. Next, I fired up diskpart following the instructions in the Intel Rapid Start Technology Guide for UEFI Mode, with special emphasis on the section entitled “Create a Primary Store Partition on a non-OS drive SSD.”

3. I skipped the convert gpt step, because the format I created in diskmgmt.msc was already GPT-formatted (in Step 12). I followed the create partition step as shown, using 34816 as the size of the hibernation partition in megabytes (34 GB * 1024 (megabytes per gigabyte) = 34816).

4. I jumped over into Intel Rapid Storage Technology, clicked the Performance tab, and made sure the acceleration features were enabled (this turns out to be an essential step in the process, though not very well documented).

5. I cut-and-pasted the exact value for the set id command from the documentation, namely “D3BFE2DE-3DAF-11DF-BA40-E3A556D89593” as shown in the Intel User Guide, then exited diskpart as directed.

6. Before you can get the Intel Rapid Start installer to work, you need to reboot the PC. After that, provided your chipset (Intel 8-series chipsets or better, with spotty 7-series coverage) and setup are copascetic, the program should install nicely and do its thing. One more observation: I had to reboot my machine two more times after installing Rapid Start to start observing the effects that the software promises — that is, a more rapid start. Apparently, it takes two reboots before the hibernation file gets set up and starts working properly, so be patient, please!

My PC now boots to the login prompt in under 10 seconds, which is at least 10 seconds faster than it used to boot before installing the Rapid Start stuff. Is it worth it? The real answer is that it depends on how often you reboot your PC. I mess around with mine all the time, so I think it’s worth giving up 34 GB of SSD space for this purpose. If you don’t reboot often, or you don’t have the SSD space to spare, you may not feel the same way.

But now, at least, I’ve figured out how to install and use Rapid Start on a home-brew PC, and I’ve got a RAID-based disk setup going for this UEFI Windows 8.1 install. The machine currently clocks at 8.1 in the WinAero version of WEI (Windows Experience Index, with the Intel 530 SSD the slowest link in the collection of subsystems measured) so I can’t be too unhappy with the results. By a slim margin (8.10 to 8.05 for my other desktop’s SSD), it’s now the fastest system I’ve got.

Facebooklinkedin
Facebooklinkedin

Customization and Control: Does the OS Really Matter Anymore?

I’ve got 4 laptops, 1 all-in-one, and three desktop computers on the roster at home, and another couple of laptops, a mini-ITX desktop, and a Chromebook on my “school loan” program right now. At this point, all but one of those machines — the Chromebook — is running Windows 8.1. I have added either Classic Shell or Start8 to all of the Windows machines, to make using and working from the desktop easier and faster, but otherwise I haven’t really mucked with the OS itself all that much. Many of those machines boast a “perfect score” in DriverAgent (no drivers out of date, that is) with the “worst score” on any machine showing three drivers outdated (two of which are bogus in each case, the other sufficiently mysterious and apocryphal to resist my occasional efforts at update/repair).

Even Windows 8.1 shows a plain-vanilla Windows 8 logo in the system info widget from control panel
Windows 8.1 shows a plain Windows 8 logo in the system info widget from control panel.

In short, everything is humming along nicely and all but one of the machines is rock-solid stable with a perfect 10 score in the Windows Reliability Monitor (and even the odd PC out — my production desktop, ironically enough — is sufficiently stable in day-to-day working practice that I don’t worry about losing work or productivity on that machine). All of this adds up to an interesting observation or realization on my part — namely, that the OS running on those machines doesn’t really matter all that much any more. By hook or by crook, I’m able to keep things working, and I’m not being stymied or feeling overly frustrated about maintaining my computers, and keeping them working properly over time.

Windows 7 was (and remains) great, but Windows 8 and Windows 8.1 have also done right by me, too. Does this mean I’ve been lucky? Perhaps so, as I read about and hear from others who’ve run into snags with Windows 8, or the 8.1 update/upgrade, or who are struggling with hardware and driver issues. But I’m also inclined to observe that both hardware and software seem exceptionally stable and troublefree of late, and to have experienced fewer Windows headaches in the past four years or so, starting with the release of Windows 7 in October 2009. I’m not even terribly inclined to knock on wood so as not to tempt fate overmuch with my words, though that thought immediately crossed my mind as soon as I wrote them!

Here’s hoping that 2014 will continue humming along, as 2013 did for me, to my great surprise and delight. May your experiences be the same, too, if not better than that!

Facebooklinkedin
Facebooklinkedin

Whoa! Strange (and I mean StR@NgE) contortions required to resolve Window device issue

Here’s a list of instructions that I had to follow on my Lenovo X200 Tablet, to remove an issue with the WAN miniport (#2 and #3) drivers on that machine, whose failure to load up and register properly also rendered Bluetooth inoperable on that machine when running Windows 8 (or 8.1, as you might expect; this material is fully documented in KB article 2871372):

kb2971372

Who came up with this mysterious fix, and how they did figure this out? Wowie-zowie!

  1. Open Device Manager.
  2. Right-click the WAN miniport (Network monitor) device, and then click Update Driver Software.
  3. Click Browse my computer for driver software.
  4. Click Let me pick from a list of device drivers on my computer.
  5. Clear the Show compatible hardware check box.
  6. In the column on the left side, select Microsoft, and in the column on the right side, select Microsoft KM-TEST Loopback Adapter.
  7. In the Update Driver Warning dialog box, click Yes to continue installing this driver.
  8. After the driver is installed, right-click the device, and then click Uninstall.
  9. After the device is uninstalled, right-click the computer name in Device Manager, and then click Scan for hardware changes.
  10. On the View menu, click Show hidden devices.

The WAN Miniport (Network monitor) device should now be started and no longer have a yellow exclamation mark next to it.

For reasons that go way beyond my ken but that I find egregiously irritating, this bit of mumbo-jumbo actually worked! To me, it seems almost like turning widdershins thrice, hopping on one foot, while making an incantation, to try to make something happen. Arthur C. Clarke said that “Any sufficiently advanced technology is indistinguishable from magic,” and I’m damned if I can really tell what’s up here, other than the bizarre reality that installing and then uninstalling a nugatory driver actually results in proper recognition of the underlying hardware, and automatic installation of the correct driver when the next hardware rescan occurs.

There is just a glimmer of a suggestion of what’s really going on here in the “Resolution” section of the related KB article. It says that MS Update 2822241 must be “integrated with” (which I believe means slipstreamed into) the installation image (WIM file, probably) used during setup of Windows 8 for target hardware to avoid these contortions. That tells me that the update rollup in that particular update file somehow fixes the issues discussed in 2871372, even though it’s not specifically called out in the “Issues that this update fixes” in its supporting documentation.

What galls me about this fix (which I’m very grateful to have found, and am now able to use Bluetooth devices on the X220 Tablet) is that it’s so very arcane and non-intuitive. I’m able to address most driver issues in Windows on my own, with a bit of elbow grease, and lots of odd and interesting techniques for extracting driver files from installers for software that won’t run on my systems. I’m OK with that, and have learned how to cope. But installing a loopback driver, and then removing it, to provoke a proper hardware scan for device recognition? The mind reels…

Facebooklinkedin
Facebooklinkedin

Get the iPhone/Pad/Pod (iOS) Windrivers without installing iTunes

I’ve got numerous PCs around here and there — I can see two desktops and two laptops as I sit here in my office, and there are two more laptops and one SFF desktop elsewhere in our domicile at this moment; I’ve also got four laptops out on loan right now to various friends and relations. My wife and I both use iPhones (both are 4S models), and we’ve got a family iPad, plus a 32 GB iPod that Gregory used to play on a lot before he got a Nook for his birthday earlier this month. That means we have no shortage of machines into which we might plug one of these iDevices, but there’s an issue in working with them that I wanted to avoid on those machines where I don’t usually play iTunes music or watch much video.

The conundrum pretty much boils down to this: the iPhone driver that Windows loads on its own is pretty ancient, but unless you want to install iTunes, it’s a tricky business to get a more up-to-date driver without carrying all the extra iTunes baggage along with it. Believing there had to be a way to get the drivers without the full-blown package, I searched Google using this string “install iPhone drivers without installing iTunes.” And sure enough, up pops a free utility named CopyTrans Drivers Installer that will do the job for you (here’s a C|Net download link for the 3.35 MB utility in ZIP form, just like the afore-linked product page itself proffers). Download the file, unzip to a directory, then run CopyTransDriversInstaller.exe (version 1.024 as I write this post), and you’re done. Not much to it, really.

The initial run screen requires you to agree to the licensing terms.

There is one catch, however: the program will download iTunes in its entirety, then extract the drivers from that download and install them for you. That’s what the Automatic install option at the lower right of the installer window above is about: it’s well worth using, because it does all the grunt work for you. It also works with the latest and greatest iTunes download available from the Apple site on your behalf — that was version 11.0.2.26 as I wrote this post — so you don’t have to check or worry about version numbers, either. The iTunes download (it’s nearly 86 MB in size) took far longer than any other parts of the installation activity. Though the whole operation took about 8 minutes or so on my Lenovo T520 laptop, more than half that time was devoted to downloading iTunes so the program could extract the drivers contained therein for installation (which took well under a minute, when it finally got underway).

If you want to dock your iDevice to a Windows PC without installing iTunes, it’s probably worth grabbing a copy of the CopyTrans Drivers Installer. Put it through its paces, and you’ll have the latest and greatest iDevice drivers at your disposal without having to shoulder the burden of iTunes (and the Bonjour protocol, iTunesHelper.exe, and anything else Apple decides to throw into the iTunes mix — see this fascinating and horrifying list of background processes that can show up when you use iTunes on a Windows PC, straight from Apple Support).

[Querelous and Concluding Unscientific Postscript, with apologies to Kierkegaard: I’d love to know what tool or technique the CopyTrans Drivers Installer uses to access the contents of the 32- or 64-bit iTunes installer files. I attacked them with both 7Zip (which is suprisingly capable at taking .exe files apart) and Legroom Software’s Universal Extractor (which is a good tool, but hit or miss, and crashed when trying to unpack this file’s contents) without any luck. Knowing how they did their thing would help me do it with other installers, which is sometimes the only way to get access to Windows drivers that may not otherwise be accessible on some PCs, particularly when, for example, trying to snag a Dell driver for use on an HP machine, or vice-versa.]


Facebooklinkedin
Facebooklinkedin

USB 3.0 SandForce Flash Drives: True Value or False Economy?

I’m in a bit of a quandary on an interesting subject. I just purchased a 128 GB USB 2.0 Flash drive — a Centon DataStick Sport — that I picked up on special from TigerDirect for about $65 (as I write this blog, you can pick them up at Amazon for about $80). It seemed like a very good deal when I bought the unit, but I was quickly disabused of my enthusiasm when I plugged it into my desktop PC to copy all 29 GB of music I keep on that machine to see how it performed doing large bulk file transfers. The entire transfer took almost three hours to complete (I can do it in under 40 minutes from one direct-attached disk to another), after which I understood that while I might have purchased plenty of capacity, I didn’t get the kind of performance one might wish to have, to keep the time required for big file transfers more manageable — but then I didn’t pay for that privilege, either.

This flash drive is big (128 GB) but it's not fast.
This flash drive is big (128 GB) but it’s not fast.

At least, I now understand why USB 3.0 or eSATA makes more sense for big flash drives, or other forms of external storage, especially if you need to move large amounts of data on a regular basis. But if you go shopping for USB 3.0 flash drives (probably the most practical form of higher-speed flash storage available at the moment) you’ll find prices running from $1-2 GB for such storage, depending on how fast you want that storage to be. In particular, the bigger and faster such drives get, the more they cost. In particular, this $290 Super Talent 100GB USB3.0 Express RC8 Flash Drive (model ST3U100R8S) stuck me as amazingly extravagant, even if it is “Windows To Go certified” for Windows 8 Enterprise.


The SuperTalent Unit is big and fast, but also pretty costly.

On the other hand, you can jump over to Newegg and purchase a Vantec NexStar 3 USB 3.0/eSATA 2.5″ drive enclosure for $30, and a very fast Samsung 830 128GB SSD for $105. Add $20 for shipping and handling, and you’ve spent $155 for more storage capacity (119 GB actual storage in Windows Explorer vs. 93 GB likewise) and similar or better speed (depending on whether or not your notebook has an eSATA port or “only USB 3.0″). Given those economics, I have trouble understanding why anybody would buy the higher-dollar UFD, except that the form factor is significantly smaller. But my Vantec drive measures out at about 5.5 x 3.5 x 0.7” and weighs under 250 grams, so it will fit into a laptop bag with no stress or strain at all. And it only takes 5 minutes and a Philips-head screwdriver to put all the pieces together.

But there must be a market, because there are lots of 64 GB and higher-capacity USB 3.0 UFDs available. Go figure!


Facebooklinkedin
Facebooklinkedin