All posts by Ed Tittel

Full-time freelance writer, researcher and occasional expert witness, I specialize in Windows operating systems, information security, markup languages, and Web development tools and environments. I blog for numerous Websites, still write (or revise) the occasional book, and write lots of articles, white papers, tech briefs, and so forth.

Simple Command Craters Windows10 PCs Immediately

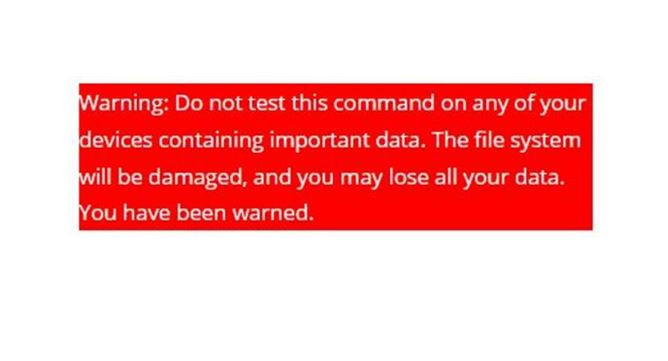
It’s not often you see a warning like the one in the lead-in graphic for this story. Indeed, executing a certain string at the command line will immediately crash a Windows 10 PC and render it unbootable. Before I go into details, I’m concerned that a simple command craters Windows10 PCs immediately. (Windows 8, 8.1, and XP are also reportedly affected, but not Windows 7.) Opportunities for malicious use are mind-boggling.

[Note: the lead-in graphic comes courtesy of Sergey Tkachenko at WinAero,com. He posted the story in which it appears Friday, January 15.]

It gets worse. That same string also corrupts any targeted NTFS volume in a URL (just a portion of that string in the address bar will do it). Furthermore, it works from inside a ZIP archive, an ISO, VHD, or VHDX file, too. I’m stunned!

I actually debated myself for days on whether or not to share this info. I finally concluded that the Windows community needs to know. It might arm bad actors with new ammunition. Hopefully, that danger is offset by the increased care it should cultivate in everyone else who learns about it.

What Simple Command Craters Windows10 PCs Immediately?

The command can occur in a file reference at the command line or in PowerShell. The simplest invocation is:

cd c:\:$i30:$bitmap

That’s it. Doesn’t look like much, does it? It can address other drive letters (in which case, it will corrupt them instead). C: is particularly dangerous because it’s the default volume where Windows and all of its necessary pieces and parts reside. Once the string is entered, an error message appears. It informs you that “The file or directory is corrupted and unreadable.” Windows will attempt repairs via Chkdsk upon restart, but it will not succeed.

According to Tkachenko:

…users have figured that it is enough to paste the above ‘:$i30’ string into the browser address bar.

to crater the C: drive. Not good!

Holy Moly! How does THIS work?

This exploit is based on the NTFS $i30 index attribute, which ties into filesystem directories and contains a list of its files and subfolders, and may include deleted items as well as active ones. If you search on “$i30 index attribute” or “NTFS $i30 attribute” you’ll see it’s well-known to computer forensics professionals. It’s also a critical part of the MFT (Master File Table) structures for NTFS. Nobody yet knows or understands why referencing it in a command, URL, or archived file structure is damaging.

According to Tkachenko, the security researcher who found this gotcha says:

I have no idea why it corrupts stuff and it would be a lot of work to find out because the reg key that should BSOD on corruption does not work. So, I’ll leave it to the people with the source code…

MS knows about this now and is reportedly working on a fix. This one should be a doozy, and should get fixed as quickly as they can manage it. In the meantime, watch out!

Do NOT try this at home (or at work, or anywhere else, either). If you simply have to try it, do it in a throwaway VM. Otherwise, cleanup will take time and effort, even if it’s just to restore a backup. As the man said “You have been warned.”


Facebooklinkedin
Facebooklinkedin

WIMVP 2021 Renewal Granted

Dear Readers: I’m pleased and proud to report some good news via email from the Insider MVP Program on Friday, January 15th. My WIMVP 2021 renewal granted, I’m good for another year of participation in this interesting and outstanding program. The lead-in graphic for this story, in fact, is the header and part of the first paragraph from that e-mail.

WIMVP 2021 Renewal Granted.WIMVP-page

Here’s a snippet from my official WIMVP listing on the WIMVP website.

When WIMVP 2021 Renewal Granted, Then What?

In one sense, re-upping in the program just means more of the same:

  • keeping up with Insider Previews, and providing feedback whenever possible
  • writing and researching Windows 10 topics
  • following the traffic at TenForums
  • posting at least 5 times a week about Windows stuff
  • writing articles for ComputerWorld and other publications on Windows news, topics, tips and techniques

From a different perspective, it’s an active community of Windows experts and aficionados. There’s an in-house MS component through Michelle Paison and the whole Windows Insider team. There’s an out-of-house component — the WIMVPs themselves — scattered around the globe keeping up with Windows tools and technologies, and providing early, frequent and informed feedback to the in-house folks. We also have frequent meetings, to talk about Windows 10 topics, and to hear from various product development teams within MS. I count 89 named WIMVPs on the listings pages, which makes me feel lucky, and even more honored, to be found worthy to rank among them.

Becoming a WIMVP

One becomes an WIMVP through a nomination process, followed by an application process. Even previous WIMVPs (like me) must re-apply every year. That means documenting one’s contributions to the Windows community. In my case I get hits from my online content for the past year, report on TenForums activity and status, and report on presentations and other Windows related activity and involvement.

The WIMVP nomination form is not currently available because the program just switched to put all members on the same annual calendar. They used to re-up 1/4 of the population each quarter, but now they start accepting nominations in early October each year, and WIMVPs wishing to continue in the program must submit their applications by mid-November. I plan to keep participating as long as they’ll have me. It’s not only a great community, it’s a joy to take part!


Facebooklinkedin
Facebooklinkedin

Restoring Missing 21292 N&I Taskbar Item

Here’s an interesting learning adventure. Upon introducing Windows 10 Build 21286, MS also introduced a News and Interests (N&I) taskbar item. I covered this topic on January 8. But after upgrading my Lenovo X220 Tablet to a newer Dev Channel release, N&I disappeared. Remembering a related WinAero.com story, I followed its activation advice. And that, dear readers, is how I found myself restoring missing 21292 N&I taskbar item a few minutes ago. Here’s the deal…

Going About Restoring Missing 21292 N&I Taskbar Item

Restoring or activating N&I requires the third-party ViVe tool. Helpfully, it can enable or disable Windows 10 A/B and hidden features. Download ViVe from Github, where the latest release is v0.2.1. For myself, I just observed that v0.2.0 also works. That’s because  I just used it successfully on my X220T, not yet realizing a newer release is available.

After you download the ZIP file, extract it into a folder. Next, run an administrative cmd or PowerShell session from that folder. Then, execute the following sequence of commands:


vivetool addconfig 29947361 2
vivetool addconfig 27833282 2
vivetool addconfig 27368843 2
vivetool addconfig 28247353 2
vivetool addconfig 27371092 2
vivetool addconfig 27371152 2
vivetool addconfig 30803283 2
vivetool addconfig 30213886 2

Note: If using PowerShell, prepend the string “.\” before each command or it won’t work.

Cut’n’paste these commands into the window. Please execute each one individually. Next, you’ll need to restart your PC. Voila! The N&I item reappears in the Taskbar. At least, it did on my X220T PC.

8 Commands Too Much? Try Some Batch Files

OTOH, if you prefer, WinAero offers a ZIP file in its story. It  activates all necessary settings from one batch file, and deactivates them from another.

And remember, N&I only appears in Build 21286 or higher-numbered Dev Channel Insider Preview releases at the moment.

More About the ViVe Developers

Note: the authors of ViVe are Rafael Rivera and somebody named Lucas/thebookisclosed/albacore. Both are active Windows developers and toolsmiths. Rivera is also an occasional contributor to Thurrott.com (which is where I first came across him and his work). The other person is also the author of the excellent Managed Disk Cleanup utility, also available on GitHub.

Facebooklinkedin
Facebooklinkedin

MTPW Data Recovery Works Eventually

This is not a dig at the Data Recovery Tool in  MiniTool Partition Wizard (MTPW). When I entitled this item MTPW Data Recovery works eventually, I only meant to observe that it takes FOREVER to recover the contents of a damaged or corrupted drive.

I just learned this the hard way, when something corrupted both drives in my Wavlink ST334U dual drive dock. One of the two drives involved was a Toshiba 8TB unit with approximately 4 TB worth of production PC backups. Thus, I really wanted to recover some — but not all, at north of 100GB per image — of those files. The lead-in screencap for this story shows Data Recovery scanning to recover the contents of the other drive. It’s a mostly disposable 500GB unit that incorporates two Samsung EVO m.2 SSDs into a pseudo-array on a Syba SATA adapter card. Note that it plans to take 4:25 to recover 207.17 GB in 4119 files.

How Long, When MTPW Data Recovery Works Eventually?

Hmmm. Let’s see 4:25 for 207 GB means 19.787 times longer to recover 4 TB. That’s roughly 89.4 hours. Which in turn is 3 days, 17 hours, and 24 minutes. Of course, that’s way too freaking long for most ordinary people to wait for the whole thing to complete. Especially me.

Turns out that you can manipulate the left-hand menu in MTPW Data Recovery, and instruct it to recover only the files you tell it to by clicking checkboxes. And, as it turns out, by expanding listing items with a plus sign (“+”) to their left. Eventually, you get a map of what the recovery utility finds on the drive, and can pick what you like.

In my case, I liked the following:

1. About 1.5 TB worth of the most recent backups
2. About 2.5 GB worth of legal work archives
3. About 124 GB worth of info snapshotted from a now-retired E: drive

Thus, of the 4-plus TB worth of holdings on that 8 TB drive, I decided to recover under 1.7 TB. How long did this take? Somewhere in the neighborhood of 30 hours. Long enough that, when I copied the recovered files from the 4 TB HGST drive I pressed into service to receive them back to their original home, that process took 2:43:00.

What About the Other Drive?

I let Data Recovery scan for about an hour, then checked over the drive’s contents. It’s always been a scratch drive, so I was able to confirm there was nothing on that drive I couldn’t live without. So, I quit out of Data Recovery and MTPW. Next, I opened Disk Management, where the drive showed up as RAW at full capacity with an E: letter assignment. I changed it back to its original M: assignment to produce this screencap:

With the right drive letter in place, I can recreate the drive.
[Click image for full-sized view.]

Next, I right-clicked on its box, and then selected “Format” from the pop-up menu. I named it Syba.5 (Syba dual SSD adapter with 0.5 TB of storage space, give or take). The formatting operation took a surprisingly long time to finish (almost a minute) with the following result:

Even on a Quick Format, it took almost a minute for this drive to format.
[Click image for full-sized view.]

OK, then. I guess I’m back in business. Now if I can only figure out what went wrong in the first place, so I don’t do this to myself again. Sigh.

Facebooklinkedin
Facebooklinkedin

Restore Point Failure Forces Strategy Change

I run Macrium Reflect backup on my production desktop every morning at 9 AM. Hearing the big Toshiba 8TB drive chunking away reminds me it’s got things covered. I should’ve turned to that backup image immediately after a driver install yesterday. A new Realtek Universal Audio Driver (UAD) was expected out of that update. But I wound up with a Realtek HD Audio driver instead. Because I decided to try a restore point made just before that driver install, I bought trouble as well. And that’s why I say: Restore Point failure forces strategy change. Let me explain…

How Restore Point Failure Forces Strategy Change

Silly me. I should know better. I rely on Macrium to provide a failsafe against glitches. This includes self-inflicted wounds, like ignoring Device Manager’s warning that it couldn’t find a replacement UAD driver in the version v6.0.9045.1 pointer I picked up yesterday. Though it came from my own TenForums Realtek UAD thread, and a usually impeccable source, it didn’t work the way it should have.

Having been down the road of attempting a UAD update and winding up with an HD Audio drivers instead, I already knew the easiest way out of this spot was to roll back and start over. My mistake — which I will never repeat again — was to use a questionable but more recent Restore Point, rather than a known, good working Macrium backup image (an .mrimg file). When it failed, I found myself turning to that .mrimg file anyway.

When Failure Takes Longer Than Success…

The truly galling part of this misadventure is that it took 40 minutes for the Restore Point to fail and return control of the PC into my hands. It took just over 10 minutes to restore Macrium’s image backup file and for me to get restarted on the failed Realtek driver update (not to mention the Windows Update items for Patch Tuesday as well).

Ultimately, I did find a v6.0.9079.1 UAD driver at Station Drivers that did work as expected later. It was the easy part of the post Restore Point cleanup efforts, some of which are still underway. Ironically my big, honkin’ 8TB backup drive and the little 500GB SSD parked next to it in myWavlink dual SATA drive caddy both got hosed in the Restore Point’s wake. I’m using the Data Recovery feature in MiniTool Partition Wizard v12.3 to recover the 8TB drive’s contents now. This task has already taken 14 hrs and is 22% complete. When it’s done, the 500GB drive recovery should go MUCH faster.

What’s Next?

When the cleanup is done, I’ll be turning off restore point capture on my C: drive. I’ll also purge all the storage space that restore points currently consume (1.7 GB according to the WizTree graphic at  the head of this story). I figure if I don’t have any more restore points around to “try it and see what happens” with, I’ll be unable to repeat this recent debacle.

For the record, the item that caused the restore operation to fail was a Dropbox file. It’s ironic that something deliberately mirrored between cloud and desktop could cause such an operation to crash. Another copy is still in the cloud, safe and ready to mirror back locally when needed. Sigh.

Facebooklinkedin
Facebooklinkedin

Failing Drives Need Copy First and Foremost

I’m a long-time member and supporter at TenForums.com (joined November 14 2014). Just recently I saw a thread where a member reported issues with an apparently failing hard disk drive (HDD). Immediately, he and other responders started chewing on how to diagnose and possibly fix the HDD. “NO!” I remember thinking as I started reading the back-n-forth. “Failing drives need copy first and foremost,” I went on, “so progressive failures won’t cause more data loss.”

Why Do Failing Drives Need Copy First and Foremost?

If an HDD is starting to fail, there’s usually a cascade involved. First, one or two small failures, followed by increasing frequency and severity of failures. After that: complete drive failure. Once you have a clue that a drive is starting to fail — and SMART monitors like HD Sentinel or CrystalDiskInfo will clue you in quickly — the next step in troubleshooting is: Make a snapshot!

When trouble rears its head, the temptation to start diagnosing and attempting fixes can be nearly overwhelming. But in this particular case — a possibly failing HDD — such diagnosis and fix activities can severely exercise the disk. If it is failing, that could either make existing data losses worse, or cause data losses that haven’t yet occurred.

How to Get That Snapshot

I’d try a disk image using something like Macrium Reflect Free. If the disk is seriously corrupted, however, it might not work. In that case, use File Explorer or copy commands at the command line/in PowerShell to copy anything and everything you can see.

On the other hand, if you have a reasonably current backup of the failing drive — and you should — you can copy only items dated since the backup was made. Once you’ve captured what you can, you won’t experience further data loss as you pursue various troubleshooting strategies. Now that you’ve done due diligence for data protection, go for it!

When in Doubt, Replace the Disk

In my experience over 36 years of working with personal computers, I’ve had half-a-dozen hard disks fail on me. (I bought my first PC in 1984: a Macintosh 512K, aka “Fat Mac.”) As disks start to fail, they become increasingly unreliable and problematic. I’ve always replaced them as soon as diagnosis pointed out unquestionable failure signs or symptoms. I learned the hard way to backup, too: I lost the better part of a book manuscript in the late 80s when an external (and expensive!) 300MB SCSI hard disk experienced a head crash. Please: learn from my bad experiences. Don’t wait to have your own. Take my word for it: you won’t like them, not one little bit.

Facebooklinkedin
Facebooklinkedin

Lenovo X220 Tablet Hits IME Wall

I knew it was coming, but not when. I’ve already retired my Lenovo T520 laptop. I bought them together, so my X220 tablet has the same CPU — an i7-2640M Sandy Bridge– and  a 6 Series/C200 Series chipset. In the wake of the latest Dev Channel (Fast Ring) 21286 Build, this machine is now throwing  Intel Management Engine errors. As the lead-in screencap shows it tells me “ME is in Recovery State.” Then, it hangs until I hit the proverbial “Any Key.” When I say the Lenovo X220 Tablet hits IME wall, I’m really saying it’s too old for the installer. Simply put, Windows 10 apparently doesn’t know what to do with this old hardware any more.

If Lenovo X220 Tablet Hits IME Wall, Then What?

I can keep this machine going for a while yet, but I can tell its days are numbered. Upon investigation, its most current IME drivers and software date to the Windows 8.0 and 8.1 era. And then, there’s this cheery warning on the drivers and software download page for the X220 Tablet:

Key phrases in the warning are “no longer being actively supported” and “available ‘as-is'”. Translation: PC is old, and you’re on your own. [Click image for full-sized view.]

I found some fascinating discussion from others who’ve had this problem with this PC and others of its vintage. The most interesting item is at Bill Morrow’s Thinkpads.com forum. It prescribes a firmware hack as the best fix, which more or less turns off the Intel Management Engine (more recently renamed to Active Management Technology, or AMT).

To use this approach, I would have to buy a cheap (under US$20) EEPROM burner. Then I’d need to hack the bits for the BIOS myself  (through a Python program named ME_CLEANER).

I’m still chewing on whether or not I really want to do this. I will keep it running as it stands as long as I can, I think. I’ll pass it along to my old buddy Ken Starks at Reglue.org when I can’t upgrade Windows 10 on it anymore. Even with this glitch, by pushing the “Any Key” after each reboot during the Windows 10 install process, I got this machine upgraded to Build 21286. For the time being, I’ll just keep on keeping on until I have to do something else. Stay tuned!

Facebooklinkedin
Facebooklinkedin

About 21286 News and Interests

OK, then. Right after I upgraded to the latest Dev Channel Insider Preview Build (21286.1000) I expected to see the new “News and interests” item show up in the notification area on my Taskbar. No dice on my Lenovo X380 Yoga test machine. But as I learned more about 21286 News and interests I came to understand that the Edge Browser is involved in its inner workings. So, I checked the update level on Edge on that PC. And sure enough: it needed to come up to the current version 87.0.664.75 to be fully up-to-date.

More About 21286 News and Interests

After updating Edge, and another reboot, News and interests showed up. You can see it in the lead-in graphic for this story, which shows the notification area on my taskbar. It’s off to the left. It shows the sun occluded by a cloud, and reads “45°F Partly sunny.”

If you’re running this Dev Channel release and News and interests fails to appear, try upgrading Edge. Another reboot, and you should see something like the lead-in graphic for this story. That’s because in this build, News and interests is turned on by default. What if you want to turn it off, or see less of what it has to show? Easily done!

Managing This New Taskbar Item’s Appearance

To manage News and interests, right-click on a blank area in the taskbar. A menu will pop up that includes the “News and interests” item (see below). Click on the fly-out symbol to the right, and a fly-out menu with controls appears. Set the one you want. It’s just that easy.

Tip: Hidden means you won’t see it. Or you can Show icon only, if you don’t like the default value Show icon and text. ‘Nuff said.

About 21286 News and Interests.controls

If you don’t like the default value (“Show icon and text”), here’s where you change related settings.

Facebooklinkedin
Facebooklinkedin

Early One Outlook Screencap Eases Concerns

Following quickly in the wake of news of Microsoft’s Project Monarch, (reported here on Monday), a screencap from an actual user allays some of my fears. Notice the left-hand column in the lead-in screecap for this story. It shows the Archive folder amongst the other Outlook folders present. I take that to mean there is a way to integrate an archive with live, web-based messages in the cloud. Thus, an early One Outlook screencap eases concerns about business use.

Why Early One Outlook Screencap Eases Concerns

The name for the app is currently “One Outlook.” This speaks directly to Microsoft’s desire to assemble all Outlook clients in a single code base. Obviously, they’ve thought about the importance of archives in the Outlook environment. In fact, I’m relieved it shows up in such early intimations of where the app is headed.

My old friend and former Novell colleague, John King, responded to my previous post. He proposed the notion that an archive might  be uploaded to the cloud to remain accessible. I’m not certain. I could see it either way, given that I’m sure I’m not the only person with a 10+GB Outlook archive.pst. Millions of 10GB uploads may be more of a storage load than Azure wants to handle. It may make more sense to build plumbing into the app to access a local archive.

Those details, however, are a long way from being settled. According to OnMSFT.com, which reported on this phenom and the screencap, One Outlook is unlikely to appear until 2022. Right now, they say, it’s only available to “brave dogfooders” with in-house, internal Microsoft accounts.

Give Me Preview Access, Please

As the app evolves and develops, I sincerely hope that MS will provide more brave dogfooders outside the company with early access. In fact, I’d like to nominate myself among the ranks of “early outside adopters.” I’ll use it on a test machine, for sure, but it could help me further ease my concerns, as I explore its capabilities. For something this central to how I work and live, I hope that’s not too much to ask. Stay tuned: I’ll keep you informed.

Facebooklinkedin
Facebooklinkedin

MS Docs Names Windows 10 Upgrade Four Phases

OK, then. I just struck a small lode while mining for Windows 10 gold. I found it in a Windows 10 Docs item named “Troubleshooting upgrade errors.” Therein, MS Docs names Windows 10 upgrade four phases. This document describes four phases during the upgrade process, and provides pointed troubleshooting suggestions and identifies useful error codes wherever it can. Good stuff!

If MS Docs Names Windows 10 Upgrade Four Phases, What Are They?

In the afore-linked Docs item, the four phases of Windows 10 Upgrade are named as follows:

Downlevel phase

This occurs while the old OS is still running (hence the name). This is the phase that runs right up until the initial reboot, at which point the old OS is no longer running. During this phase MS downloads all the pieces and parts it needs to perform the upgrade, so it’s apt to label this as an initial set-up and preparation phase. Errors that occur at this phase are most likely related to file access or download issues encountered as setup.exe attempts to pull all the pieces onto the target PC.

SafeOS phase

At this point you see something like the screencap shown in the lead-in graphic for this story. Following the initial reboot, Windows PE boots from the install image supplied as part of the source files for the upgrade. Those files might come from Windows Update, or an ISO obtained (and mounted) from the Media Creation Tool, Visual Studio downloads, or any number of other reputable Windows 10 image sources (Heidoc.net, UUPdump.ml, and so forth). Errors that occur at this phase at most likely device driver related.

First boot phase

About 30% into the “Working on updates” (SafeOS) phase, Windows 10 will reboot again to load key drivers for graphics and networking adapters or circuitry. Here again, driver issues are the most common cause of problems. Microsoft wisely advises those who encounter problems during this phase “[d]isconnect all peripheral devices except for the mouse, keyboard and display.  Obtain and install updated device drivers, then retry the upgrade.”

Second boot phase

About 70% into the “Working on updates” phase, Windows 10 reboots one or more times as needed. Now it is running the new OS with its new drivers. When errors occur during this phase, they most commonly originate from anti-virus software or filter drivers. Key advice: “Disconnect all peripheral devices except for the mouse, keyboard, and display. Obtain and install updated device drivers, temporarily uninstall anti-virus software, then retry the upgrade.” This phase is sometimes called the OOBE boot phase, during which final settings are applied.

Those who make it through all four phases complete their successful upgrade when they go through (or bypass) the “Out-of-box” phase (“Hi! We’ve got some updates for your PC. This might take several minutes.”)

Here’s a helpful diagram of the process that MS provides in the afore-linked Docs file:

[Click image for full-sized view. Much more readable!]

Notice it provides ample technical details about what’s going on in each phase. IMO, this is the most informative element in the whole document. Definitely worth reading right away (and returning to when handling upgrade or clean install issues). Enjoy!

Facebooklinkedin
Facebooklinkedin