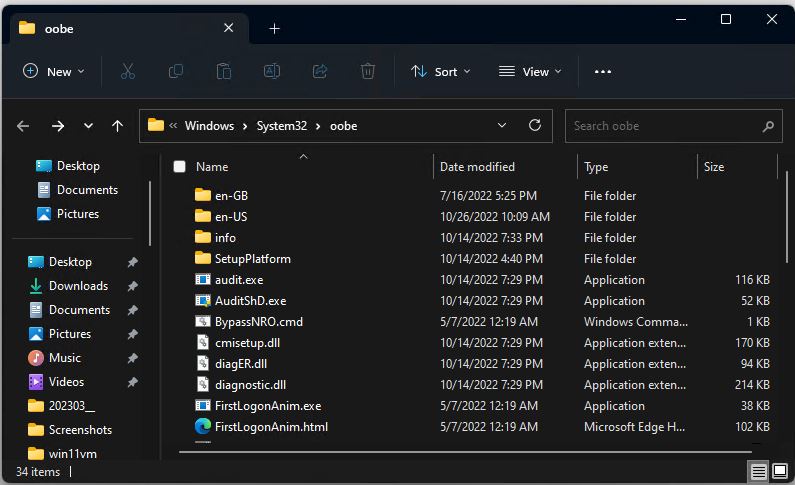
Windows 11 is a little trickier to install with a local account and no working Internet link than was Windows 10. That said, there’s a “trick” you can use to take a Windows 11 Install network bypass. It relies on a specific command file in the %windir%\System32\oobe folder named BypassNRO.cmd. See the lead-in graphic for this small but weighty 1KB file.
Warning! Do NOT open this file to “see what happens…” Let me tell you instead and skip it for yourself: it reboots your PC (as it would during install to change modes). To open the file, visit it in Explorer, right-click with left Shift key depressed, and choose “Copy as path” from the pop-up menu. Then paste that path specification into Notepad, Notepad++, or your favorite text editor. It’s a three-liner that turns off input echo, adds a registry key (to bypass the network requirement), and then restarts the PC instantly.
How-to: Taking the Windows 11 Install Network Bypass
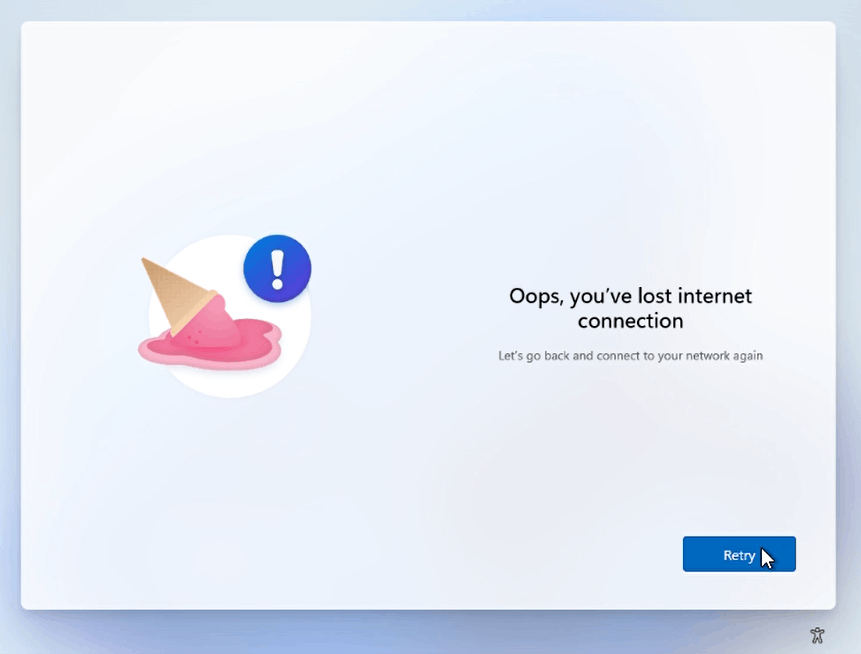
Start the install process with the Internet disconnected (this is key). When the Windows 11 installer tells you “Oops, you’ve lost Internet connection” don’t press the Retry button. Click Shift+F10 to open a command prompt instead. Type OOBE\BYPASSNRO, then hit enter (no spaces, because it’s a file specification — the installer runs in %windir%\system 32).
 The PC will restart, and you’ll see a different screen that reads “Let’s connect…” (see below). Notice the link at lower right that says “I don’t have internet.” Click that.
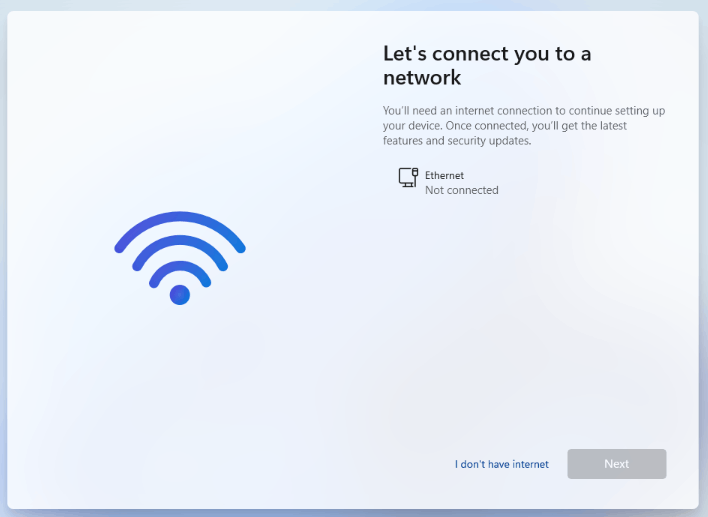
At that point, you’ll be prompted to create a local account for login post-install. The OOBE process will complete without having to use an MSA (Microsoft Account, with associated e-mail address) during the process. This can be helpful for all kinds of reasons (including easier scripting for automated installs).
Credit Is As Credit Is Given
I have to thank user SproutTheRobot at MS Answers for providing the screenshots and instructions for using oobe\bypassnro. I’d also like to thank the users at ElevenForum.com in the thread What is “oobe\bypassnro”? for their illuminating discussion of this process. It’s what led me to the MS Answers item cited here. Thanks, people!
Works with my xps 9320. Appreciate the trick!
Glad you found it useful. Thanks for your comment. =Ed=
Thank you Ed, youre a life saver
Glad you found this bit of sometimes helpful administrivia useful. As you can see in the previous comment, getting the syntax right is vital! Thanks for the comment. =Ed=
It still works OK – ACER Aspire 3 A315-58-32C0, Manufacture Year 2023, Purchased 11-Mar-2024, W11 Home 22H2 22621.4
Unfortunately mistakenly – typed OOBE/BYPASSNRO – instead of the correct string OOBE\BYPASSNRO …
Assumed the OOBE command was removed in the latest W11 version by Microsoft I additionally typed cd OOBE and MSOOBE\BYPASSNRO with a catastrophic result: got a forever turning “Just a moment” circle and after hard reset left stuck with the unreachable “defaultuser0” account and obviously intentionally locked “Safe Mode” so the only way out was a W11 reinstall 🙁
Syntax matters. Sorry for your trouble, but thanks for reporting this. Hopefully readers will take a lesson from this and double-check spacing and spelling before hitting the “Enter” key. Thanks for sharing! =Ed=
thankyou – worked for me
Glad it helped: you’re welcome! =Ed=
No one says to do the commands on separate lines. Spent over two hours trying to figure out the OOBE\BYPASSNRO
You need to cd OOBE and then press Enter
then type BYPASSNRO and press Enter
Computer will then reboot.
I haven’t encountered this. It works for me on one line, with no space between OOBE and \BYPASSNRO. Go figure! =Ed=
Great insights, Ed! The step-by-step guide for bypassing network requirements during the Windows 11 installation was super helpful. I appreciate the clarity and detail you’ve provided—it made the process a lot less daunting. Thanks for sharing!
Glad you found it useful. I got it from the folks at ElevenForum.com, an eminently well-informed and worthwhile Windows 11 resource. =e=