
Here’s something I just learned that I should’ve known years ago. Turns out that if you type in a specially formatted version of any printer’s IP address into a web browser, you’ll go straight into a report interface. To be more specific, the Printer IPv4 address produces reports on the resulting web page. Let me explain…
How Printer IPv4 Address Produces Reports
Of course, three things are essential for this technique to work. They don’t pose a big hurdle, though, as you can see here:
Thing1: The printer must be network-attached and have an assigned IP address (that’s how most printers work nowadays, though many home users still use USB-attached devices).
Thing2: You must know the printer’s IP address (I explain two handy ways to get that info in a following section).
Thing3: You must format the URL for the printer as follows:
http://xx.xx.xx.xx, e.g. http://192.168.1.44
Secure HTTP (which puts https:// at the head of the URL string) does NOT work, as I confirmed by experiment.
When I tried this technique for both printers on the LAN here at Chez Tittel, it worked in Edge, Chrome and Firefox. One is a Dell color laser 2155cn MFP; the other is a Samsung monochrome laser ML-2850. I can’t say from sure knowledge that it works in ALL browsers and all printers, but I can assert it works in all the browsers and printers I use.
Under the hood, there’s a reporting API for network-attached printers. It produces report data as HTML formatted output when this kind of connection gets made. Works nicely, so it’s good enough for me!
Finding Printer IP Addresses
I can describe two ways to get this info, though those with their own IP scanning tools can use them instead. The first way is to open Devices and Printers, right click the printer of interest, then select the Printer Properties item from the pop-up menu. Select the Ports tab, then find the currently selected port in use (hint: it’s the only one whose left-hand checkbox is checked). Highlight that port, then click the “Configure Port…” button. You’ll see something like this:
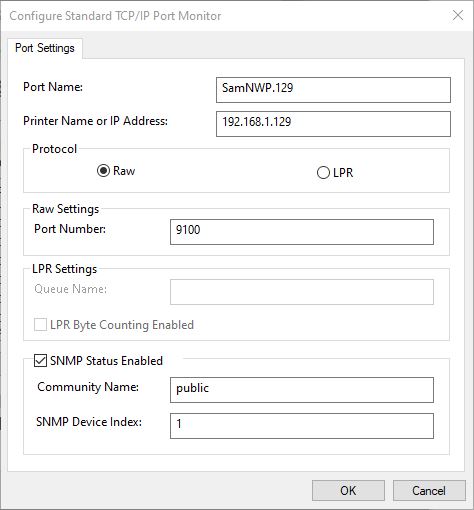 Note that the IP address appears in the second field from the top (Printer name or IP address). Works every time!
I am also fond of Nirsoft’s NetBScanner utility. If you scan your local LAN segment it will report and describe all IP addresses it finds in use. For me, it’s a little faster and easier than the foregoing tactic, so it’s the one I use most often myself. Other scanners will do the same for you, so if you’re already familiar with another one, use it with my blessing.
Always nice to learn something new. Even better is to learn something new and useful. Here ’tis!
[Note added early afternoon: Thanks to ElevenForum member and fellow WIMVP @stormy13 whose off-hand remark in this thread pointed me into this topic.]