
OK, then: now that my vision is limited thanks to cataract surgery last year, I’m adjusting what I can see without reading glasses. One of those things is relocating the notification area. Turns out it’s easier to see on the right-hand monitor in my dual-display setup. Moving Windows 11 main display — see the lead-in graphic for the source of this terminology — works through Settings > System > Display.
Moving Windows 11 Main Display, Step-by-Step
When you click into Settings > System > Display, your available monitors will appear in their positions as you’ve established them (or as Windows has done so on your behalf). The current “main display” (see greyed out first line under the Multiple displays heading) is highlighted in blue.
When I first entered that pane in Settings, Display 1 was highlighted. Here’s how I changed that to what you see in the lead-in graphic, step by step:
1. Click on monitor 2 at right (moves highlight from 1 to 2)
2. Click on the checkbox to the left of “Make this my main display” shown below unchecked
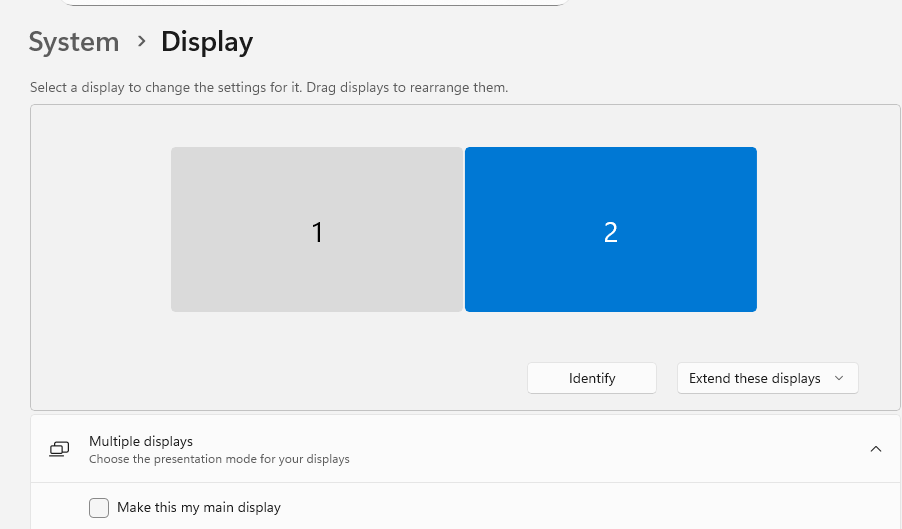 Once you’ve clicked that checkbox, your displays will pause for a second or two. They’ll also shrink for a moment. Next, Display 2 becomes main and that checkbox appears greyed-out. Done!
Accommodating Aging Eyeballs
I’m learning all kinds of tricks to make it easier for me to see what’s happening in Windows-World. The Zoom option in Outlook messages and Word documents, and the page Zoom functions in browsers like Chrome and so forth — all of which I blow up to 150% — are particularly useful. I can keep chunking along productively, as long as I can see what I’m doing. Learning how to make Windows work to those ends is helpful and lets me stay on the playing field.