In removing the last vestiges of Adobe Flash Player from my Surface Pro 3 (SP3) yesterday, I found myself in need of a BitLocker Recovery key. Why so? That system has BitLocker turned on. Thus, one can’t get access to the C: drive’s content without providing its 48-digit recovery key. Because that’s what I needed to do, I quickly found myself resolving BitLocker Recovery Key confusion.
Secrets to Resolving Resolving BitLocker Recovery Key Confusion
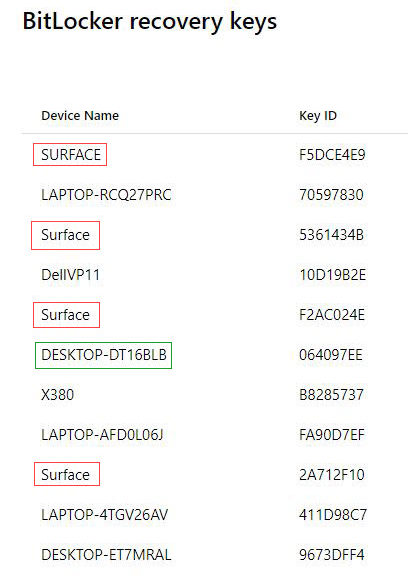
Because I didn’t realize the SP3 had BitLocker turned on, I turned to my Microsoft Account’s recovery key page. That’s when I got confused. As you can see from the lead-in graphic, there are four devices named Surface in the list shown. “Simple,” thought I to myself “I’ll just grab the Surface item with the most recent Key Upload Date and that should do it.” (Note: Key Upload Date is another column on the afore-linked key recovery page, not shown in the screencap above.) Wrong! In fact, it turned out that NONE of the recovery keys for devices named “Surface” worked to provide access to the drive. Uh-oh!
Key ID to the Rescue
Knowing there had to be a way to link the recovery key to the information that BitLocker provided at bootup, I noticed the on-screen prompt supplied a Key ID tied to the recovery key. (It’s the right-hand column in the lead-in screencap.) On close examination, the first 8 HEX digits in that ID match the key column for Device Name DESKTOP-DT16BLB. And in fact, it is tied to the Recovery Key that allowed me access to the SP3’s BitLocker-protected C: drive.
An Ounce Of Preparation…
If you should ever wish to manually edit otherwise protected files in an OS installation at the command line, you’d be wise to check to see if BitLocker is turned on for the target drive. Easily done, using the Bitlocker Drive Encryption utility in Control Panel. Here’s what running it on the SP3 produces, with some info and fields of particular interest.
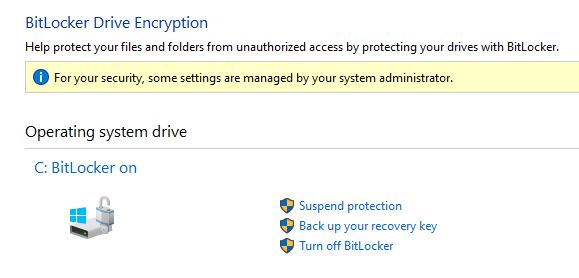
Notice this Control Panel item shows BitLocker turned on for Drive C: Notice further, the link that reads “Back up your recovery key.”
The “Back up your recovery key” entry lets you save it to your MS account, save it to a file, or print the recovery key information to any available printer. It showed me the complete recovery key ID as well as the complete recovery key itself. And it confirmed what I’d already figured out. Indeed, none of my devices named “Surface” hold the valid recovery key for the SP3 device.
As it turns out, I did a clean install on that machine around October 4 2018. This produced a randomly generated device name DESKTOP-DT16BLB whose Recovery Key is the one the SP3 uses. Afterward, I changed the Device Name back to Surface, without realizing that related Recovery Key info at my MS account did not change along with it. Live and learn! I’m also taking the opportunity to delete a bunch of now-obsolete BitLocker Recovery keys, too.
PowerShell Tools for BitLocker Automation
Knowing that admins like to work through SCCM or similar tools, and work on systems using scripts, I found a useful PowerShell script to grab BitLocker Recovery keys. Here’s its output (best directed to a text file with additional identification info, if run against a slew of remote PCs), along with the handy built-in PS cmdlet manage-bde.
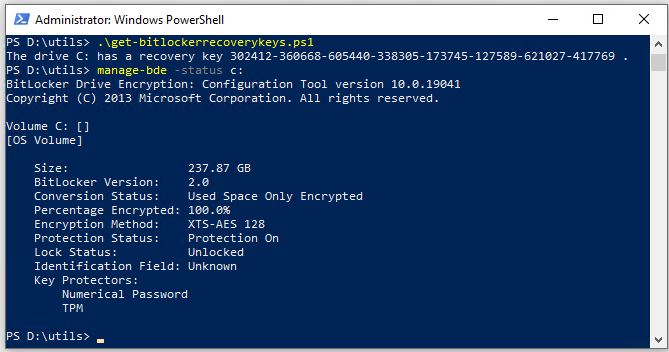
Use them in good health, to good effect, please.