Keyboard Driver Issue Kills Productivity

Think about how you type on a keyboard. Now, consider these words: fully, password, assign, connect. What they have in common is doubled letters. When I type them, I strike the doubled key very quickly then move on to the next letter. The speed at which the keyboard allows this to occur is called the “key repeat rate” aka “repeat rate.” Yesterday, some kind of keyboard driver issue kills productivity. It imposed an apparent 1-second delay between repeats. Indeed, I could barely function at the keyboard!

If Keyboard Driver Issue Kills Productivity, Then What?

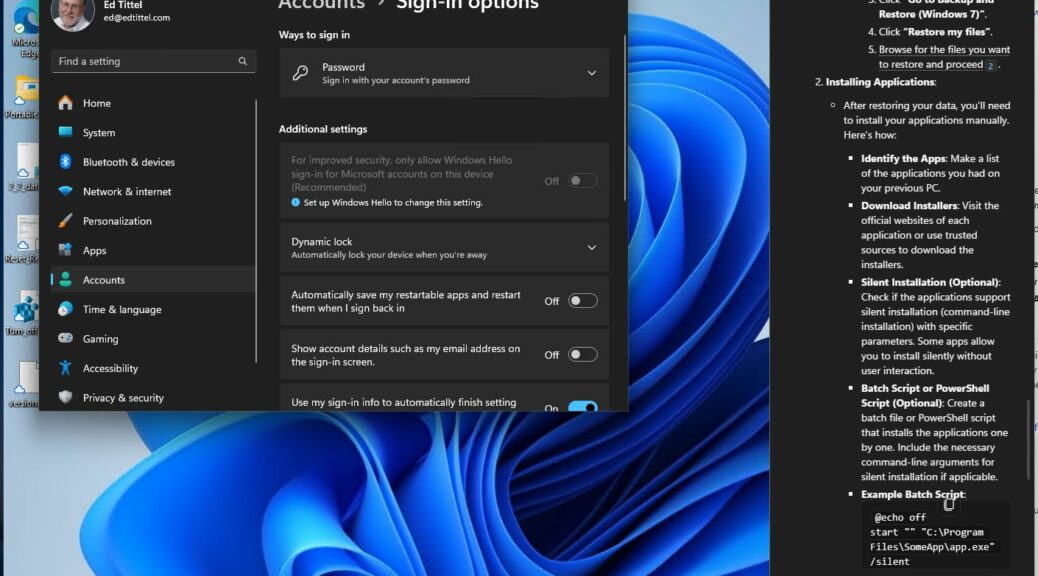
A little quick online research informed me about repeat delay and repeat rate. Indeed, it came courtesy of a tutorial from long-time friend and TenForums/ElevenForum colleague Shawn Brink. It’s entitled Change Keyboard Character Repeat Rate in Windows. Its header graphic appears as the lead-in image for this blog post, too.

First, I discovered that both the repeat delay and the repeat rate weren’t working at all. I had to wait about a second to hit any key a second time, and have it show up on the display. Next, I  learned that the Microsoft Mouse and Keyboard Center wouldn’t let me adjust either rate directly. And finally, upon checking existing Registry settings, they should already have been working properly.

Title Says Driver, Fix Replaces Driver

All these bits of evidence told me the driver itself was broken. So I returned to MS support to download a new version of the MKC (Mouse and Keyboard Center) version 14.41, 64-bit. After the install, I had to reboot my PC. When it came back up, I jumped immediately into Notepad. Once again I could type words with doubled letters. And when I pressed and held any letter key, it would quickly start pumping out copies until I lifted my finger. Back in business!

They say, it’s the little things that get you in the end. Here in Windows-World they also get you at odd and random times, too. Like yesterday when MKC went south. So it goes…

Facebooklinkedin
Facebooklinkedin

MS Provides “Complete” CPL File List

“What,” you may ask, “is a CPL file?” It stands for control panel item or component, and maps to something you can run inside the Control Panel hierarchy. You can see the top level of my Windows 10 hierarchy above, and a corresponding one from Windows 11 below. Though MS is working to replace CPL items with Settings elements, there are still a lot of CPLs around. In fact, MS provides complete CPL file list on one of its support pages. It’s called “How to run Control Panel tools by typing a command.”

Click image for full-size view (Windows 11 CP).

MS Provides “Complete” CPL File List: Use It!

Upon closer examination of this list, and comparisons with voidtools Everything output (search on “*.cpl”) I can see several limitations of this list. But for most of the items that do appear therein as actual .cpl references, they do provide quick access via PowerShell or the Command Prompt. That said two of the items — namely, the Fonts Folder and the Printers — simply tell readers to use corresponding folder structures.

OTOH, there are numerous items that aren’t on the list that do appear in the Control Panel window. That makes things interesting. You can also see that third parties can and do register items in the Control Panel. And the list is neither complete nor accurate when it comes to Windows 10 and 11. Let me lay things out, then explain…

Get It from a Table…

I built a table that shows item names, cpl file names (when present), and the name of the software item that launches. Some may surprise you: they sure surprised me!

Control Panel Item CPL filename Result in Windows 10/11
Accessibility options access.cpl not found (use Settings > Ease of Access)
Add New Hardware sysdm.cpl System Properties CPL (computer name tab)
Add/Remove Programs appwiz.cpl Add/Remove programs CPL
Date/Time Properties timedate.cpl Date and Time CPL
Display Properties desk.cpl Opens Settings > System > Display
Findfast control findfast.cpl Defunct (no longer available)
Fonts folder ==none== Visit C:\Windows\Fonts
Internet Properties inetcpl.cpl Opens Internet Properties (General tab)
Joystick Properties joy.cpl Opens Game Controllers CPL
Keyboard Properties main.cpl Opens Mouse Properties CPL
Microsoft Exchange mlcf632.cpl Defunct (no longer available)
Microsoft Mail wgpocpl.cpl Defunct (no longer available)
Modem Properties modem.cpl Defunct (no longer available)
Mouse Properties main.cpl Opens Mouse Properties CPL
Multimedia Properties mmsys.cpl Opens Sound CPL
Network Properties netcpl.cpl Not found (use Settings > Network & Internet)
Password Properties password.cpl Not found (use Settings > Accounts > Sign-in…)
PC Card main.cpl Opens Mouse Properties CPL (but defunct)
Power Management powercfg.cpl Opens Power Options CPL
Printers Folder ==none== Use Settings > Bluetooth & devices > Printers…
Regional Settings intl.cpl Region CPL
Scanners and Cameras sticpl.cpl Not found (use Settings > Bluetooth… > Printers…)
Sound Properties mmsys.cpl Sound CPL
System Properties sysdm.cpl System Properties (computer name tab)

What’s Interesting Here?

This file clearly shows its age with some items (especially Exchange and Mail stuff) long, long gone from Windows. The need to use Settings elements instead of CPLs shows the gradual shift-over from the latter to the former. It’s also interesting how many still work just as they always did.

Ahhhh, Windows. It’s always an education to dig into the details and see how older versions still have influence. But new forces (and designs) will inexorably push old stuff out of the way (e.g. PCMCIA or PC Card stuff). Interestingly the meta-data says this file was created in 2017 and last updated in 2021. That shows, and explains why some of its info is just plain out of date and thus, wrong.

Enjoy!

Facebooklinkedin
Facebooklinkedin

Windows 11 24H2 = Next Release?

There’s been a lot of flap and guff in the rumor mill about how “Windows vNext” will be labeled. Some have said “Windows 12;” others, “Windows 11 24H2.” Strong evidence that Windows 11 24H2 = next release popped up last Friday. This WindowsLatest story Microsoft document confirms Windows 11 24H2 update includes a link to a Windows App Development support note that uses this very nomenclature. It reads:

Starting in Windows 11 Version 24H2, EnumDeviceDrivers will require SeDebugPrivilege to return valid ImageBase values.

If Windows 11 24H2 = Next Release, Then?

I guess this should ease off the WTF factor that seems to explode whenever Windows 12 comes up. My best guess is that MS still wants to slide as many business users over from Windows 10 to 11 as it can. Thus, it’s always seemed a little whacky for insiders and pundits to freak out over Windows 12. With EOL still more than a year in the offing for Windows 10 (October 14, 2025 is 617 days away as I write this, says TimeandDate.com).

I’m just glad to believe if only for a while that the 4 channels of Windows 11 Insider Previews and a single such channel for Windows 10 will be all I have to follow. Plus the production versions of each OS, of course. It manages to keep me reasonably well-occupied. Who knows how the channel count will change when MS does get into Windows 12 releases? Not me! Stay tuned, though: when I find out, I’ll tell you…

Nomenclature Confirmed

After installing the latest Canary Build 26052 on February 8, here’s what came up in Winver on that test PC (Lenovo ThinkPad X12 Hybrid Tablet). It’s also explicitly stated in the release notes as well [General section] (emphasis in bold is Microsoft’s):

Starting with Build 26-xx today, Windows Insiders in the Canary and Dev Channels will see the versioning updated under Settings > System > About (and winver) to version 24H2. This denotes that Windows 11, version 24H2 will be this year’s annual feature update.


So indeed, Windows 11 24H2 it is for sure, straight from the source

Facebooklinkedin
Facebooklinkedin

NirSoft BatteryInfoView Works Well

I admire the heck out of Israeli software developer Nir Sofer. He’s the person behind the powerhouse utility provider NirSoft.net, where you’ll find nearly 200 (177 at last count) great Windows utilities ready for download and use. I just got reminded about his nifty BatteryViewInfo took in a recent AskWoody newsletter. Indeed the free NirSoft BatteryInfoView works well, and provides lots of useful battery status and health information. See a typical display from my 2018 vintage Lenovo ThinkPad X380 Yoga in the lead-in graphic.

Why say: NirSoft BatteryInfoView Works Well?

As you can see from the screencap above, BatteryInfoView (BIV) tells you pretty much everything you need to know about any given PC (laptop, tablet, etc.) battery. The current capacity and battery health values tend to be of greatest interest.

And indeed, Lenovo offers a battery settings control, for which it claims that setting maximum capacity to around 80% will result in longer battery life. I believe that translates into better battery health over time. Here’s what the X380 shows under battery charging threshold in the Battery section for Lenovo Vantage:

NirSoft BatteryInfoView Works Well.batset

Note: Charge threshold is turned on. Charging starts at 75% and stops at 80%. [Click image for full-size view]

Notice further that in the lead-in graphic, battery health is 92.8%. On my Lenovo ThinkPad X1 Extreme, which I obtained in 2021, I did not reset the battery threshold on that PC. Thus, even though it’s two years newer than the X380, its current battery health number is 89.3%. That’s about 4% less. To me, it shows that Lenovo’s recommendations to lower the stop and start values for charge levels really do have an impact on battery life. It’s not huge, but it’s not nothing, neither.

It also shows how a good tool can help admins and power users get the most from their technology investments.

Copilot Weighs in on Battery Health

Just for grins I asked Copilot “Working from NirSoft’s BatteryInfoView utility, at what level of “Battery Health” should one consider replacing the battery?” Copilot hemmed and hawed but ultimately said this:

In general, if the “Battery health” value is consistently below 80%, it may be a sign that the battery is deteriorating and may need to be replaced soon. However, this is not a hard and fast rule, and other factors such as the age of the battery, the usage patterns, and the operating conditions can also affect the battery life and performance. If you notice that your laptop’s battery is not holding a charge as long as it used to, or if you are experiencing other issues such as overheating, slow performance, or unexpected shutdowns, it may be a good idea to have the battery checked by a professional or replaced if necessary.

My original impression comes from translating a story from German into English for Tom’s Hardware back in the early 2000s. Even then, their research showed that a regime of reducing charge level was the best way to keep a laptop battery healthy in the long run. I wish I could find a link to that story (but I can’t) but they recommended dropping battery charge levels to 40% for long term storage, and recommended not charging batteries to over 80% if a PC remains plugged into AC power. Regular deep discharge cycles were also recommended. A 2023 Tom’s Hardware forum thread still cites the 80/40 rule, in fact. Sounds like the old rule is still cool.

Facebooklinkedin
Facebooklinkedin

No Details Means Reset Reliability Monitor

Here’s an interesting one. Sometimes when I have to grope for a blog topic, I check Reliability Monitor on one or more of my Windows PCs. In an ironic twist, this itself produced my topic when the data in my Windows 10 production PC turned up missing in ReliMon (as I like to call it). In fact, a quick web search told me that no details means reset Reliability Monitor is a good fix. And there are numerous batch files to do that job. Ultimately, the one I used appears in the ElevenForum tutorial “View Reliability History in Windows 11.”

Why No Details Means Reset Reliability Monitor

Behind the scenes reliability monitor itself relies on scheduled tasks and a data collection service. These combine to sweep up all the data it tracks into an XML file at regular intervals. If any of those elements hang up or fail, data neither gets collected or stored. With no data to show, ReliMon can’t put on much display, either.

WindowsClub published a story entitled “How to Reset Reliability Monitor in Windows 10/11” in September 2023. It’s mentioned in the afore-cited ElevenForum tutorial in Post#11. As a usually reliable source for fixes and info, I gave the batch file a go. And indeed it cleared Reliability Monitor completely (see next image).

No Details Means Reset Reliability Monitor.blank

Nothing to see hear: the report history is completely cleared.”

By design, I must  wait 24 hours before reported data starts showing up. I’ll report back here if it works — or not. But in the meantime, please chuckle with me that in looking for something to blog about, the very tool I sometimes use to help me zero in on topics itself provided my topic for today.

And is that how things often go in Windows World? You bet!

Note Added Next Day (Feb 2)

And …. yes! …. ReliMon is back at work on the affected PC. Doesn’t have much to show for itself yet, but you can see events and data are being collected and reported.

Happy to show that ReliMon is again gathering and reporting errors, warnings, info events, and so on.
[Click image for full-size view]

The reset appears to have had the intended outcome: Reliabiity Monitor is back at work.

Facebooklinkedin
Facebooklinkedin

New WT 1.19.10292 Solves Self-Update

Life is always interesting for programmers when they have to update the code that’s running the update. This gets even more interesting for updates to Windows Terminal (WT) and PowerShell, running inside — you guessed it — WT and PowerShell (PS). Right now, a new WT 1.19.10292 solves self-update issues that remain present for PS. You can see the proud evidence in the lead-in graphic, which concludes a WT upgrade with “Successfully installed. Restart the application to complete the upgrade.” PS, on the other hand, still says “Cancelled” at the end of a self-upgrade, even though a restart reveals the newly-upgraded version at work.

How New WT 1.19.10292 Solves Self-Update

Windows users are actually much more familiar with this self-mod situation than they may think. Indeed, the reason why Windows must reboot after CUs and during OS install and upgrade, is so an updater or installer can work on files totherwise in active use RIGHT NOW if they weren’t suspended (if only temporarily).

In essence, this is what restarting WT/PS does. It terminates running processes for the code to be updated. Then they can be altered or replaced before the next set of new processes starts back up. I’m glad to see the WT team take such a steady and time-worn approach to updating Windows Terminal itself. It’s what makes most sense!

When I was learning to program back in the late 70s and early 80s one of my first and hardest-learned lessons was “Don’t step on your own toes” (write code that changesitself in unwanted or unplanned ways). That way lies madness. Glad to see those old lessons still apply, even for WT and PS.

Facebooklinkedin
Facebooklinkedin

Winget GPU-Z 2.57.0 Download Error

Here’s something I’ve not seen before, but immediately understood. Yesterday’s update check found a pending update for TechPowerUp’s nifty GPU-Z software. But it forced a Winget GPU-Z 2.57.0 download error upon attempted retrieval, as you can see at the bottom of the intro graphic.  I kind of like the error message “Download request status is not success.” Methinks the download link or path might be incorrect, what?

Hint: To actually *see* the bottom of the screencap, right-click the intro image and select the closest thing in your browser to “Display image in its own tab” (Firefox) or “Open image in new tab…” (Chrome or Edge) or whatever else you might find in your software of choice.

Overcoming Winget GPU-Z 2.57.0 Download Error

Although the error message is a bit convoluted, the associated HTML error code  — namely, 410 — is not. Here’s what Ahrefs.com has to say about this particular code number (bold emphasis mine):

The 410 Gone is an HTTP status code returned by the web server when the client (a browser or a web crawler) requests a resource that is no longer available at the requested address. It is one of the so-called “client errors,” meaning that the error is on the client side, not on the server.

Unlike the 404 Not Found response code that can be shown for non-existing or mistyped URLs, the 410 code indicates that the resource was in use but is no longer available and will not be available again at the requested address.

This would seem to indicate that TechPowerUp has moved or deleted the resource associated with the download link. I believe this is on them to fix, so the winget manifest can be appropriately updated. I have emailed the EIC to that effect.

A Dead Simple Workaround

When I visit the home page for GPU-Z, I can access its download link page, where I see what may be part of the problem. It points to 10 mirrors, from any one of which a download may occur (6 in USA, UK, NL, DE and SG [Singapower]). Probably, the developer who supplies manifests needs to pick one mirror and let winget use it exclusively — or write code to handle localization and pick a proximate mirror instead. Which do you think is more likely?

Winget GPU-Z 2.57.0 Download Error.mirrors

Count ’em: 10 (ten) mirrors!

Long story short: when I access any US mirror, I can download the 2.57.0 file without difficulty. Run that file (GPU-Z.2.57.0.exe) and it updates the program without problem. Solved!

Facebooklinkedin
Facebooklinkedin

Exploring Build 26040 Windows Installer

Well then: here we go! After a couple of hours of trying different things, I’m finally en route to installing a Windows 11 Insider Preview build that features a totally revamped OS install process. You can see the first step as the lead-in graphic. I’m now finally exploring Build 26040 Windows Installer having overcome initial Hyper-V stumbling blocks, as I will explain next.

Stumbling Before Exploring Build 26040 Windows Installer

Unlike earlier Windows 11 VM installs, this one didn’t complete  successfully when I pointed it at the ISO for Build 26040. Instead, it kept citing to issues with virtualization-based security on the host PC. Because this stalwart Lenovo ThinkPad P16 Gen 1 Mobile Workstation had all the virtualization bells and whistles engaged, I was initially stumped. Then I turned on Device Guard in the UEFI and Presto! now everything is working. I’m not quite sure what the deal is, but having read about others who fixed the same problem in this way, I’m glad to simply move ahead instead.

What’s the Deal with the New Installer?

Good question. It’s a break with tradition that goes back to Vista that changes the look and feel substantially. After the initial language/time & currency questions (supplied with answers by default, and correctly), comes Keyboard or input method (US). I’ll skip that and shoot the next screen instead:

Exploring Build 26040 Windows Installer.scr03

Next up (Scr03) you see options to (clean) install Windows 11, repair the current image, or launch the legacy experience.

Bootable Windows images can, by and large, repair a target PC’s installed image or wipe it out and install a different one. This reworked screen underscores those capabilities. Note: you can’t proceed to the next screen with Install Windows 11 selected (a clean install, that is) without also checking the “I agree…” stipulation that everything present will be deleted. Good call.

BTW, if you click “Launch the legacy experience” it reverts to the old familiar installer that has appeared in Windows versions since Vista. I’ll forgo further mention of this going forward except to observe that ESC let me start over from the very beginning with little muss or fuss. Ditto for “Repair my PC,” which proceeds with normal WinRE (Windows Recovery Environment) behavior.

Onward, Into the Bowels of Windows 11

Next up comes a request for a product key. Then comes a license screen (mercifully, it’s a simple one-paragraph agreement rather than the “whole shebang” as MS has presented in the past). Click an Accept button to proceed (Click “Legal” at center left and you get a URL where those inclined can indeed access the license in its awesome entirety).

The the install gets going: in this case, it finds the VHDX I defined for the VM and asks to consume the whole thing. Granted, by clicking “Next:”

Exploring Build 26040 Windows Installer.scr06

Screen 6 shows the virtual disk I set up for this VM. By default it grabs the whole thing.

Finally, we’re “Ready to install” as the next screencap proclaims. Because it’s as simple as Windows installs get (VMs are carefully constructed to push no boundaries by deliberate design). That makes it as safe to click the “Install” button at lower right as it ever gets. Here goes!

Exploring Build 26040 Windows Installer.scr07

With a click on “Install,” the Installer actually gets to installing.

Then, an activity window shows up that reports progress (show just the upper snippet):Exploring Build 26040 Windows Installer.scr08

This counts through the installer’s progress and takes you through a couple of reboots before your get to the OOBE stage.

This takes several minutes to complete and then deposits you into the OOBE (Out of Box Experience) screens. I won’t provide these, but will enumerate them as they are pretty familiar to Windows-heads:
1. Is this the right country or region (US shows by default; click “Yes”).
2. Is the the right keyboard layout or input method (US shows by default, click “Yes”).
3. Want to add a second keyboard or layout (Skip by default, click same).
4. Checking for updates (as a fresh new release, it finds nothing and jumps to …)
5. Let’s set things up for your work or school (enter Microsoft Account, MSA) Note this has to be an AD-connected MSA. If you, like me, lack same use the Domain Join approach instead.
(See this AskWoody article for deets on doing this if you’ve not taken this route before.)
6. Choose privacy settings (Click “Yes” to accept defaults).
7. Checking for updates (Again, none because it’s a fresh preview).
8. Settings things up screen appears as the desktop and so forth are prepped for use (takes a couple of minutes, too).

Next, you’ll be prompted for your password. Then comes the desktop. Good stuff! Overall, those parts of the new installer that are new (screens through 7) are simple, straightforward and easy to understand and use. This is a positive development for Windows 11. Interesting, too, because it comes two years into its lifecycle.

If you want to see the whole setup sequence there are plenty of other places online where you’ll find them. Here are my two current faves:

Paul Thurrot: A Quick Look at Windows Setup in Windows vNext
Albacore (@thebookisclosed): Pics of other screens for those curious [you can scroll through in sequence up to product key].

Facebooklinkedin
Facebooklinkedin

Beta Channel Gets In-Place Upgrade Repair

I’ve been waiting for this to show up for a while. Now it’s finally here. In build 23635.3130, Windows 11 Beta channel finally shows the “Fix problems using Windows Update” button. It appears in Settings → System → Recovery. You can see it in the intro screenshot above. I call this an “in-place upgrade repair” (sometimes, I add “install” to the end of that phrase) because it’s been a known technique for a decade and longer under that name. But when Beta Channel gets in-place upgrade repair, MS describes it as “Reinstall your current version of Windows” — a completely acceptable alternate label. Whatever you call it, it’s great to have it built right into the OS now.

As Beta Channel Gets In-Place Upgrade Repair, Use It!

The idea behind the in-place upgrade repair (install) is to replace all of the current — and suspect, or possibly damaged or deranged — OS files with known, good, working versions. This is a powerful Windows repair technique, and one of my go-tos when more focused troubleshooting tries and fails to fix things. This built-in version has the advantage of grabbing everything it needs from Windows Update and doesn’t require admins or power users to download and build an ISO, mount the image, and then proceed from there. It’s much more hands-off than that (but also more time consuming). No need to build custom ISOs at UUPDump.net, either.

Another Great Way to Fix Windows 11

As long as Windows is still running, this may be the best way to run the in-place upgrade repair install. But don’t pitch out your rescue media, boot drives, and especially not your backups. This tool can’t cover all contingencies. You’ll still need that other stuff when Windows won’t boot or run the setup.exe installer on which this maneuver depends. But even so, it’s a great addition to the Windows repair toolbox.

In fact, I can’t wait to try it out! Thus, I just fired it off on a test machine to see what happens. Here’s an approximate timeline rounded to the nearest 5 seconds:

00:20 Checking for updates
07:15  Downloading install files (“Downloading”)
32:45 Installing replacement OS (“Installing”)
02:20 Time from “Installing – 100%” to “Restart now” button
02:35  Time with “Updates are underway” prior to reboot
03:30  First reboot to second reboot (jumps to 54% after)
05:10  Second reboot to lock screen
02:15  Transition through “Welcome” to Desktop
Total time elapsed: 55:10

Trust me: this takes a LOT longer than mounting an ISO and running setup.exe to handle the repair install. OTOH, all I had to do was push a few buttons along the way. Just be prepared to give it some time.

Facebooklinkedin
Facebooklinkedin

DiskGenius Poses Odd Winget Issues

OK, so here’s an interesting set of issues. The otherwise usable and worthwhile free version of DiskGenius poses odd Winget issues. ICYDK, DiskGenius is a disk partitioning toolbox that also does data recovery, backup and restore and disk management. The free version offers more limited capability than its paid-for counterpart. But it definitely has issues related to its package structure inside Winget. Let me explain…

Evidence: DiskGenius Poses Odd Winget Issues

Take a look at the lead-in graphic. It’s from a PowerShell tab inside Windows Terminal. It shows the results of a winget update scan. I made it just AFTER I had forcibly uninstalled DiskGenius using Revo Uninstaller Free, then used Winget to install it afresh:

Winget install eassos.DiskGenius

As you can see, winget upgrade –all –include-unknown still wants to update DiskGenius. It wants to update to the same version that’s already installed: 5.5.1. According to the application’s Help/About info, it’s actually version 5.5.1.1508 x64. This makes me think there is some kind of problem with the manifest where the local installed copy of DiskGenius reports a different version than is associated with the manifest even though they’re the same. My best guess, in fact, is that the .1508 x64 at the end is getting truncated or lost.

As you can see in the next screencap, DiskGenius clearly shows 5.5.1 as its version number from the winget show output. (I split the pane to block out a bunch of extraneous details from the release notes.)

DiskGenius Poses Odd Winget Issues.show

Winget Show DiskGenius shows version number, publisher, and so forth.{Click image for full-sized view.}

Because DiskGenius happily runs as a portable app without actual installation, I’ve decided to uninstall it and run it from a flash drive when I need it. That way I don’t have winget constantly nagging me for an update that I neither need nor want to read about. Problem solved.

The Other Issue…

Remember, I mentioned “odd Winget issues” (plural) in the headline? So yes, there’s something else. When I initially installed DiskGenius I chose a USB-attached NVMe drive as the target. These problems started popping up when I unplugged that drive from its original host PC and plugged it into another one for some testing. Winget still complained about the need for an update, but then failed on the update because — of course, of course — it couldn’t find what wasn’t there. Plus, we already know it woudn’t have changed the nag report anyway…

Turns out installing left sufficient traces in the registry and file system that winget could know DiskGenius was supposed to be present, but nowhere to be found. Even using the uninstall option in Settings → Apps → Installed apps didn’t get rid of all traces. I had to use Revo Uninstaller and remove all registry entries and remaining files (mostly shortcuts that pointed to the now-missing E: drive) to make this stop.

But eventually, I got it all cleaned up. And now, I’m just going to run it as a portable app from the USB-attached SSD enclosure where it now lives. And sigh loudly, because that really is the way things too often go here in Windows-World.

Facebooklinkedin
Facebooklinkedin

Author, Editor, Expert Witness